7 Amazing Benefits Of Mermaid Yoga Pose On Your Body
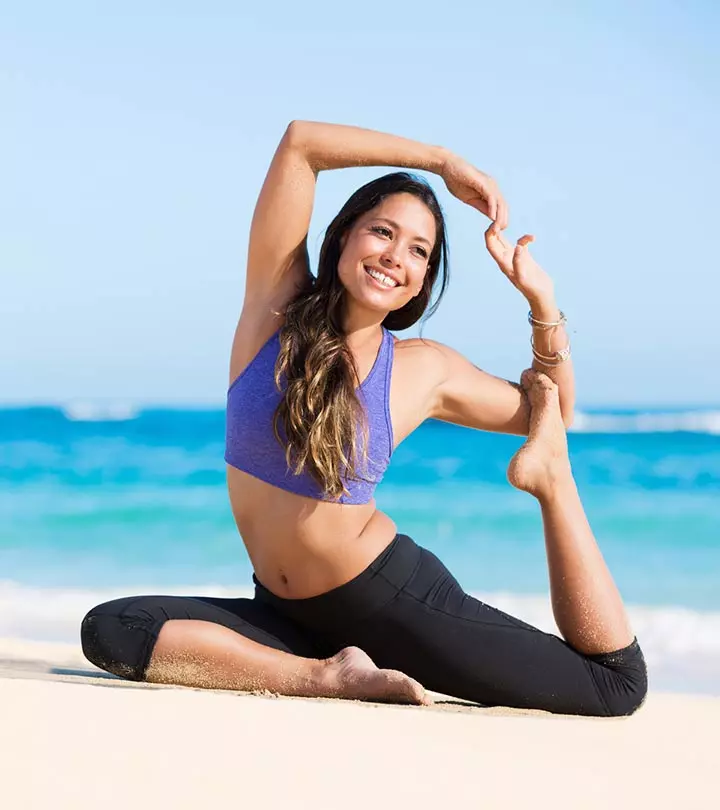
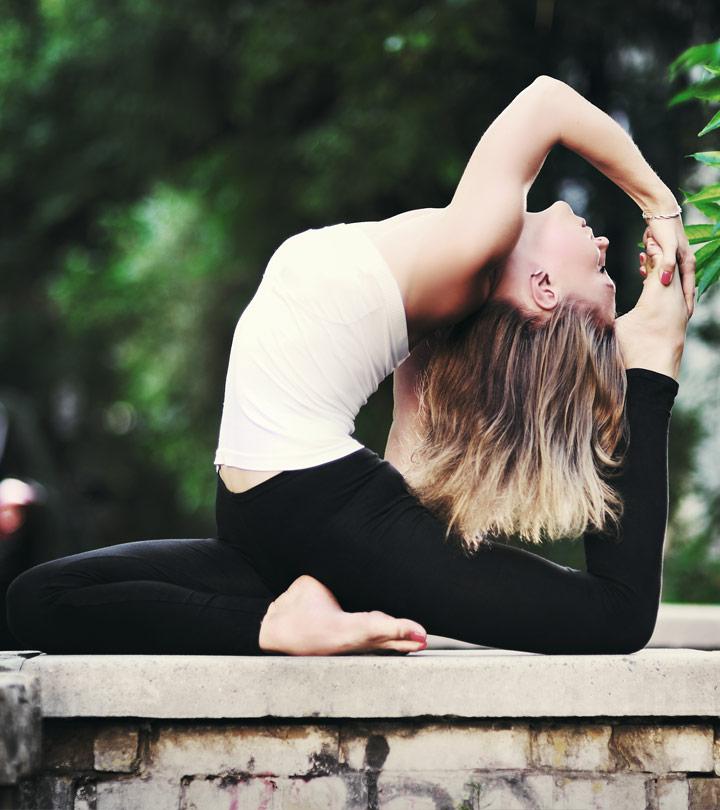
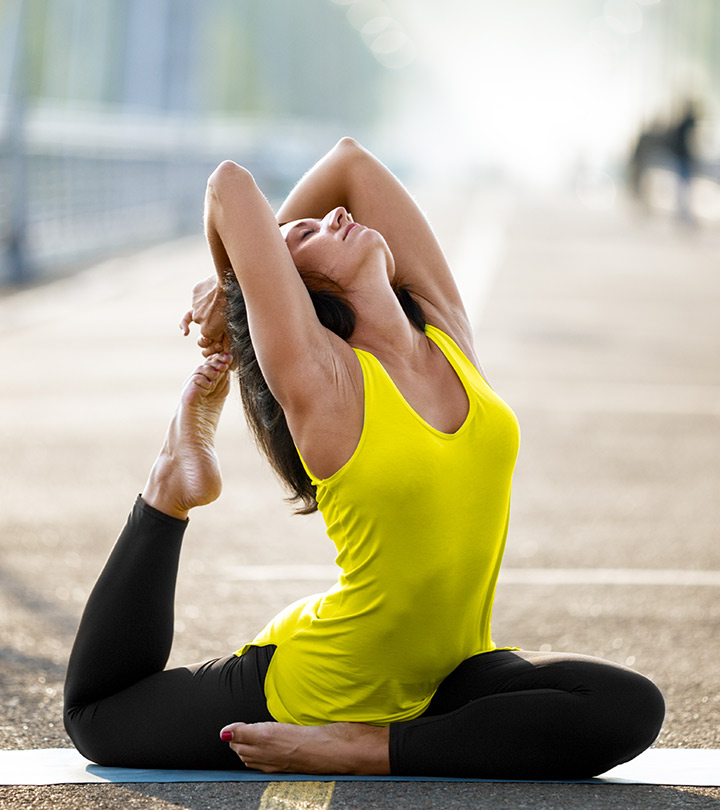
Mermaid Pose looks quite similar to the very potent hip opening yoga asana, Eka Pada Rajakapotasana. It is an advanced way of practicing the Pigeon Pose. If done right, the Mermaid Pose helps in easing a tight hip and even nurses you out of a bad sciatica pain. However, it is not suitable for those who have knee injury. Plus, being a powerful pose that is really challenging, it is not advisable for beginners to practice without proper supervision.
Let us take a look at how to do the mermaid pose, but please do not practice this pose unless you are comfortable doing Eka Pada Rajakapotasana and you are an advanced yoga practitioner.
How To Do Mermaid Pose:
- Start with Adho Mukha Svanasana, the Downward Facing Dog pose.
- Spread your fingers outward, lift the hips, and elongate your spine. Balance yourself on the heels.
- Exhaling deeply, bend the right knee in such a way that it rests between the hands spread out at shoulder width.
- Let the right ankle rest near the left wrist on the yoga mat in such a way that the right knee lies close to the right wrist.
- Stretch the left leg backward so that the left toes are touching the floor.
- Exerting pressure on the fingertips, elongate your entire body and pull the torso from the thigh. Let the tailbone fall closer to the left heel.
- Drawing down via the shin of the right leg and dividing your balance between the hips, pull the right thigh towards your midline.
- Pushing your legs, lengthen your spine as high as possible.
- Let the right hand rest on the right thigh.
- Bend the left knee and using your left hand clasp the left foot.
- Pull the left foot as close as possible to your body in such a way that the toes rest in the elbow’s crease.
- Keeping the spine elongated, bring the right hand above your head. Bend it at the elbow and clasp the left hand.
- Squaring the torso and hips forward, exert pressure on the legs to activate the core and lift the spine.
- Keep you gaze fixed at the sky with deep breaths.
- Hold the pose for 10 breaths.
- Then release the left leg allowing it to extend backward.
- Place you hands in front of the body.
- Tucking in the left toes, come back to Adhvo Mukha Svanasana.
- Repeat the same steps with other side too.
This makes one repetition. Do 5 to 7 such repetition, relaxing for about 15 seconds in between.
Modifications:
A very strong pose, this can render a grace to your body with regular practice. Here are few tips to modify the pose to meet your requirements:
- You can use a yoga belt to hold your left foot if you find it difficult to allow the foot to rest in the elbow crease. Tie the belt firmly around the foot and hold it with the hands. This can also be used to deepen the pose.
- You can also do a partial backbend if you feel the intensity of bending backward is a little aggressive.
- Place a blanket beneath your hip for added support and cushioning.
Benefits Of Mermaid Pose:
The advanced version of One Legged Pigeon Pose comes with an array of health benefits. Here is what you can expect from practicing Mermaid Pose regularly:
- A stronger pelvic floor and core
- Freedom from back ache and sciatica
- A more flexible and stronger lower back, quad muscles, and hip flexors
- A better level of balance
- Stronger and more open shoulders and chest
- A better control over your sexual desires
- A stronger and more potent digestive system and reproductive system
A Word Of Caution:
Never practice this pose in case you are suffering from any kind of injuries to the meniscus, knee, or ligaments. Avoid practicing the pose if you have a history of hip or shoulder dislocation. Always make sure that the foot in the front is flexed enough to avoid knee injury. Keep the spine extended and lifted throughout. Do not push yourself beyond your limits. Keep practicing for perfection.
Practice and patience – these are the two key elements you need to master Mermaid Pose. As I mentioned in the beginning, it is not a good asana if you are a novice, beginner, or have some knee injury. However, you can try this if you have strong willpower.
Are you comfortable with Ek Pada Rajakapotasana? Have you ever tried Mermaid Pose? What was your experience? Share it with us in the comments section below.
Read full bio of Shirin Mehdi








Community Experiences
Join the conversation and become a part of our empowering community! Share your stories, experiences, and insights to connect with other beauty, lifestyle, and health enthusiasts.