How To Do Squats Properly: 9 Variations For Full-Body Strength
Here's the breakdown for performing the perfect squat for flawlessly toned legs!
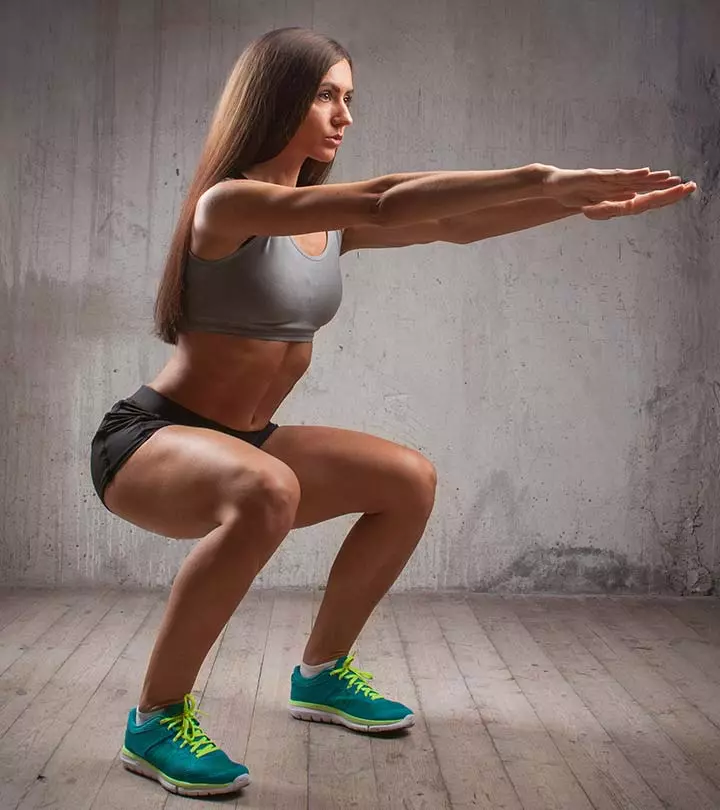
Image: Shutter stock
Squats are great for shaping and toning your glutes and thighs. But how to do squats properly? Without the proper form, you can hurt your back and knees. Squats are compound movements that target major muscle groups. They help strengthen the glutes, core, calves, quadsi A group of four thigh muscles located between the hip and the knee, used for movements like running, walking and jogging. , hamstrings, adductorsi An important group of muscles on the inner thighs that help move the legs towards your body and away from it. , and lower back. Not squatting the right way is a common mistake by beginners. Therefore, it is best to understand how to squat step-by-step to prevent any injury. Read on to see images and learn how to squat and master it quickly. Also, learn a few other modified squats to help you lose weight from the lower body, strengthen, and tone up. Scroll down!
 Workout Blueprint: Squats
- Frequency: Daily
- Benefits: Boost lower body strength, endurance, posture, and flexibility.
- Equipment Needed: Mat, dumbbells, and a barbell.
- Space Required: Small area
- Assistance Required: Yes, for certain exercises.
- Who Should Avoid: Anyone who has recently undergone surgery or has acute knee, hip, or back pain.
In This Article
The Beginner’s Guide To A Perfect Squat
Things You Need To Squat
- Comfortable clothes
- Training shoes
- Headband and/or hair band
How To Squat Properly
Before you start, warm up your muscles to prevent injuries and enhance performance. A quick 5 to 10 minute warm-up routine can include light cardio like jogging or cycling, followed by dynamic stretches. Dynamic stretches, such as leg swings, arm circles, and torso twists, help increase flexibility and prepare your muscles for the workout.
Step 1: Starting Position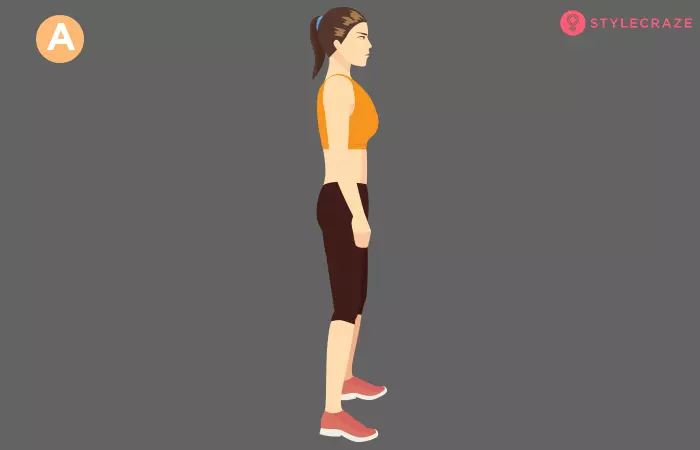
. Look straight, with the arms extended in front of you, and squeeze your glutes so that your pelvic region is in symmetry with the imaginary straight line drawn from your left foot to the right.
Step 2: Start Squatting
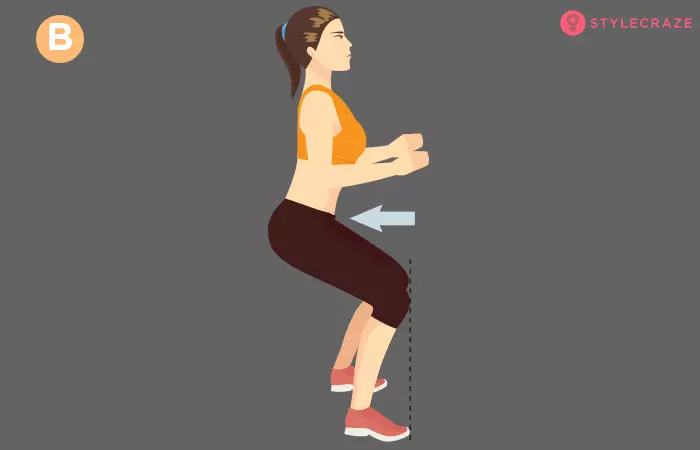
Look straight ahead, keep your back straight, and engage your core. Inhale, push your buttocks out, and start bending your knees. Your weight should be on your heels and NOT on your toes.
Step 3: Full Squat
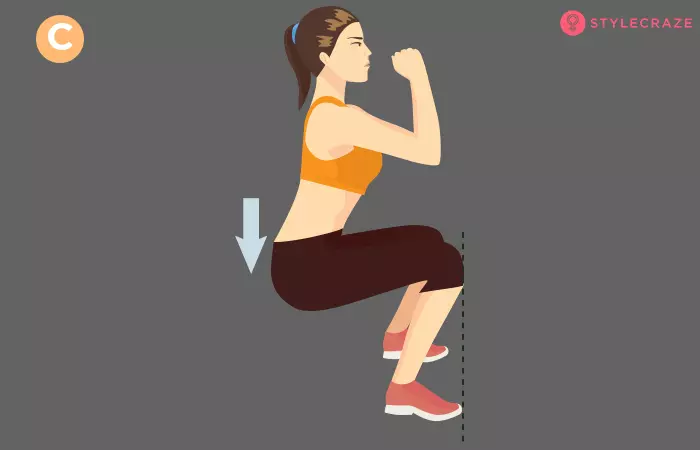
Push your buttocks out and look straight ahead. Sit down with your body weight on your heels. Your knees should not overshoot your toes. Go down until your hip joints are lower than your knees. Yes, this is the correct full squat. If your hip joints are not below the level of your knees, it’s a partial squat.
Step 4: Hold
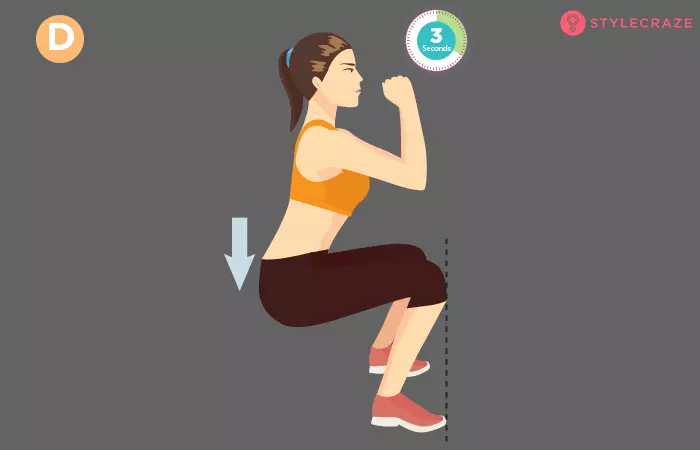
Keep your arms in front of you or grasp your right wrist with your left hand, and look straight. Make sure your pelvic region is in alignment with the toes, and your knees are not overshooting the toes. Your hips need to be pushed back, core tight, and glutes squeezed. Hold this pose for 3 seconds.
 Quick Tip
Step 5: Getting Back Up
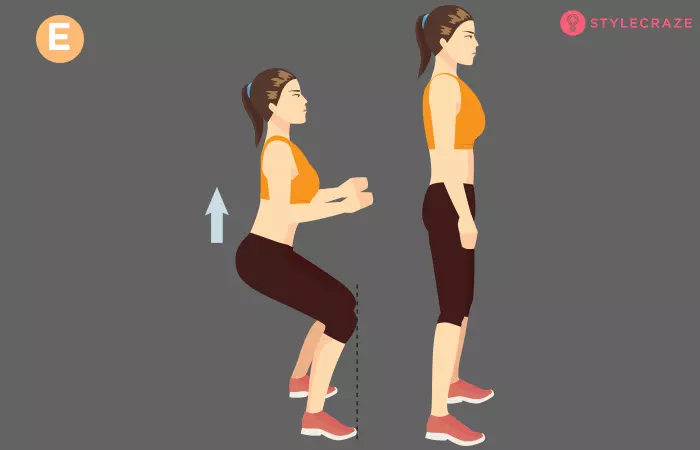
Exhale and start getting back up. Keep the body weight on your heels, shoulders pinched backward, and chest up. Push your hips forward and squeeze your glutes. Keep your legs straight.
Step 6: Repeat
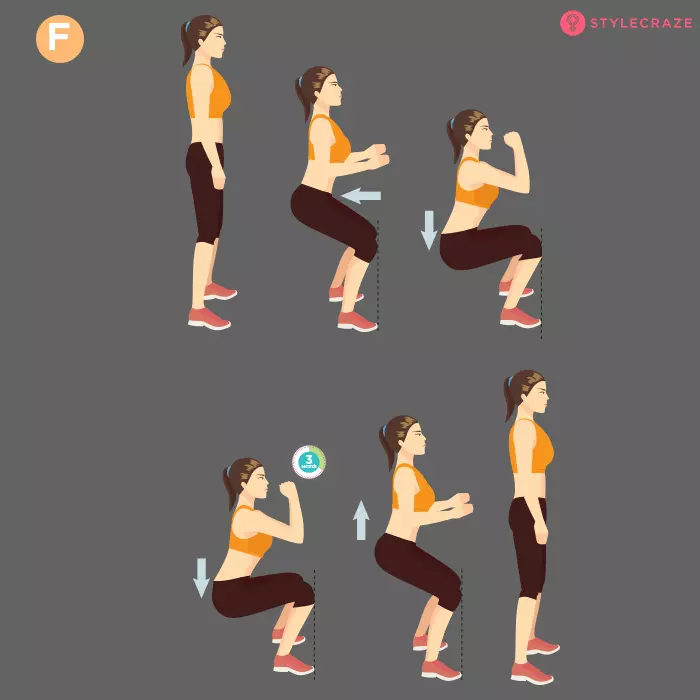
Again, inhale and go down to the squat position. Hold for 3 seconds, and come back up.
Tip: Be slow when you are learning how to squat. There’s no hurry. Squatting correctly is more important than doing 3 sets of 30 squats.
 Quick Tip
So, you see, squatting is not rocket science. You just need to be patient, observant, and open to unlearn the wrong squatting technique that you were following. Now, before we move on, I would like to introduce you to the advanced level of squats. You can do these exercises as part of your full body exercise routine, but make sure you do them correctly.
Key Takeaways
- Your toes should point slightly out and the chest should be lifted.
- The back needs to be straight and your buttocks should be pushed out while squatting.
- Make sure the weight is on your heels and not on your toes while squatting.
- Pulse squat and sumo squat require no equipment.
- Squats may not only aid in burning fat but improve blood circulation.
9 Squats For Full Body To Burn Calories
1. Pulse Squat
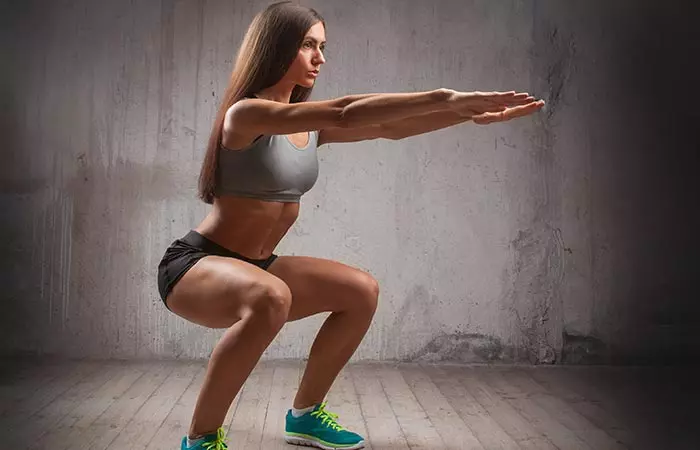
Target
Quads, hamstrings, hip flexorsi Muscles in the arm, hand, leg and foot that help bend a limb or another part of the body by contraction. , glutesi A group of three muscles that primarily make up the buttocks important for carrying out basic bodily movements like walking and standing. , calves, adductors, and core.
Duration – 7 mins
Steps
- Stand straight with your feet a little wider than shoulder-width apart, toes slightly pointing out, shoulders pinched back, chest forward, and hands in front of you.
- Inhale and push your hips out and squat down and keep your body weight on your heels. Make sure your hip joints are a little lower than your knees, and your knees do not overshoot your toes.
- Now, instead of coming back up, pulse in the squatting pose – go up and down at frequent intervals.
- Pulse and count to 10.
- Exhale and slowly get back up to the starting position.
- Do 2 sets of 5 reps. Increase the reps and sets as you advance.
2. Explosive Squat

Target
Quads, hamstrings, hip flexors, glutes, calves, adductors, core, lats, biceps, and neck muscles.
Duration – 7 mins
Steps
- Stand straight with your feet a little wider than hip-width apart, toes slightly pointing out, shoulders pinched back, chest forward, and hands in front of you.
- Inhale and push your hips out and squat down. Keep your body weight on your heels. Make sure your hip joints are a little lower than your knees, and your knees do not overshoot your toes.
- Now, get back up from the squatting position and before you fully stand up, propel your body into a jump. Simultaneously, lower your hands to the sides to help propel your body up.
- Land softly on your feet, move your hands from the side to the front, bend your knees a little, and go down to a squat pose again.
- Do 2 sets of 10 reps. Increase the reps and sets as you advance.
3. Squat Jump Forward And Back
Target
Quads, hamstrings, hip flexors, glutes, calves, adductors, chest, and core.
Duration – 10 mins
Steps
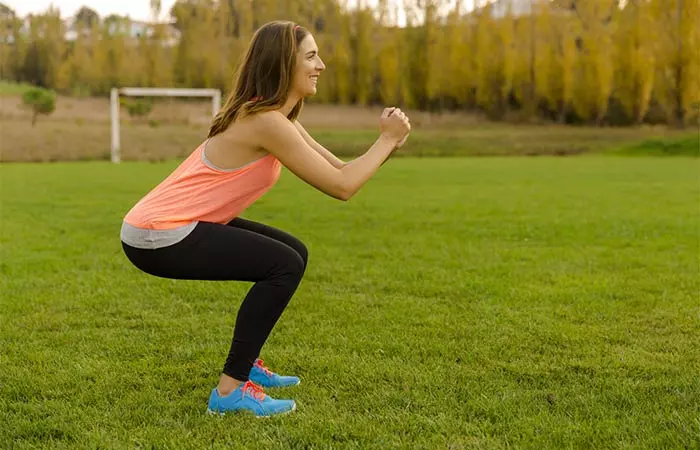
- Stand straight with your feet a little wider than hip-width apart, toes slightly pointing out, shoulders pinched back, and chest forward. Clasp both the hands together, and keep the elbows slightly bent.
- Inhale and push your hips out and squat down, keeping your body weight on your heels. Make sure your hip joints are a little lower than your knees, and your knees do not overshoot your toes.
- Get back up from the squat pose and squeeze your glutes.
- Jump forward and back, keeping your legs in the same stance and toes pointing out. Make sure to land smoothly on your feet.
- Once you have jumped forward and back, inhale and squat again.
- Do 2 sets of 10 reps. Increase the reps and sets as you advance.
4. Plie/Sumo Squats
Target
Adductors, quads, hamstrings, hip flexors, calves, core, and back.
Duration – 5 mins
Steps
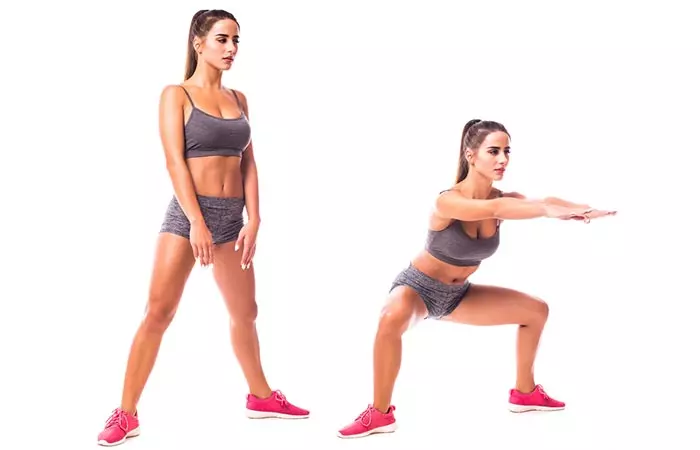
- Stand straight with your feet a little wider than shoulder-width apart, toes pointing out (45 degrees), shoulders pinched back, and chest forward. Clasp both the hands together, and keep the elbows slightly bent.
- Inhale, push your hips out and squat down, and keep your body weight on your heels. Make sure your hip joints are a little lower than your knees, and your knees do not overshoot your toes.
- Hold this pose for 2 seconds.
- Exhale and get back up to the starting position.
- Do 3 sets of 10 reps.
- As you advance, you can also do explosive plie/sumo squats or use a kettlebell to make it a little more challenging.
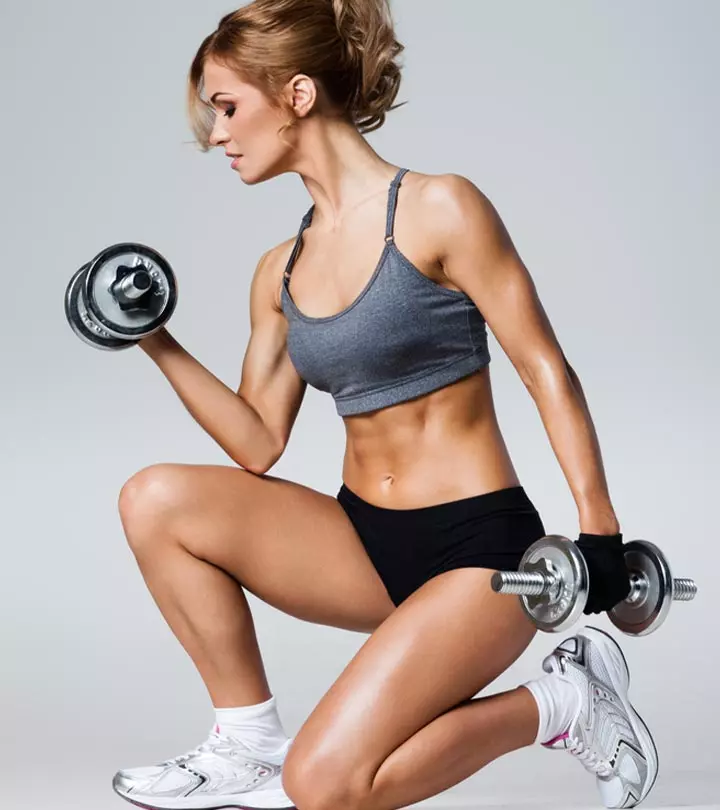
5. Squat With Bicep Curls
Quads, hamstrings, hip flexors, glutes, calves, adductors, chest, core, back, biceps, shoulders, and wrist extensors and flexors.
Duration – 7 mins
Steps
- Stand straight with your feet a little wider than hip-width apart, toes slightly pointing out, shoulders pinched back, chest forward, and elbows slightly bent.
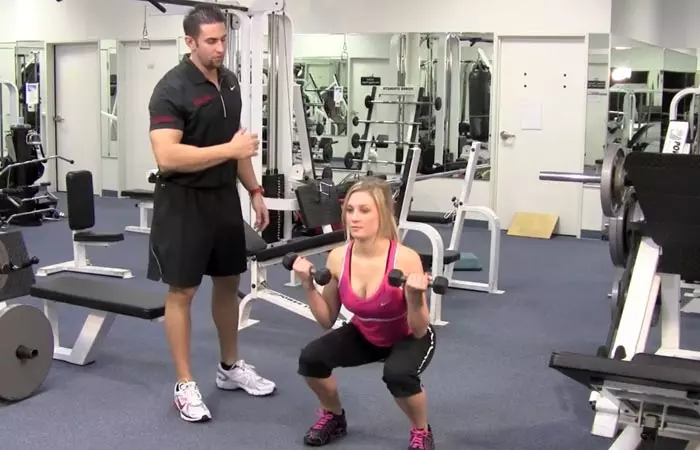
- Hold 5.5-pound dumbbells in your hands. Bring your elbows close to the torso. Your palms must face forward, and hands must lie by the sides of your body.
- Inhale and push your hips out and squat down. Keep your body weight on your heels. Make sure your hip joints are a little lower than your knees, and your knees do not overshoot your toes. As you continue to do squats with weights, lift your forearm until the dumbbells almost touch your shoulders. Remember to keep your upper arms stationary.
- Hold this pose for 1 second.
- Exhale, get back up, lower your forearm and come back to the starting position.
- Do 3 sets of 10 reps. Increase the reps, sets, and weight as you advance.
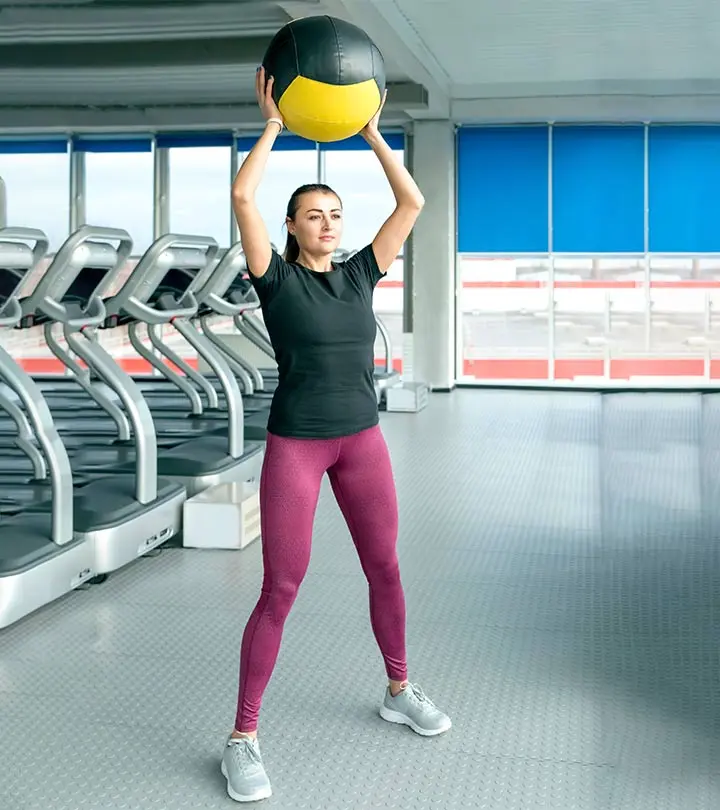
6. Squat With Overhead Press
Quads, hamstrings, hip flexors, glutes, calves, adductors, chest, core, back, biceps, shoulders, and lats.
Duration – 10 mins
Steps
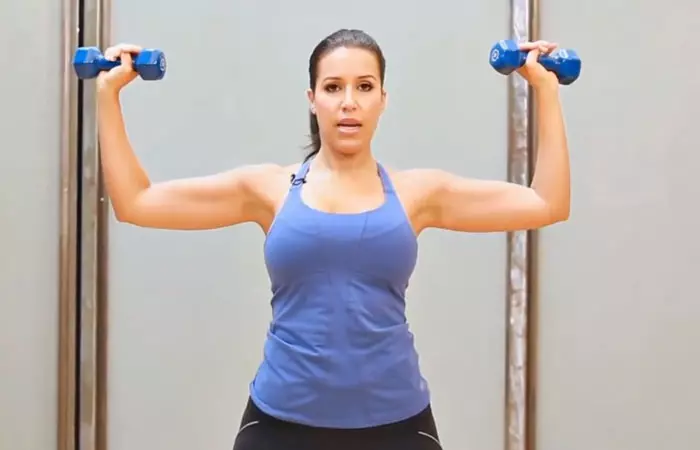
- Stand straight with your feet shoulder-width apart, toes slightly pointing out, shoulders pinched back, chest forward, and hold 5.5- pound dumbbells with your arms lifted and leveled with your shoulders. Your forearms should be at a right angle with the upper arms.
- Inhale and push your hips out and squat down, keeping your body weight on your heels. Make sure your hip joints are a little lower than your knees, and your knees do not overshoot your toes. As you squat, extend your arms up and directly above your head.
- Now, exhale and slowly get up from the squat pose, flex your elbows, and bring your arms back to the starting position.
- Do 2 sets of 10 reps. Increase the reps, sets, and weight as you advance.
7. Barbell Sumo Squat
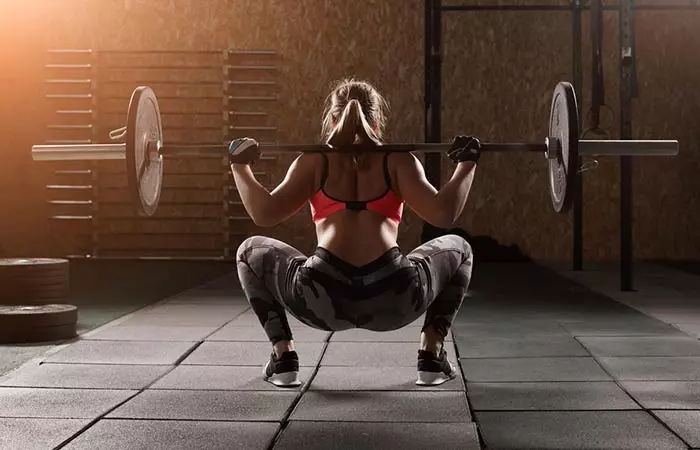
Target
Shoulders, glutes, lats, lower back, abs, quads, chest, triceps, biceps, hamstrings, calves, adductors, hip flexors, wrist flexors and extensors.
Duration – 10 mins
Steps
- Position yourself inside a squat rack. Load the bar with weights on either side while it is still on the rack. Now, step under it and place it across the back of the shoulders, slightly below the rear deltoidsi Muscles located in the shoulder that help the movement of the arms and connect them with the trunk of the body. . Hold the bar with your hands, palms facing forward and elbows close to your torso.
- Squeeze your shoulder blades and rotate your elbows forward. Position your feet slightly wider than shoulder-width apart and squeeze your glutes. Your chest must be out, spine neutral, knees slightly bent, and toes pointing out.
- Remove the barbell from the rack. Push your hips backward and squat down. Continue going down until your hip joints are slightly lower than knees. Your knees should not overshoot your toes, and the entire weight should be on your heels. Inhale as you go down.
- Exhale and get back up to the starting position.
- Do 2 sets of 5 reps. Increase the reps, sets, and weight as you advance.
8. Goblet Squat
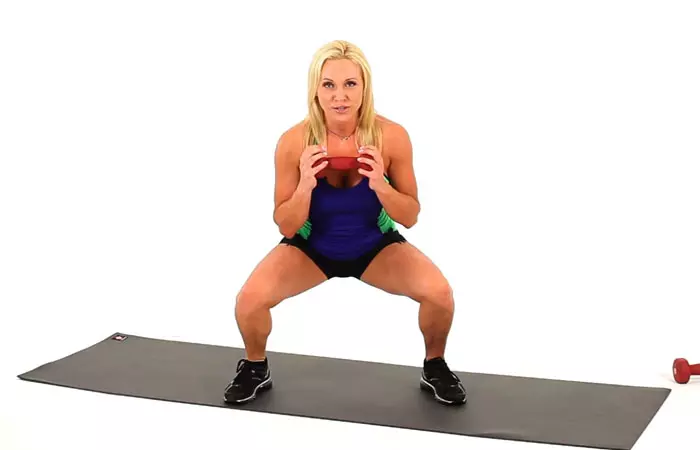
Glutes, core, quads, hamstrings, lower back, and shoulders.
Duration – 7 mins
Steps
- Stand straight with your feet a little wider than hip-width apart, toes slightly pointing out, shoulders pinched back, chest forward, and the elbows slightly bent.
- Hold a 5.5-pound dumbbell with both your hands in front, close to your chest. Keep your elbows close to the torso and body weight on your heels.
- Inhale and push your hips out and squat down. Make sure your hip joints are a little lower than your knees, and your knees should not overshoot your toes.
- Hold this pose for a second.
- Exhale and come back up to the starting position.
- Do 3 sets of 10 reps.
9. Zercher Squat
Target
Biceps, forearms, quadriceps, core, upper back, glutes, hamstrings
Duration – 5 mins
Steps
1. Take a barbell and position it in the crook of your elbows and lock it in the front with your forearms.
2. Keep your feet shoulder-width apart. Keep your chest and back straight, and maintain this posture throughout.
3. Inhale and bend at the hips and knees to get into a squat, going as low as you are able to. Keep your torso upright and hold the position for a few seconds. 4. Ideally, your thighs should be parallel to the floor in the squat position.
5. Exhale and push from your heels and pull your hips back up to the starting position.
6. Do 3 sets of 10 reps each.
These are different variations of squats that you can do to tone your body and shed fat. They include box squats, Smith machine squats, resistance band squats, Bulgarian split squats, barbell squats, dumbbell squats, front squats, wall squats, and plyometric squats.
Steve Collins, a personal trainer and blogger, shared his experience of squatting in his personal blog. He said, “I know some people can’t do the front squat grip, in which case I would do a goblet squat with a dumbbell or kettlebell rack squats. I am not a big fan of the classic bodybuilding front squat with the arms crossed over, it looks like an accident waiting to happen (i).”
As you practice more, you will get better, and squatting will become easier. Here’s a list of benefits that you get by squatting regularly.
Benefits Of Squats
- Help burn the fat.
- Tone the muscles.
- Build muscle strength.
- Make real-life activities much easier.
- Improve stamina.
- Prevent injuries.
- Help flush out the toxins.
- Improve blood circulation.
- Help to get rid of cellulitei Non-malignant fat deposits that lie beneath the skin and create a dimpled and lumpy appearance. .
- Increase flexibility.
- Help build core strength/core engagement
- Improve posture.
- Strengthen the bones and joints.
- Glute activation
- Knee alignment
Squats offer numerous benefits. Perform them correctly to avoid injuries and maximize results. To ensure proper form and prevent common mistakes, mind the following common mistakes many commit.
Common Mistakes To Avoid
By being mindful of these common mistakes, you can ensure proper form and maximize the benefits of squats:
- Avoid letting your knees extend past your toes. This can put excessive strain on your knees.
- Maintain a neutral spine throughout the movement. Rounding your back can lead to lower back pain.
- Keep your heels firmly planted on the ground to distribute weight evenly.
- Avoid bouncing at the bottom of the squat. Instead, pause briefly and then push back up.
Infographic: How To Do Squats Properly
With the many benefits of squats and the ease of doing them anytime anywhere, you might be tempted to overdo it. When you are learning how to do a squat, there are certain things you should keep in mind. Make sure to maintain the right stance and posture to avoid any strain or injuries. Have a look at the infographic below to know more details.
Some thing wrong with infographic shortcode. please verify shortcode syntaxThe best way to learn how to do squats correctly is to focus on your form. Beginners tend to get their form wrong and end up hurting their back and knees. Always keep your shoulders relaxed and your back straight, lift your chest, and maintain your body weight on your heels (not toes) while doing a squat. Make sure your knees are aligned with your toes when you get into the squat position. More importantly, do not do this exercise in a hurry and just focus on your form.
Frequently Asked Questions
What are some modifications for beginners?
If you are new to squats or have limited mobility, you can start with easier variations like chair squats or wall sits. These modifications help build strength and technique before progressing to full squats.
Can I do squats if I have knee pain?
Before performing any workout, especially squats, you should speak with a doctor or physical therapist to identify the source of your knee pain and to gain clearance. To lessen the load on your knee and avoid additional injury, they can advise substituting exercises or making adjustments to the squats.
How many squats should I do in a workout?
Beginners must try to do 2-3 sets of 8–12 repetitions. Those on the Intermediate level must try to do 3–4 sets of 8–12 reps, and the ones on the advanced level must do 4-5 sets of 8–12 repetitions.
What equipment do I need to do squats?
You can perform squats by using your own body weight as resistance in place of any equipment. This is a fantastic method to begin creating stability and strength in your legs and glutes. You can also use handheld weights like dumbbells or kettlebells to perform squats.
How can I progress to harder variations of squats?
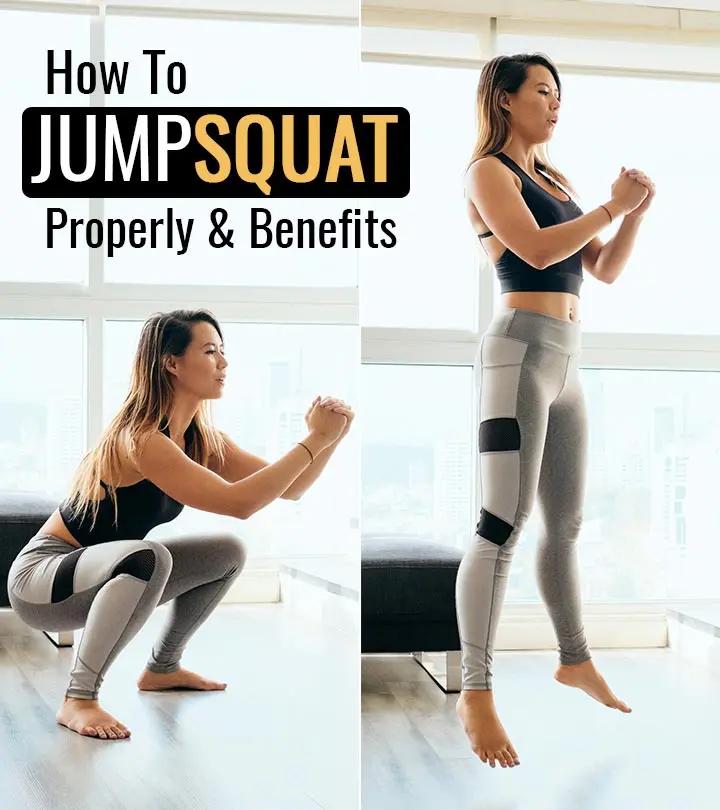
Try experimenting with novel squat variations, such as jump squats, pistol squats, sumo squats, and others. You can also include an unstable surface. Increase the difficulty level of squats by performing them on an unstable surface, such as a balancing disc or a Bosu ball. Each form is important in different ways; for example, the jump squats benefit your lower body and enhance cardiovascular fitness.
How often should I do squats to see results?
If you want to increase strength, you can do squats 2-3 times a week. If you want to work on endurance, you must do squats 2-4 times a week. If you are a beginner, try doing 2-3 sessions in a week and gradually keep increasing with time.
Illustration: How To Do Squats Properly - A Step-By-Step Guide
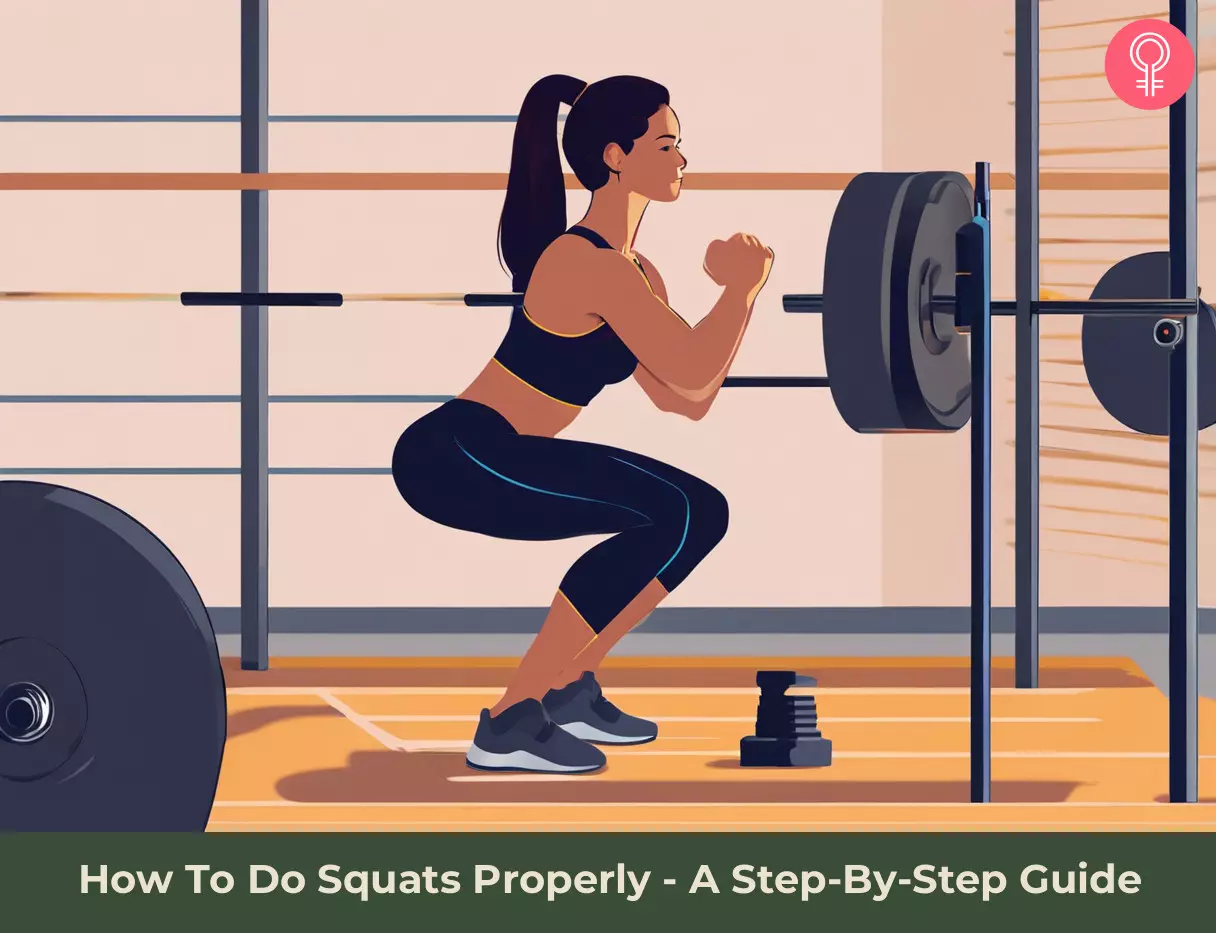
Image: Stable Diffusion/StyleCraze Design Team
Learn how to do the perfect squat and achieve a stronger lower body. Get ready to tone your legs and glutes with this beginner-friendly workout video.
Personal Experience: Source
StyleCraze's articles are interwoven with authentic personal narratives that provide depth and resonance to our content. Below are the sources of the personal accounts referenced in this article.
i. Do you need to squat?https://lostinfitness.blogspot.com/2017/04/do-you-need-to-squat.html
Read full bio of Dr. Sudhansu Singh
Read full bio of Ravi Teja Tadimalla
Read full bio of Sindhu Koganti







Community Experiences
Join the conversation and become a part of our empowering community! Share your stories, experiences, and insights to connect with other beauty, lifestyle, and health enthusiasts.