How To Do Smokey Eye Makeup – Top 11 Tutorials
It's time to ditch your fear of attempting smokey eyes—here's all you need to be a pro!
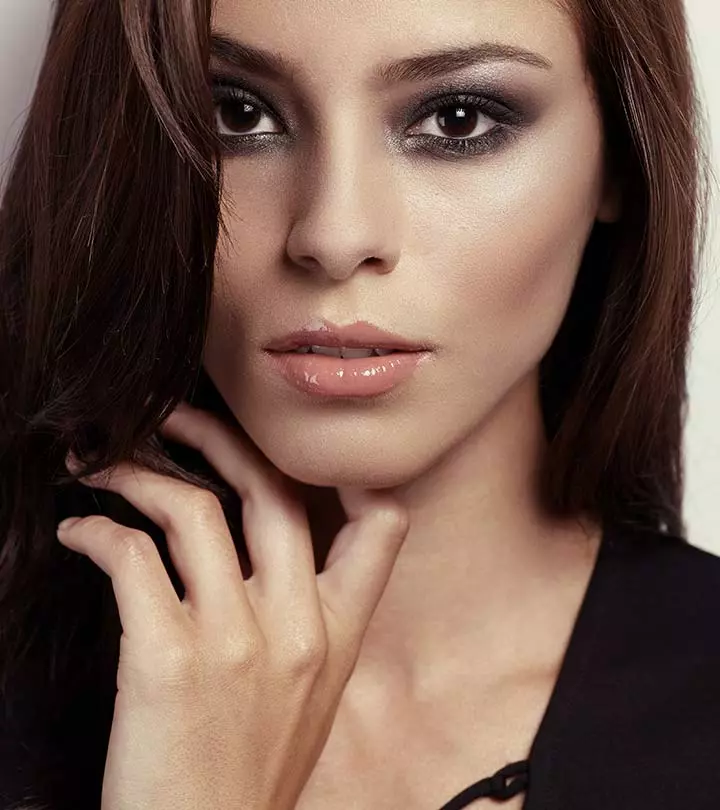
Image: Shutterstock
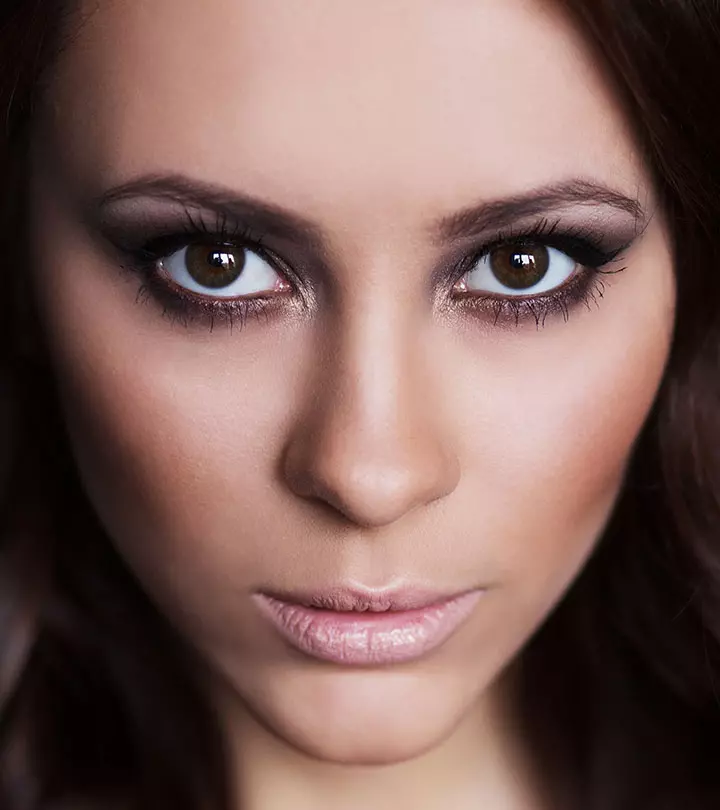
While they may look pretty elusive in practice, smokey eye tutorials are simple. So, if you are someone who loves to go bold with their eyes occasionally, smokey eyes will be your signature and go-to look, and enhance your beauty even more!
The smokey eye has origins tracing back to the 1920s. It was famously embraced by glamorous Hollywood icons. This look captivated audiences and became synonymous with bold, glamorous beauty. Over the years, it evolved into a versatile makeup technique that can elevate your appearance for anything from a casual day out to a special evening event. Nowadays, you can easily access many smokey eye tutorials online to master the technique. However, the right technique and occasion are very important to get the look right as this bold-eye look may not go well with all your outfits. However, there is no doubt that the perfect smokey eye creates dimension and looks downright glamorous.
Also, you can do this loud eye makeup look in both dramatic and subtle ways. Doing it right may require a lot of trial and error, but there is nothing quite like it once you get it right. So, if you are a beginner and have never created a smokey eye look yourself, fret not. Keep reading to find out how you can master this art effortlessly!
 Keep In Mind
- Lipstick Shades: Opt for light pink, classic red, peachy shades, as well as nude colors for a perfect look.
- Best Eye Shapes: Smokey eye makeup suits all eye shapes but looks phenomenal on almond eyes and monolid eyes.
- Best Makeup Tool: Use a crease blender or a blending brush for a salon-like smokey eyes look.
In This Article
Top 11 Smokey Eye Makeup Tutorials(Step-By-Step)
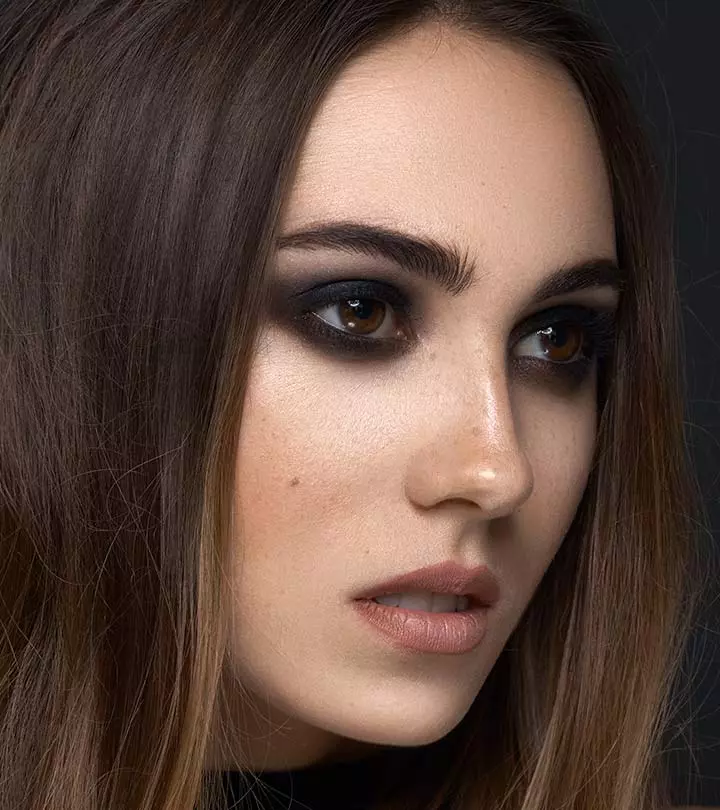
1. Black Smokey Eye Makeup Tutorial
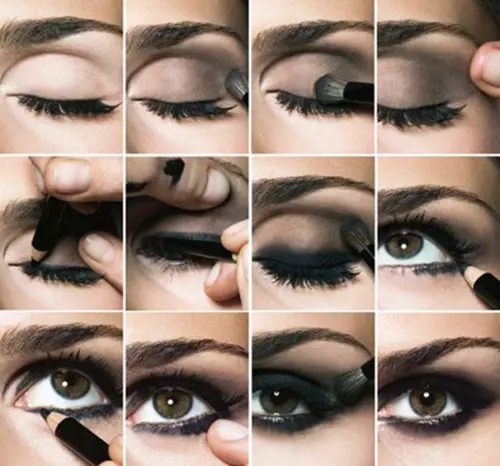
You Will Need
- Primer
- Concealer
- Black Eyeshadow
- Black liner
- Mascara
- Eyeshadow brushes
How To Apply Black Smokey Eye Makeup?
Step 1:
You should always start with a clean base. Applying a primer allows the makeup to stay longer and makes it easier to blend the eyeshadows. Use a concealer under the eyes and on the eyelids to even out any discoloration.
Step 2: Pack on black eyeshadow to the outer corner and into the crease.
Step 3: Blend out the eyeshadow, so there aren’t any harsh lines.
Step 4: If you feel that it needs more intensity you can pack on more color.
Step 5: Apply a gel or pencil liner as close as you can to the lashline.
Step 6: Smudge it out and blend it with the existing black eye shadow.
Step 7: If you want to create an intense look, you can even take the eyeliner (or use black cream eyeshadow and then set it with powder) in the crease and deepen it. Make sure to blend it out well.
Step 8: Take the liner under the eyes.
Step 9: Smudge it out to create the smokey effect.
Step 10: It’s time for the finishing touches. Apply your favorite volumizing mascara, and you’re good to go!
The sultry black smokey is a classic and is perfect for a party and night out at the club!
 Trivia
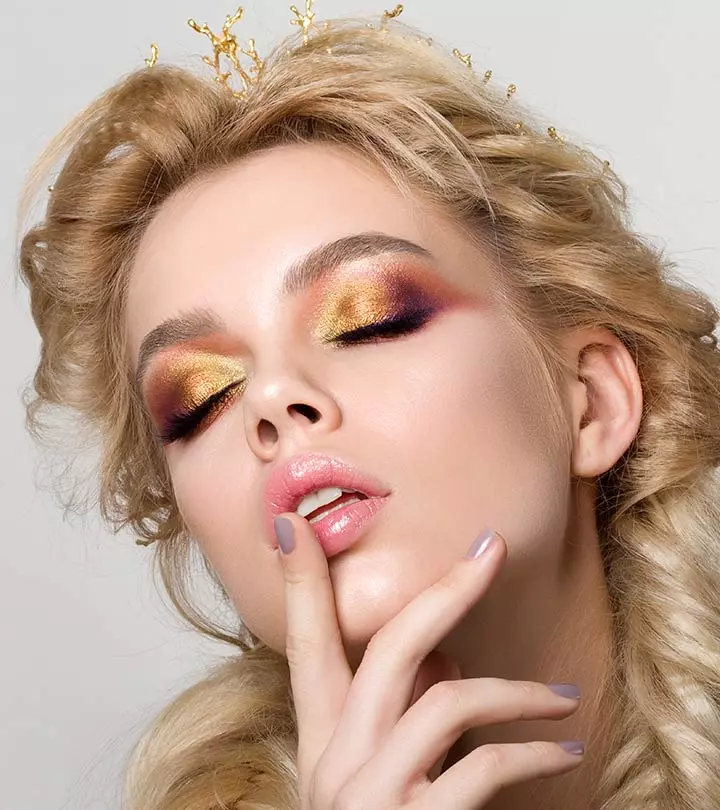
2. Gold Smokey Eye Makeup Tutorial
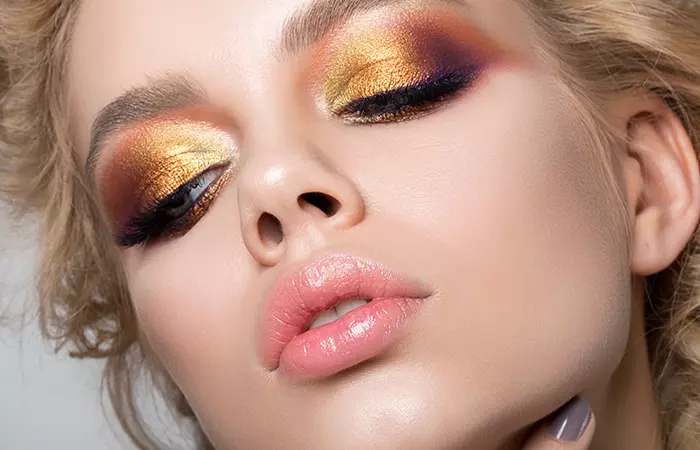
You Will Need
- Primer
- Concealer
- Gold eyeshadow (Cream and powder textures)
- Dark brown eyeshadow
- Black liner
- Fake lashes
- Mascara
- Eyeshadow brushes
How To Apply Gold Smokey Eye Makeup?
Step 1:
Prep, prime and conceal the eyelids. Use a cream gold eyeshadow base. This will make the gold pop out more when you add the powder eyeshadow.
Step 2: Pack on the gold eyeshadow and blend it with your fingers or a dense or wet brush.
Step 3: Take a dark brown eyeshadow with a fluffy brush and apply it to the outer corner and take it into the crease to create depth.
Step 4: Keep applying the gold to the middle of the lid and the brown in the outer corner till you are happy with the intensity.
Step 5: Apply the gold eyeshadow to the lower lashline. Follow up with black liner on the lower water line as well as the lash line, blending out the edges optionally with brown or black eyeshadow.
Step 6: Apply eyeliner to the upper lash line and flick it out.
Step 7: To complete the look, apply fake lashes and finish up with mascara.
You can also use contouring and highlighting to accentuate your facial features and make your eyeshadow stand out.
This is a great holiday look. It also looks fabulous for weddings.
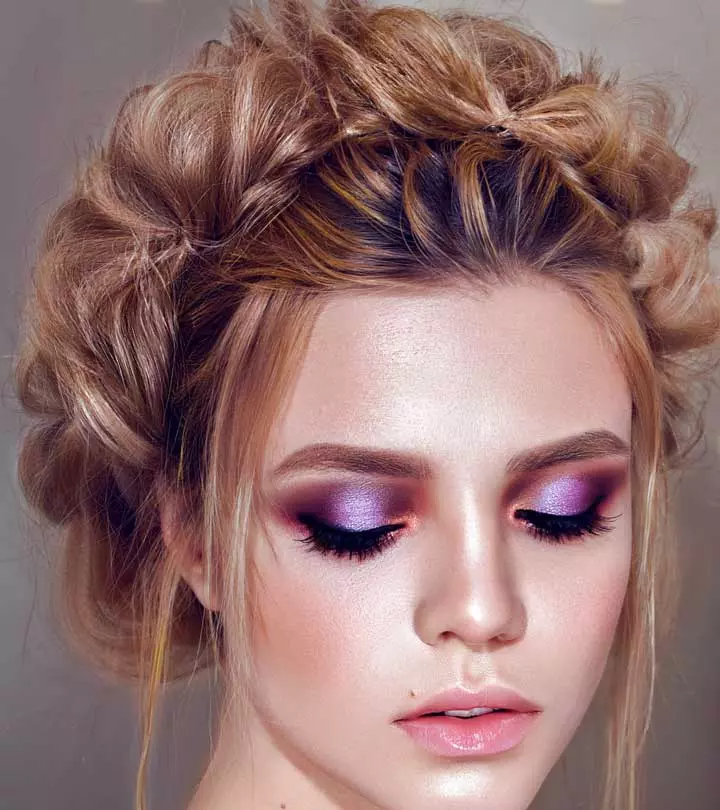
3. Purple Smokey Eye Makeup Tutorial
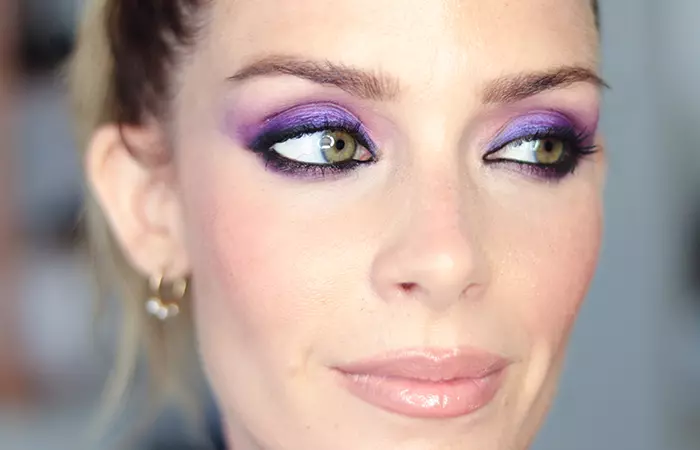
You Will Need
- Primer
- Concealer
- Lilac shimmery eyeshadow
- Black eyeshadow
- Dark purple eyeshadow
- Peachy-pink eyeshadow
- Black liner
- Mascara
- Eyeshadow brushes
How To Apply Purple Smokey Eye Makeup?
Step 1:
Start off with a lilac shimmery eyeshadow as the starting base color.
Step 2: Pack on some black to the outer corner and blend it out so that there are no harsh lines.
Step 3: Use a slightly darker shade of purple in the middle of the eyelid to create a smooth transition between the lilac and the black. This goes without saying, but blend so that it looks flawless.
Step 4: Find a peachy pink shade and use a fluffy blush to apply above the crease. This gives it a natural gradient.
Step 5: Apply kohl or eyeliner to the lower lash line and smudge it out to give it that smokey effect.
Step 6: Tightline your upper water line in order to give your lashes a fuller look.
Step 7: Apply mascara, and your purple smokey is now done!
It’s a misconception that smokey eyes have to be strong. This uses light colors and even the black isn’t so intense. This can be worn in the daytime for a day out shopping in the market or with a cute sun dress for brunch.
4. Bronze Smokey Eye Makeup Tutorial

You Will Need
- Primer
- Concealer
- Bronze eyeshadow
- Dark brown eyeshadow
- Nude eyeliner
- Gold eyeliner or eyeshadow
- Mascara
How To Apply Bronze Smokey Eye Makeup?
Step 1:
Start off with a bronze eyeshadow all over the eyelid.
Step 2: Take some of the same bronze eyeshadow and run it through your lower lash line.
Step 3: Using a dark brown eyeshadow and a liner brush, create a smudged outline as close as you can to the lash line.
Step 4: Do the same thing for the lower lash line.
Step 5: Apply some more bronze eyeshadow to get the desired intensity.
Step 6: Run a nude eye pencil along the inner corner of the eye to create the appearance of brighter eyes.
(Note: You can also switch out black eyeliner on the waterline for the nude for an eye-opening effect.)
Step 7: Blend out any harsh lines and add eyeshadow wherever needed.
Step 8: Use a gold eye pencil or eyeshadow to add some shimmery highlight to the inner corner.
Step 9: Finish off the look with a few good coats of mascara.
This trendy celebrity smokey eye technique is perfect for your prom night.
5. Silver Smokey Eye Makeup Tutorial
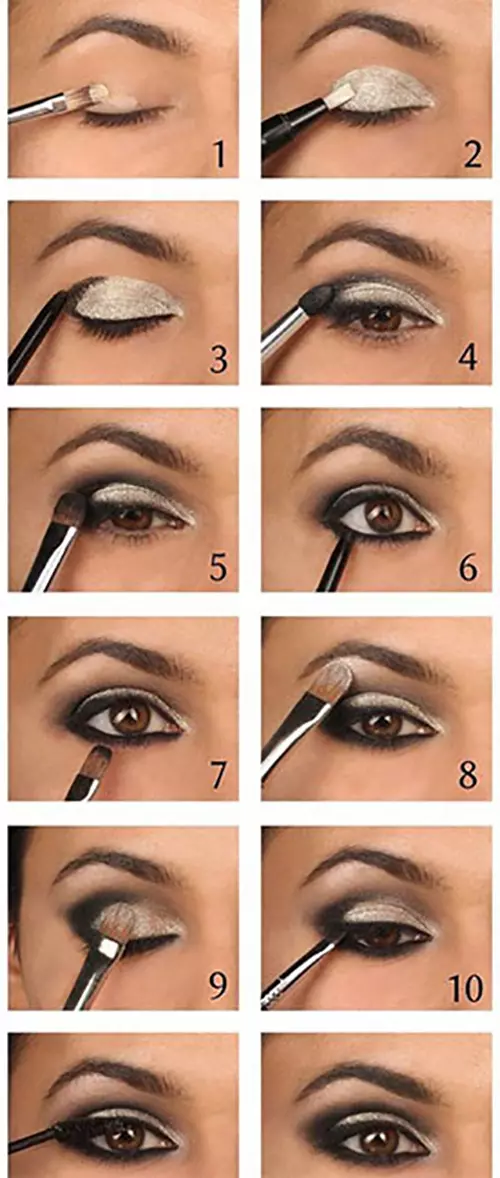
You Will Need
- Primer
- Concealer
- Cream based silver eyeshadow
- Black eyeliner
- Highlighter
- Mascara
- Eyeshadow brushes
Step 1:
Apply primer and concealer to prep the eye. Since silver is a cool toned shade, it’s important to get rid of any redness or discoloration.
Step 2: Use a silver cream based shadow on the freshly primed and concealed eyelid.
Step 3: Apply black eyeliner to the outer corner.
Step 4: Now blend it towards the middle and into the crease.
Step 5: Apply black liner to the upper and lower lash lines.
Step 6: Smudge it out to create the smokey look.
Step 7: Using a highlighter, highlight the brow bone and inner corner.
Step 8: Intensify the silver if needed by packing on more product.
Step 9: Blend it out evenly so that it transitions smoothly.
Step 10: Finish off with a good mascara, and that’s all!
6. Blue Smokey Eye Makeup Tutorial
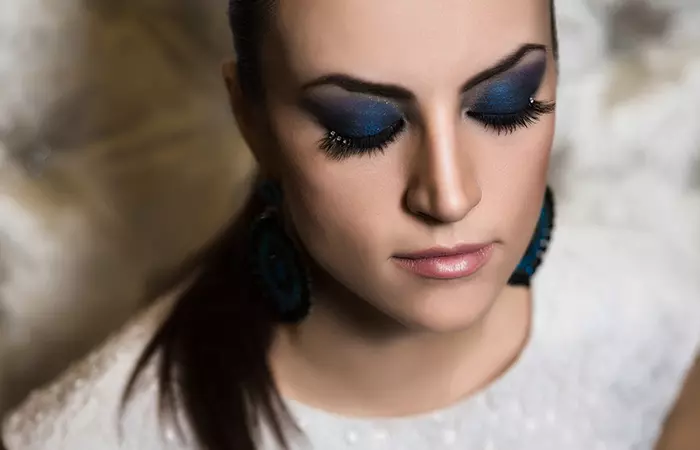
You Will Need
- Primer
- Concealer
- Black eyeliner
- Metallic blue eyeliner, kohl or eye shadow
- Silver eyeshadow
- Mascara
- Fake lashes
- Eyeshadow brushes
How To Apply Blue Smokey Eye Makeup?
Step 1:
On a freshly concealed and primed eyelid, apply a thick coat of eyeliner. This will serve as the initial base for the smokey.
Step 2: Smudge it out into the crease and a little above it to ensure there aren’t any harsh lines.
Step 3: It’s time to bring in the blue! Use either a metallic blue eye pencil, kohl, or a pigmented eyeshadow. Apply it to the eyelid.
Step 4: Blend it well, but don’t cross over the black base we created earlier. Just create a smooth transition into it.
Step 5: Run the blue to the lower lash line as well, and smudge it out to bring together that smokey look.
Step 6: Apply some silver eyeshadow a little above the crease.
Step 7: Blend it all out seamlessly and add more product if necessary.
Step 8: Finish the look with mascara, fake lashes, and glitter for that extra glam.
7. Pink Smokey Eye Makeup Tutorial
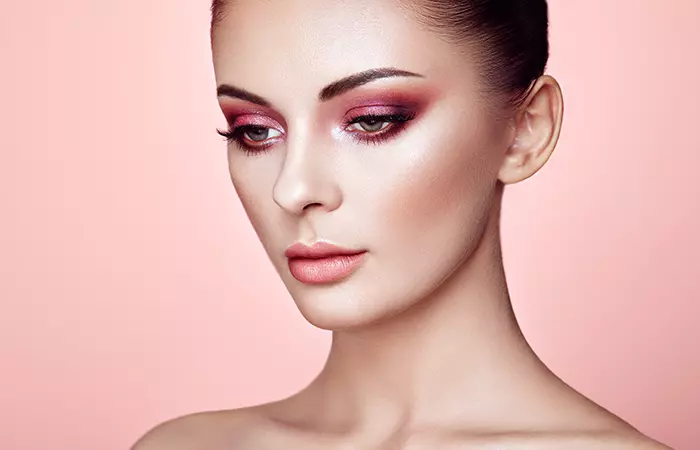
You Will Need
- Primer
- Concealer
- Tape
- Pink/Cranberry eyeshadow
- Black eyeliner
- Rose gold eyeshadow
- Mascara
How To Apply Pink Smokey Eye Makeup?
Step 1:
No surprise here, but start with a clean base. Follow the natural shape of your lower lash line to place a piece of tape strategically.
Step 2: Now, use a metallic pink—a cranberry shade, if you will—to wash over the eyelids. Take whatever is left over on the brush lightly under your eyes as well.
Step 3: Apply some black liner close to the upper lash line and thicken it as you move towards the outer corner.
Step 4: Smudge it out well and blend it into the pink eyeshadow. Run some of the eyeliner along the lower lash line as well.
Step 5: Remove the tape and soften out the harsh line.
Step 6: Apply a rose gold shimmery eyeshadow in the middle of the eyelids, to give it some dimension and make it pop.
Step 7: Apply mascara, and you are good to go!
I love this look because it is incredibly soft and this style can be worn for almost any occasion, like your graduation ceremony. It is even appropriate for office wear!
8. Green Smokey Eye Makeup Tutorial

You Will Need
- Primer
- Concealer
- Black gel eyeliner
- Emerald green eyeshadow
- Gold-brown eyeshadow
- Shimmery black eyeshadow
- Gold eyeshadow
- Mascara
- Fake lashes(optional)
How To Apply Green Smokey Eye Makeup?
Step 1:
Prep the eyelids by priming and applying concealer and filling in the eyebrows. A strong brow game brings the whole smokey look together.
Step 2: Generously apply black liner to the upper and lower lashline. Apply more on the upper lash line, on the lid, as this will be the base for the smokey eye.
Step 3: Smudge it out and blend it well.
Step 4: Apply an emerald green eyeshadow to the crease and above the crease. Blend it out with a fluffy brush so that the lines are smooth. Apply the green to the lower lash line as well.
Step 5: Use a brown shade with yellow-golden undertones to apply above the crease. This makes an excellent transition shade from your skin to the eyeshadow.
Step 6: Add intensity to the center of the eyelid by adding more black. Use a gel based product, as this is extremely dark. A gel eyeliner would do.
Step 7: Set the black gel with a shimmery black eyeshadow.
Step 8: Take this eyeshadow under the eyes as well so that everything is in place.
Step 9: Apply some gold shimmer eyeshadow to the inner corners as a highlight.
Step 10: Use an intense black mascara and false lashes (optional) to complete this gorgeous green smokey eye!
This one is definitely an all-nighter. It’s perfect for parties at night or just a night out with your girls at a club.
9. Black and Gold Smokey Eye Makeup Tutorial
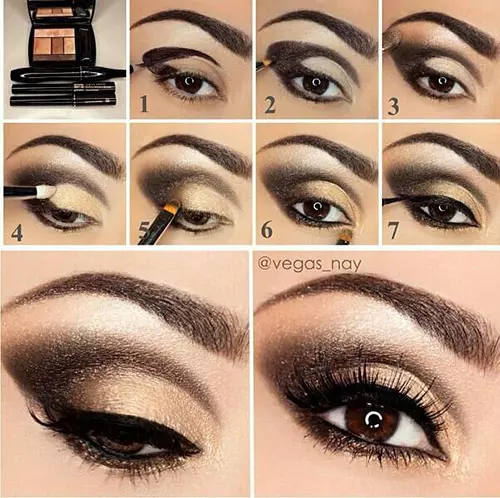
You Will Need
- Primer
- Concealer
- Black eyeliner
- Gold eyeshadow
- Black liquid liner
- False lashes
- Mascara
- Makeup brushes
How To Apply Black and Gold Smokey Eye Makeup?
Step 1:
To achieve the glam gold and black smokey look, on a clean base, apply a good amount of black liner in the outer corner and towards the crease.
Step 2: Use an eyeshadow brush to soften it out. This black will create depth in the smokey eye. Apply some of the black to the lower lash line and smudge as well.
Step 3: Pack on gold eyeshadow once the black has been blended.
Step 4: Blend the gold with the black near the outer corner.
Step 5: Apply the gold eyeshadow to the inner corner and slightly at the beginning of the lower lash line. Blend it with the black to create an ombre effect.
Step 6: Apply eyeliner to create a flick.
Step 7: Add some falsies and mascara. Voila! Done!
This is a dramatic look that would look fantastic for events and weddings!
10. Pink and Grey Smokey Eye Makeup Tutorial
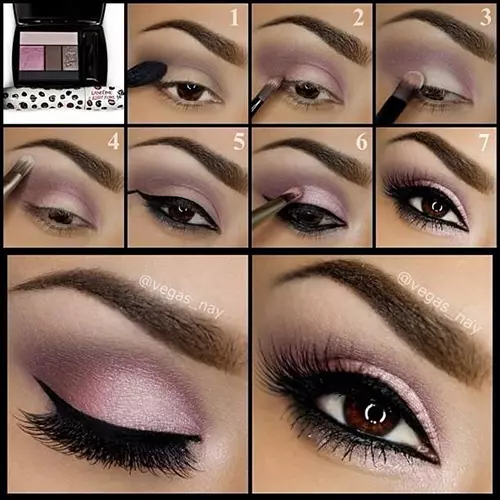
You Will Need
- Primer
- Concealer
- Dark brown eyeshadow
- Pink eyeshadow
- White eyeshadow with pink undertones
- Black liquid liner
- Black eyeliner
- False lashes
- Mascara
How To Apply Pink and Grey Smokey Eye Makeup?
Step 1:
On freshly primed and concealed eyelids, apply a cool-toned medium brown shade of eyeshadow to the outer corner and into the crease. Blend it well.
Step 2: Use a pink eyeshadow and apply it onto the eyelid. Leave the center of the eyelid plain, though.
Step 3: Now, apply a soft white shade with pink undertones in the middle space that we left empty. This creates dimension to the makeup look.
Step 4: Highlight the browbone with the same shade, if you don’t have a separate highlighter.
Step 5: Apply eyeliner and create a flick. Run a pencil liner to the lower lashline as well and smudge it out.
Step 6: Intensify the look by packing on a shimmery white shade to the center of the eyelid.
Step 7: Apply false lashes, and highlight the inner corner. You can also extend this highlight slightly towards the inner one-third.
This will bring a subtle sparkle to your eyes. That’s all!
This is a soft look that can be worn even during the day.
11. Matte Smokey Eye Tutorial
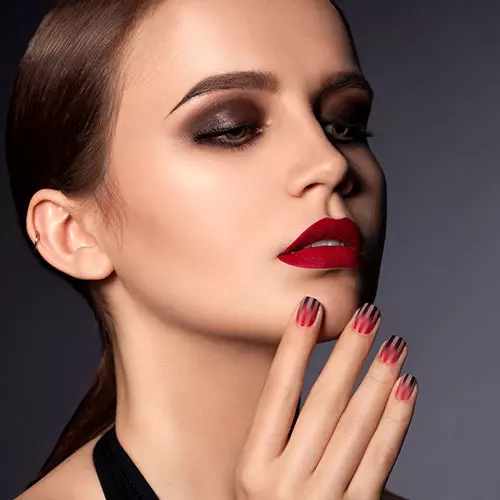
You Will Need
- Eyeshadow primer
- Neutral matte eyeshadow
- Soft brown matte eyeshadow
- Matte black eyeshadow
- Black kohl pencil or gel eyeliner
- Volumizing mascara
- Eyeshadow brushes
- False lashes
How To Apply Matte Smokey Eye?
Step 1:
Apply eyeshadow primer, then sweep neutral matte eyeshadow across the eyelid to the brow bone.
Step 2: Define crease with brown eyeshadow and apply black eyeshadow on the lid.
Step 3: Blend the black eyeshadow upwards to meet the brown transition shade in the crease. Smudge matte black eyeshadow on the lower lash line for a cohesive smokey effect.
Step 4: Intensify the look with a black kohl pencil or gel eyeliner along the upper lash line, winging it out if desired.
Step 5: Curl lashes, apply volumizing mascara, and add false lashes for drama.
A versatile black matte smokey eye is ideal for any occasion.
Smokey Eye Makeup Tips
- When you start applying the makeup make sure that it has been freshly cleansed and all the oils from the skin.
- Use clean brushes! This is extremely vital! Using clean brushes will help you deposit the colors better and even blend better. It is important to clean your brushes regularly using a mild brush cleaner or gentle soap to remove any makeup residue and buildup. Make sure to let them dry completely before using them again to avoid any risk of bacterial growth.
- I know you might be excited to experiment, but try to make wise decisions while picking out the smokey makeup look for the occasion. Reserve the heavy dark smokey eyes for the night or major events where such makeup is appropriate.
- When you go heavy on the eyes, go nude on the lips.
 Quick Tip
Bhavna, a business analyst and a blogger, shares a quick and easy smokey eye makeup tutorial using minimal products for a time-saving, wearable look suitable for beginners. She mentioned, “I recently created this quick and easy Smokey eyes and loved how it turned out. It is so time-saving and I have used minimum products to create it (i).”
Key Takeaways
- Smokey eye makeup can make your eyes look bold, and give you a glamorous look.
- You can create smokey eyes with different colors like black, gold, rose, pink or gray, and it can be easily done on different eye shapes.
- While blending eyeshadow, use a fluffy brush and use mascara, eyeliner, and highlighter to finish the smokey eye look.
- While selecting colors try to reserve heavy dark smokey eye colors for night or special occasions, where they are best suited.
Infographic: 4 Classic Smokey Eye Looks To Try
Whether you prefer it dramatic or love to keep it subtle, we got them all for you. However, if you are still confused about which smokey eye look to go for, let us help you. We have shortlisted the top 4 smokey eye makeup looks with a timeless appeal. They go with any outfit and suit all occasions. Check out the infographic below to learn more. Illustration: StyleCraze Design Team
You may have already noticed that smokey eyes have become one of the go-to looks for someone looking to go bold and sassy. But pulling it off is a different task altogether. The secret to creating a flawless smokey eye makeup look is to follow these step-by-step properly. But now that you have read this article, you do not have to be concerned about how to do it. Gather all the required cosmetics and rest assured that our smokey eye beauty tutorials will assist you in achieving the perfect look that you are pinning for. And once done, you will be glad that you tried it. So, get ready because it is time to rock your dramatic look!
Frequently Asked Questions
Do smokey eyes suit everyone?
Yes, smokey eyes suit everyone. They are a perfect way to enhance your feminine look and overall appearance.
Do smokey eyes make you look older?
Yes, smokey eyes may make you look older, especially if the dark color eyeshadow is used in large amounts. Hence, choosing the right eyeshadow is crucial to ace your look.
What eye shape is most enhanced with smokey eye makeup?
All eye shapes can be enhanced with a smokey eye if the shape of the eyeshadow is correct. However, almond eyes are best enhanced with the smokey eye makeup.
Illustration: How To Do Smokey Eye Makeup – Top 11 Tutorials
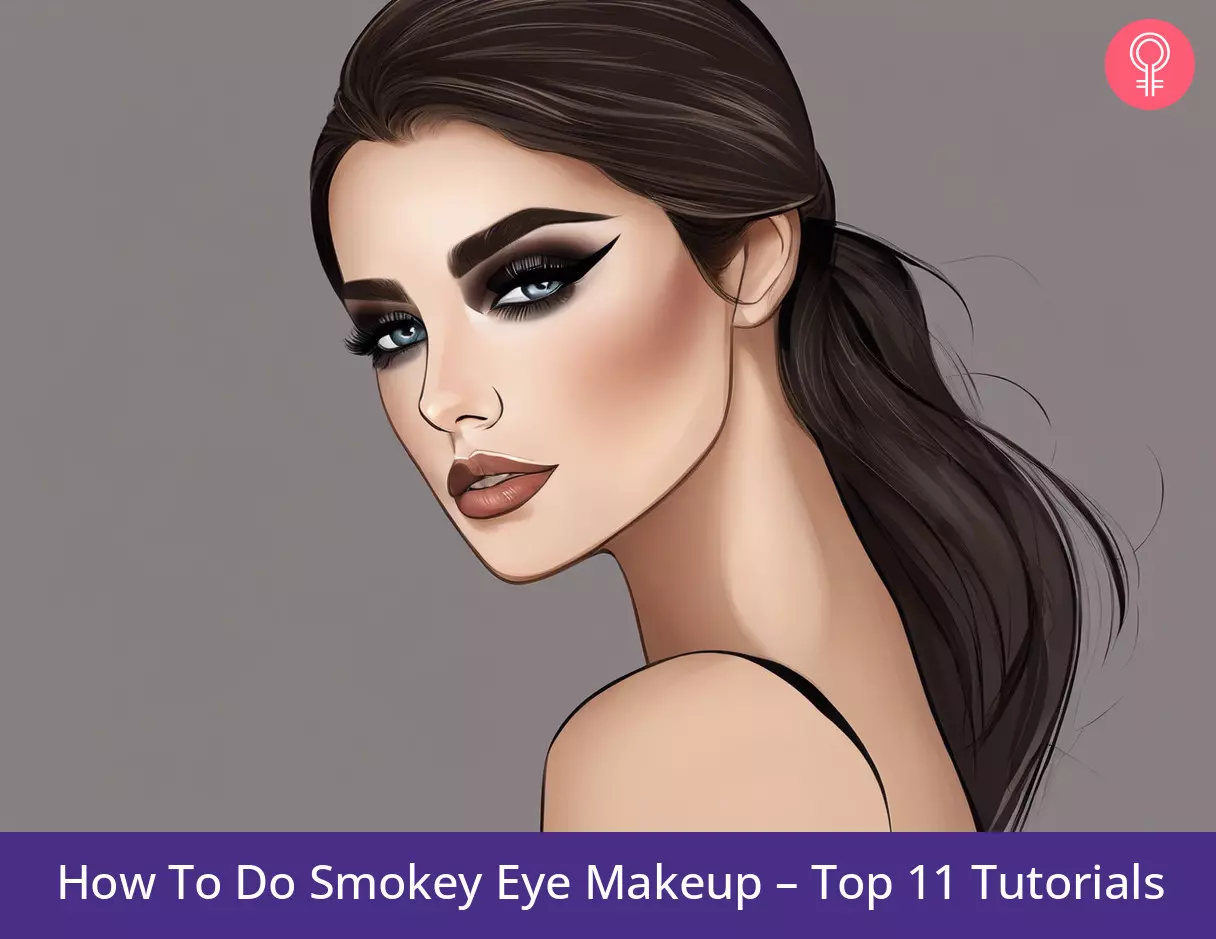
Image: Stable Diffusion/StyleCraze Design Team
Unlock the secrets to flawless eye makeup with this beginners’ tutorial. Learn step-by-step techniques and gain expert tips on applying eyeshadow to enhance your natural beauty like a pro.
Personal Experience: Source
StyleCraze's articles are interwoven with authentic personal narratives that provide depth and resonance to our content. Below are the sources of the personal accounts referenced in this article.
i. Quick and Easy Smokey Eyes!https://makeupshesaid.wordpress.com/2017/07/26/quick-and-easy-smokey-eyes/
Read full bio of Marin McCarthy
Read full bio of Shalini Roy
Read full bio of Madhumati Chowdhury
Read full bio of Vaishali Sinha




Community Experiences
Join the conversation and become a part of our empowering community! Share your stories, experiences, and insights to connect with other beauty, lifestyle, and health enthusiasts.