24 Effective Yoga Poses For Back Pain – Get Instant Relief
Feel the healing energies flow down your spine as you perform these restorative poses.
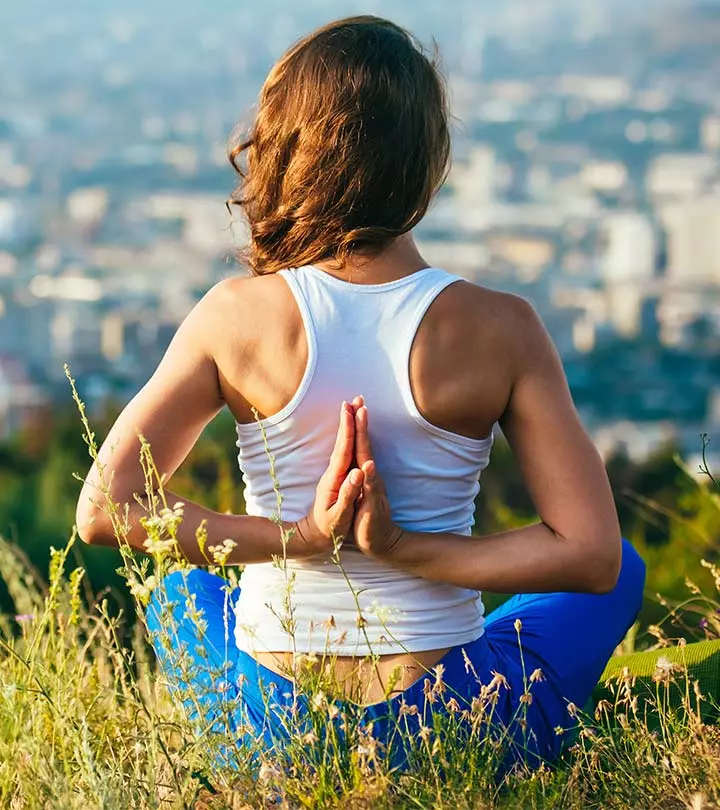
Image: shutter stock
The spinal cord is responsible for giving the entire body structure and keeping it strong and erect. However, people often complain of back pain owing to their unhealthy lifestyle. No worries! Practicing yoga for back pain can be a great idea. Health issues involving the spine are a nightmare, especially for those who spend hours sitting in front of the computer. It gets really difficult for them to cope with the pain. However, doing certain yoga poses every day is perfect for ending your sedentary lifestyle and staying fit.
Yoga helps you strengthen your spine and enhance your posture. More importantly, it helps you stretch your body and make it more flexible. In this article, we have come up with the four best yoga asanas for getting instant relief from back pain, the 24 most effective poses for complete relief, and a step-by-step guide to doing them in the right manner. Some of these poses may look difficult to perform initially, but with time, you will most definitely get better at them.
Here is how yoga offers you relief from back pain:
1. It makes your back, hamstrings, and hip flexors strong and more flexible.
2. It calms you down by easing anxiety and stress levels.
3. It stimulates blood circulation.
Keep reading to check out all the info about yoga for back pain below!
In This Article
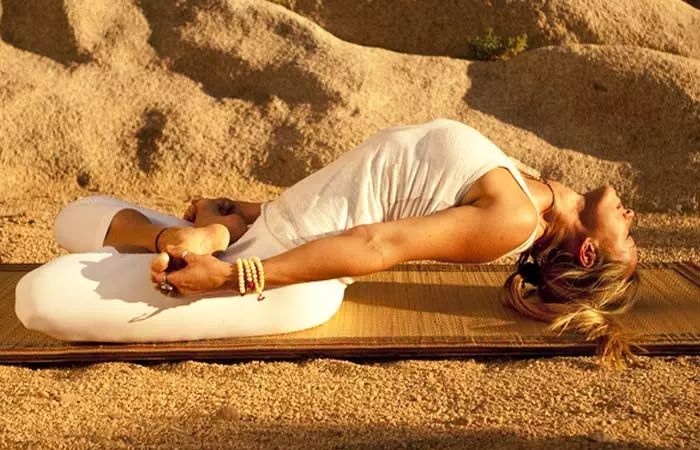
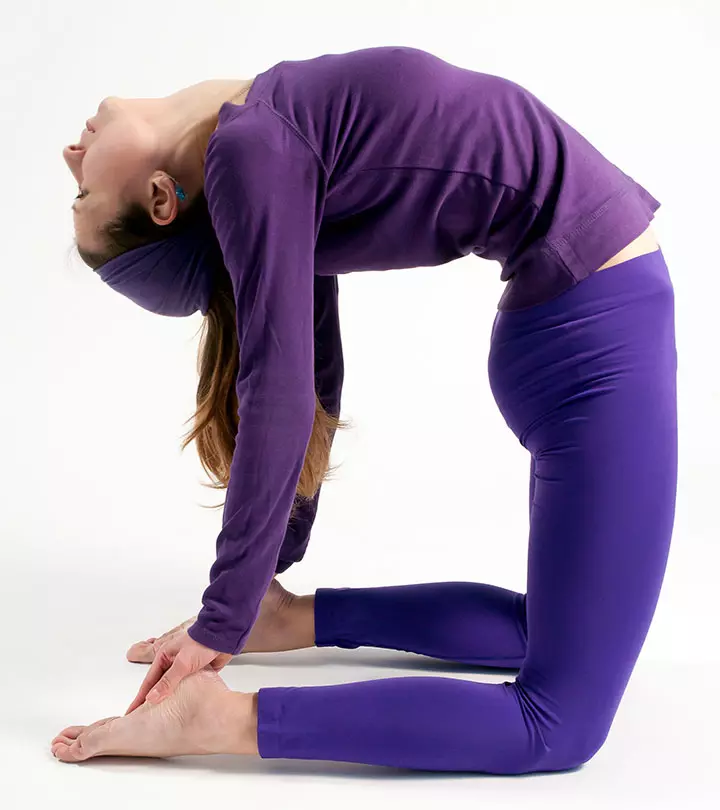
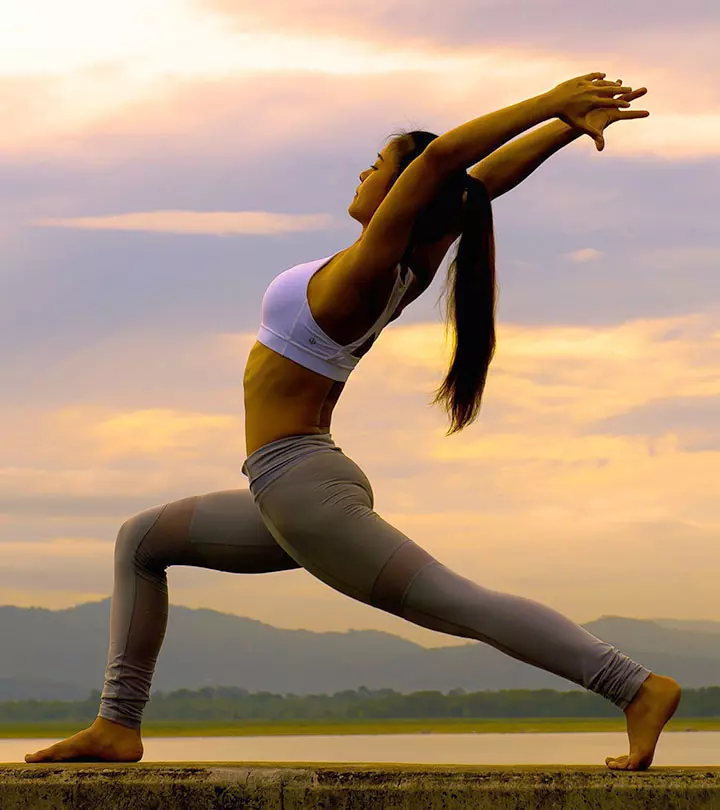
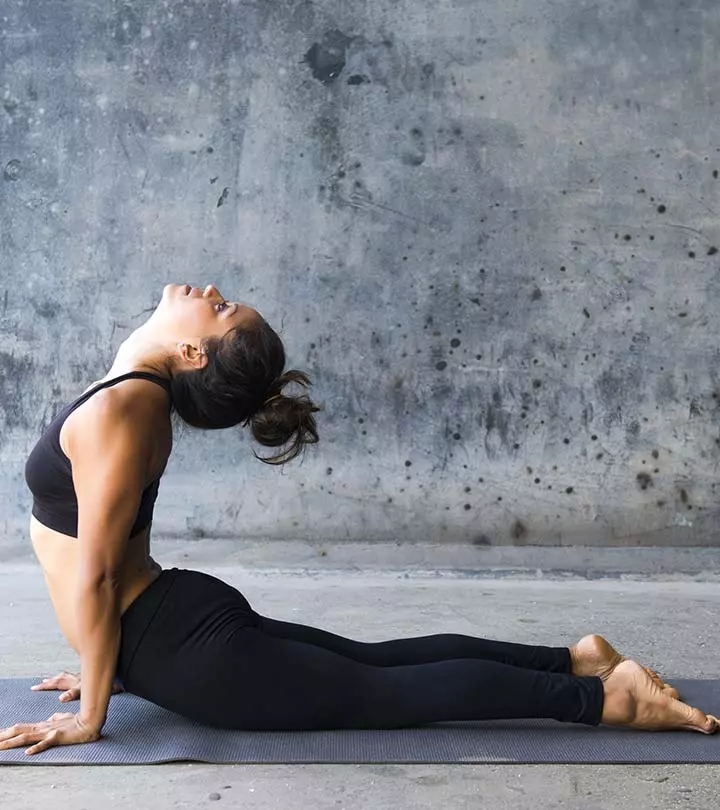
4 Yoga Asanas For Quick Relief of Back Pain
24 Effective Poses In Yoga For Complete Back Pain Relief
- Bhujangasana
- Ardha Matsyendrasana
- Marjariasana
- Bitilasana
- Adho Mukha Svanasana
- Trikonasana
- Ustrasana
- Paschimottanasana
- Purvottanasana
- Halasana
- Pawanmuktasana
- Setu Bandhasana
- Shalabasana
- Vrikshasana
- Rajakapotasana
- Tadasana
- Navasana
- Dhanurasana
- Shashankasana
- Garudasana
- Virabhadrasana 2
- Ardha Pincha Mayurasana ( Dolphin Pose)
- Baddha Konasana
- Matsyasana
1. Bhujangasana
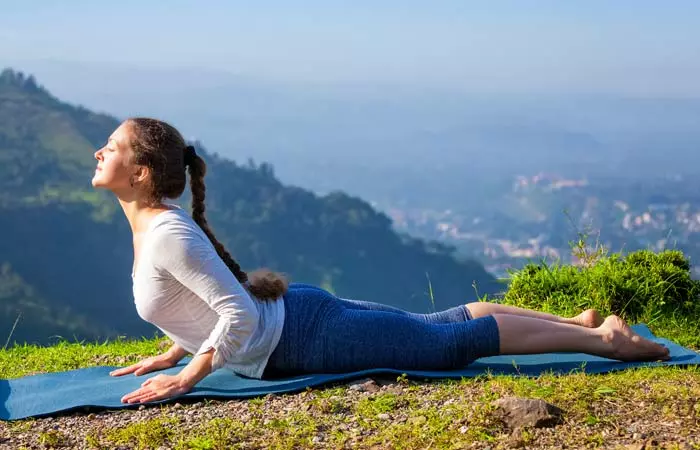
The eighth pose of the 12 poses of the Surya Namaskar, Bhujangasana is also called the Cobra Pose. It is one of the most important backward bending asanas in yoga. In this asana, the trunk and head resemble the raised hood of a cobra. Bhujanga means cobra in Sanskrit.
How To Do It
- Lie flat on your stomach. Place your hands on the side and ensure that your toes touch each other.
- Then, move your hands to the front, making sure they are at the shoulder level, and place your palms on the floor.
- Now, placing your body’s weight on your palms, slowly raise your head and trunk. Note that your arms should be bent at your elbows at this stage.
- You need to arch your neck backwards, in an attempt to replicate the cobra with the raised hood.
- Hold the asana for a few seconds while breathing normally. Feel your stomach pressed against the floor. With practice, you should be able to hold the asana for up to two minutes.
- To release the pose, slowly bring your hands back to the sides, and rest your head on the ground by bringing your forehead in contact with the floor. Place your hands under your head. Then, slowly rest your head on one side and breathe.
- Repeat this pose thrice for best results.
Variation
This asana has a variation called the Bheka Bhujangasana, where the legs are bent at the knees, and the feet are joined.
Benefits
- The Bhujangasana affects the back and the abdomen. The muscles on the back and lower back are worked, and the spine’s flexibility is increased. The back is strengthened, and any kind of stress and pain in the back is relieved.
- It also tones the organs that lie in the lower abdomen. It stimulates the digestive, reproductive, and urinary systems. It also helps regulate metabolism, thus regulating the weight.
- The cobra pose also activates the Svadhisthana chakra.
Precautions And Contraindications
- This exercise should be avoided if you suffer from hernia or have had an abdominal surgery recently.
- This asana should be avoided at all costs if you are pregnant or have a back injury.
2. Ardha Matsyendrasana
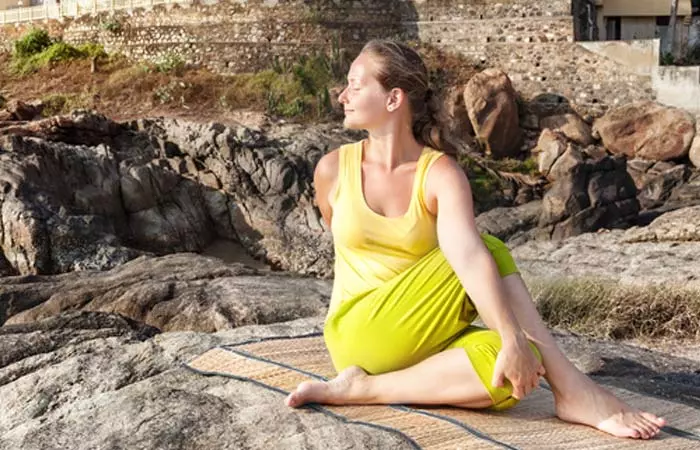
This asana is named after the yogi, Matsyendranath. The name is taken from the Sanskrit words ardha, which means half, matsya, which means fish, Indra, which stands for a king, and asana that means posture. Some other names for this asana include the Half Lord of the Fishes Pose and the Half Spinal Twist. It is a seated spinal twist and has a whole lot of variations. This pose is one of the 12 basic asanas used in the Hatha Yoga programs, and is extremely beneficial to the back.
How To Do It
- Sit erect with your legs stretched out. Make sure that your feet are placed together and your spine is absolutely erect.
- Now bend your left leg such that the heel of the left foot lies next to the right hip. You could also keep the left leg stretched out if you like.
- Then, place the right leg next to the left knee by taking it over the knee.
- Twist your waist, neck, and shoulders towards the right, and set your gaze over your right shoulder. Make sure your spine is erect.
- There are many ways you can place your arms to increase and decrease the stretch. But to do it simply, you can place the right hand behind you, and the left hand on the right knee.
- Hold the pose for a few seconds, about 30 to 60 as you breathe slowly, yet deeply.
- Exhale and release the right hand, and then the waist, chest, and finally the neck. Relax as you sit straight.
- Repeat the same steps on the other side. Then, exhale and come back to the front.
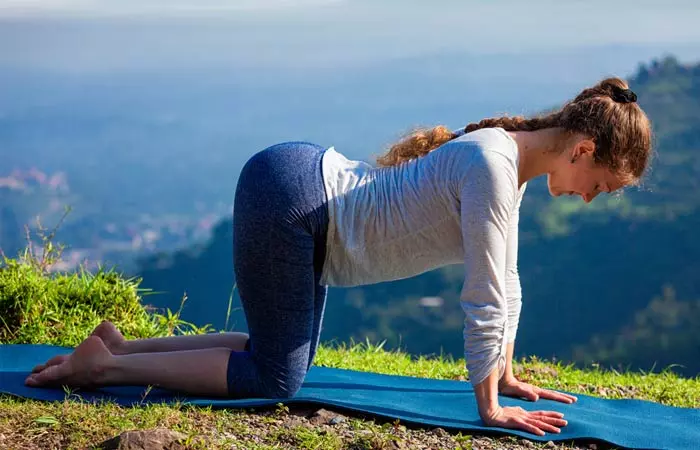
3. Marjariasana
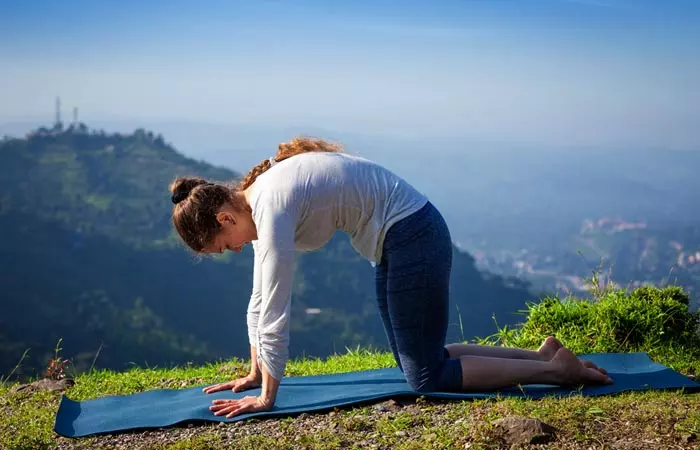
It’s true! Even cats can inspire our yoga lessons. Marjariasana, also called the cat stretch, gives the body an amazing feline stretch. One can never imagine how satisfying and beneficial a cat stretch can be.
How To Do It
- Stand on all fours, such that your back forms a table top, and your feet and hands form its legs.
- Your arms should be perpendicular to the floor, and your hands should be placed flat on the floor, right under your shoulders. Your knees should be placed hip-width apart.
- Look straight ahead.
- Inhale, and raise your chin as you tilt your head backwards. Push your navel down and raise your tailbone. Compress your buttocks. You might feel a tingling sensation.
- Hold the pose for a few breaths. Breathe long and deep.
- Then, go back to the tabletop position.
- This asana is a combination of two movements. The countermovement is as follows: Exhale, and drop your chin to your chest as you arch your back and relax your buttocks. It is called the Bitilasana.
- Do the movement and countermovement about five to six times before you come to a halt.
4. Bitilasana
Bitilasana takes its name from the Sanskrit word Batila, which means cow. It is named so because the stance of this posture resembles the body posture of a cow. This asana is almost always practiced in combination with the cat pose.
How To Do It
- Start the asana on your fours in a tabletop position.
- Make sure that your knees are placed right under your hips, and your wrists are in the same line as your shoulders.
- Let your head hang in a neutral position. Gaze softly on the floor.
- Breathe in, and then lift your buttocks up towards the ceiling as you open your chest, and let your abdomen sink towards the ground. Lift your head and look forward, or towards the ceiling.
- Hold the pose for a few seconds. Then, breathe out and come back to the tabletop position.
- This asana is a combination of two movements. The countermovement is as follows: Exhale and drop your chin to your chest as you arch your back and relax your buttocks. It is called the Bitilasana.
- Do the movement and countermovement about five to six times before you come to a halt.
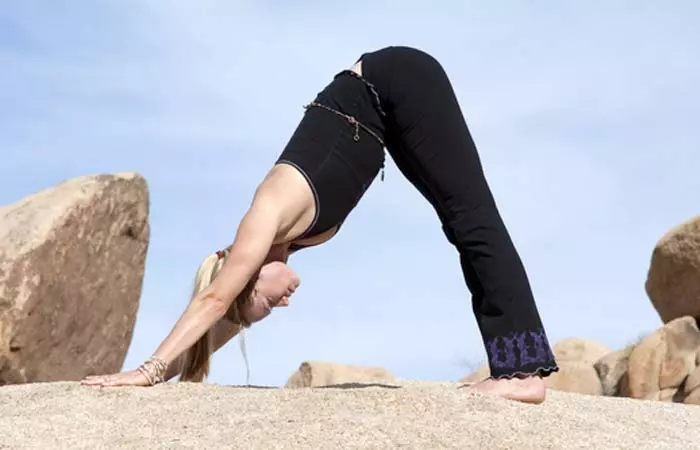
5. Adho Mukha Svanasana
The name comes from the Sanskrit words adhas meaning down, mukha meaning face, śvāna meaning dog, and āsana meaning posture. The Adho Mukha Svanasana looks similar to a how a dog looks when it bends forward. This asana has numerous amazing benefits that make it extremely essential for you to practice it every day. The best part is, even a beginner can get the hang of this asana with great ease.
How To Do It
- Stand on four limbs, such that your body forms a table-like structure.
- Exhale, and gently lift your hips and straighten your elbows and knees. You need to ensure your body forms an inverted ‘V’.
- Your hands should be in line with your shoulders, and your feet in line with your hips. Make sure that your toes point outwards.
- Now, press your hands into the ground and lengthen your neck. Your ears should touch your inner arms, and you should turn your gaze to your navel.
- Hold for a few seconds, and then, bend your knees and return to the table position.
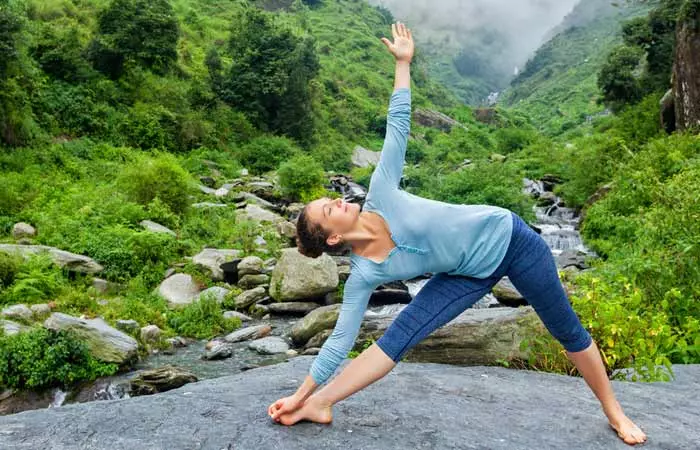
6. Trikonasana
This asana resembles a triangle, and therefore, is named so. The name comes from the Sanskrit words त्रिकोण (trikona), meaning triangle, and आसन (asana), meaning posture. This asana is known to stretch the muscles and improve the regular bodily functions. Unlike most other yoga asanas, this requires you to keep your eyes open while you practice it to maintain balance.
How To Do It
- Stand upright and place your legs about three and a half to four feet apart.
- Make sure your right foot is placed outside at 90 degrees and the left foot is placed in at 15 degrees.
- Align the center of your right heel with the center of the arch of the left foot.
- You need to remember that your feet are pressing the ground, and the weight of your body is balanced equally on both feet.
- Take a deep breath, and as you exhale, bend your body to the right from below your hips, ensuring your waist is straight. Lift your left hand up, and let your right hand touch the ground. Both your arms should form a straight line.
- Depending on the level of comfort, rest your right hand on your shin, ankle, or outside the right foot on the floor. No matter where you place your hand, make sure you do not distort the sides of your waist. Quickly check on your left arm. It should be stretched out towards the ceiling, and in line with the top of your shoulder. Let your head sit in a neutral position, or turn it to the left, with your gaze set on your left palm.
- Your body should be bent sideways, and not backward or forward. Your chest and pelvis should be wide open.
- Stretch to the fullest, and focus on stabilizing your body. Take deep, long breaths. With every exhalation, try and relax your body more.
- Inhale and come up. Drop your arms to your side and straighten your feet.
- Repeat the same using the left leg.
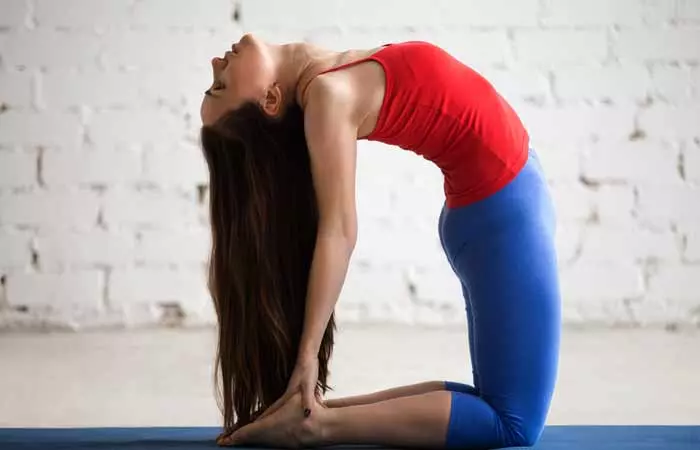
7. Ustrasana
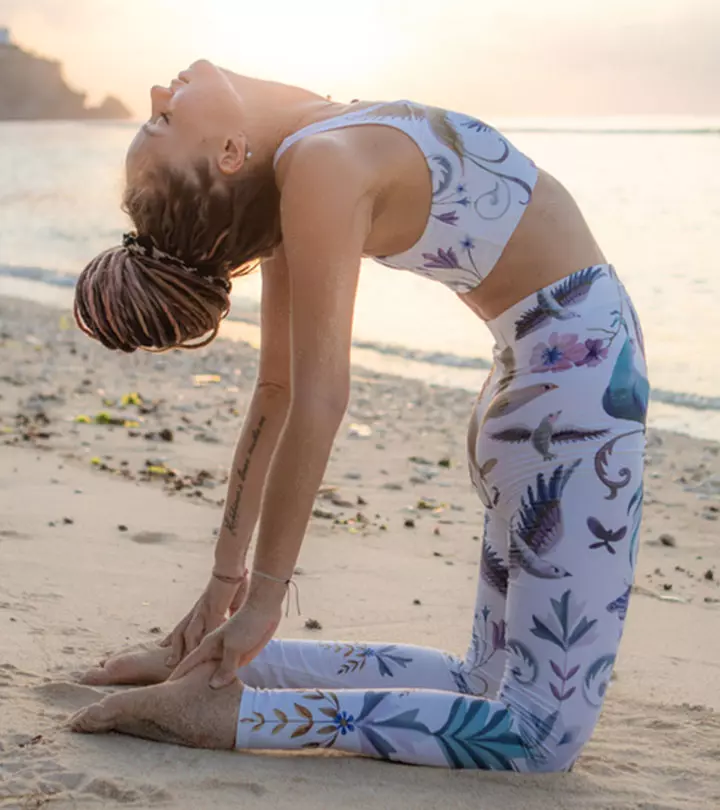
This asana, popularly called the Camel Pose is an intermediate level backward bend. Ustra means camel in Sanskrit, and this pose resembles a camel. It is known to open up the heart chakra, and increase strength and flexibility.
How To Do It
- Begin the asana by kneeling on your mat and placing your hands on your hips.
- You must ensure that your knees and shoulders are in the same line, and that the soles of your feet are facing the ceiling.
- Inhale, and draw your tailbone in towards your pubis. You must feel the pull at the navel.
- While you are doing that, arch your back, and gently slide your palms over your feet and straighten your arms.
- Keep your neck in a neutral position. It should not be strained.
- Hold the position for about 30 to 60 seconds before you release the pose.
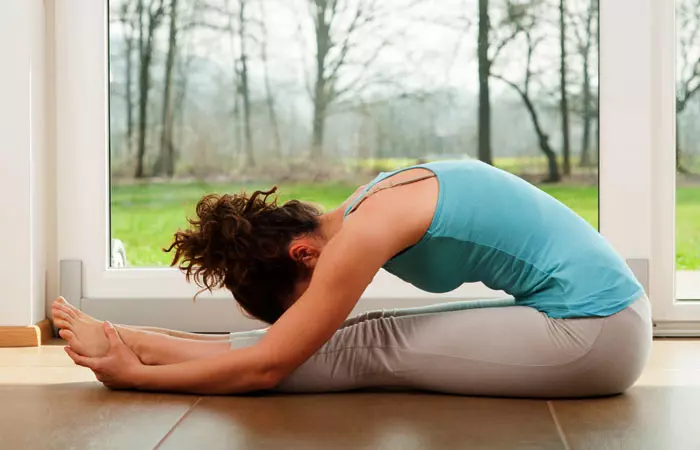
8. Paschimottanasana
This is one of the basic poses of Hatha Yoga, and it stimulates the center of your solar plexus. The name comes from the Sanskrit words paschima, meaning west or back, uttana, meaning intense stretch, and asana, meaning posture.
How To Do It
- Sit on the floor with your legs crossed.
- Keep your spine erect, and stretch your legs out to your front. Your feet should point to the ceiling.
- Inhaling deeply, stretch your hands above your head without bending your elbows. Your gaze should follow your hands. Stretch your spine to the maximum.
- Exhale, and bend forward from your thighs. Bring your hands down, and try to touch your toes. Your head should rest on your knees. Beginners can try touching their ankles or just thighs as a starter.
- Once you touch your toes, hold them and try pulling them backward till you experience the stretch on your hamstrings.
- Breathing in, hold your tummy, and try to retain the position for 60 to 90 seconds initially. Slowly, increase the time of holding the position for five minutes, or if possible, more.
- Exhaling, bring your body upward, relieving your toes from your fingers to come back to the Sukhasana or Padmasana pose.
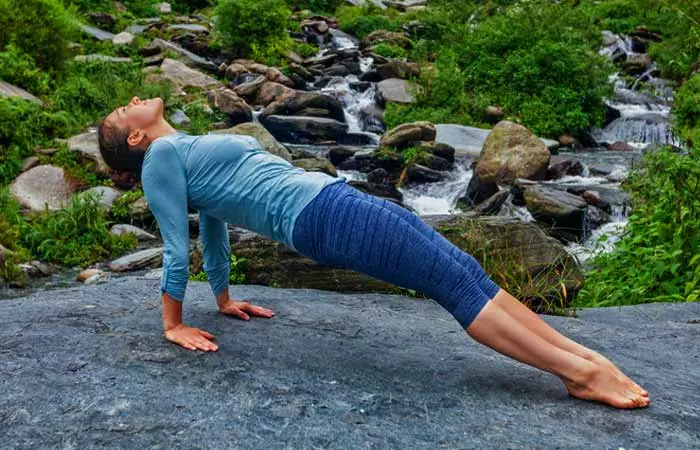
9. Purvottanasana
Purvottanasana is an intense east-facing stretch. Also called the Upward Plank Pose, this asana draws on the strength of the leg muscles, the shoulders, and the spine.
How To Do It
- Begin by placing your hands a little behind your hips, making sure your fingertips are pointing towards your feet. Gently fold your knees, placing your feet hip distance apart on the floor.
- Exhale. Push your hands and feet on the floor to lift your hips such that they are on the same level as your shoulders. Straighten your arms.
- Involve the core muscles while you slowly straighten each leg and point your toes outward. Lift your hips as high as your can. Your legs must be strong, and your glutes firm.
- Roll your shoulders behind you, and lift up your chest. Let your head hang back, but be careful not to injure your neck.
- Hold the pose for about 30 seconds, and then release the pose.
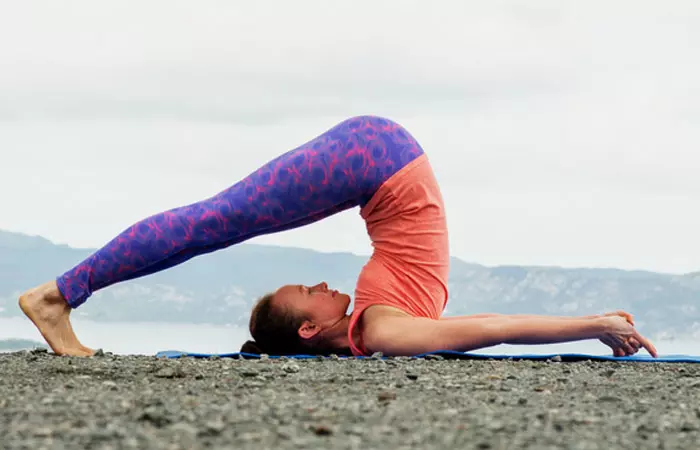
10. Halasana
Hal is a Sanskrit word that means plow. It is said that, as its name suggests, this pose prepares the field (the mind and body) for deep rejuvenation. This pose is known to tone and strengthen the body. It is a great relaxant as well and calms the entire nervous system.
How To Do It
- Lie flat on your back with your arms placed beside your body and your palms facing downwards.
- Inhale, and lift your feet off the ground using your abdominal muscles. Your legs should be at a 90-degree angle.
- Use your hands to support your hips and lift them off the floor.
- Bring your legs in an 180-degree angle, such that your toes are placed over your head.
- Make sure your back is perpendicular to the ground.
- Hold the position for a minute while focusing on your breathing. Exhale, and gently bring down your legs. Avoid jerking your legs while releasing the pose.
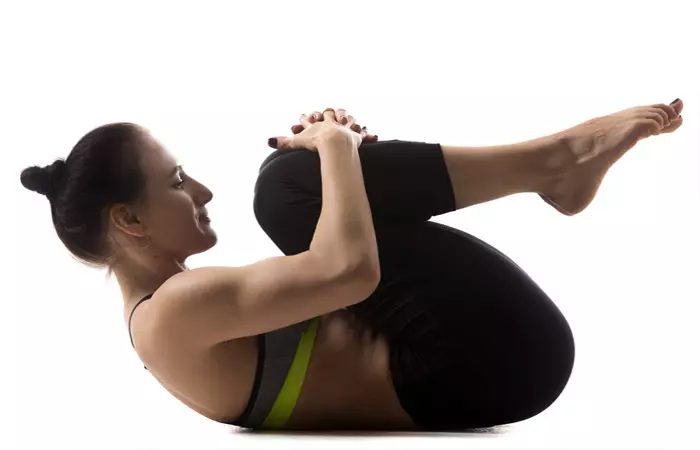
11. Pawanmuktasana
Credit: www.shutterstock.com
The Wind-Relieving Pose is a reclined posture that is suitable for everyone, whether they are beginners or advanced practitioners. This is one of the best yoga poses for back pain relief and also helps to release digestive gases from the intestines and stomach with great ease. It is also called the One-Legged Knee-to-Chest Pose.
How To Do It
- Lie flat on your back on a smooth surface, ensuring that your feet are together, and your arms are placed beside your body.
- Take a deep breath. As you exhale, bring your knees towards your chest, and press your thighs on your abdomen. Clasp your hands around your legs as if you are hugging your knees.
- Lift your head and chest off the floor. Touch your chin, and eventually, your nose to your knee.
- Hold the asana while you breathe normally. Every time you exhale, make sure you tighten the grip of the hands on the knee and increase the pressure on your chest. Every time you inhale, ensure that you loosen the grip.
- Exhale and release the pose after you rock and roll from side to side about three to five times. Relax.
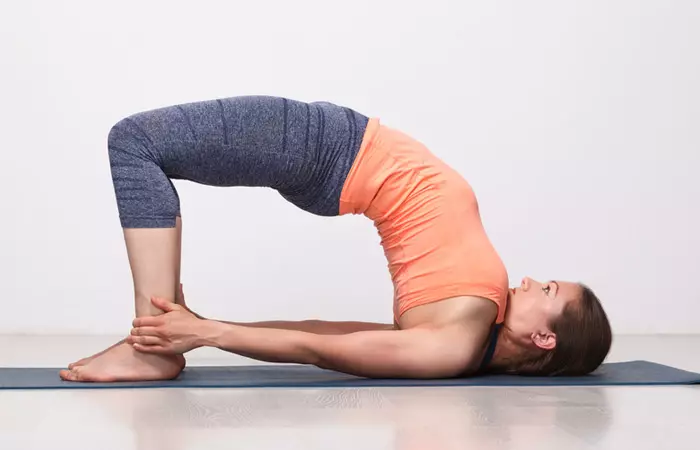
12. Setu Bandhasana
This asana gets its name from the Sanskrit words Setu, which means bridge, Bandha, which means lock and Asana, which means pose. This pose resembles the structure of a bridge, and therefore, it is named as such. This pose stretches your back, neck, and chest and relaxes your body.
How To Do It
- Begin the asana by lying flat on your back.
- Bend your knees and place your feet on the floor hip-width apart. Make sure that your ankles and knees are placed in a straight line.
- Let your arms rest beside your body, with your palms facing downwards.
- Inhale, and lift your back ( lower, upper, and middle), off the floor. Roll in your shoulders, and make sure your chin touches your chest without you having to move it. Let your shoulders, feet, and arms support your weight.
- Firm up your buttocks as you tighten them. Make sure your thighs are parallel to each other and the floor.
- Interlace your fingers and push your hands harder to the ground, to lift your torso higher.
- Hold the posture for at least a minute. Breathe slowly and deeply.
- Exhale and release the pose.
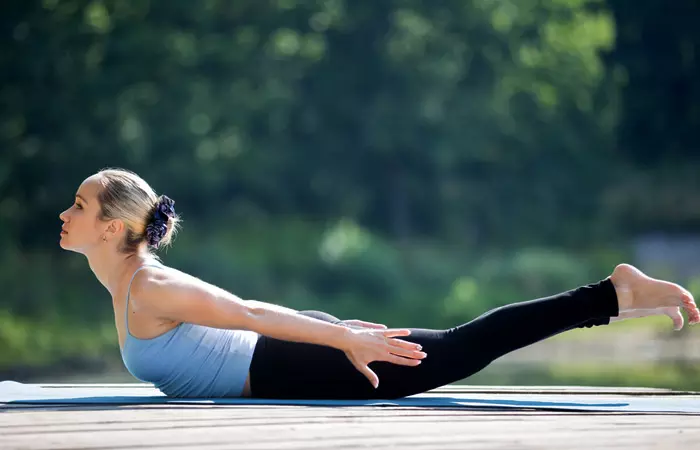
13. Shalabasana
The name comes from the Sanskrit word shalabh, which means grasshopper. The Locust Pose or Shalabhasana is a backbend that stretches and tones the entire back of your body.
How To Do It
- Lie on your abdomen on the ground and place your hands by your side.
- As you inhale, lift your legs and your upper torso.
- Using your inner thighs, lift your leg upwards without bending your knees. Your weight should rest on your lower ribs and abdomen.
- Hold the pose for a minute and then release.
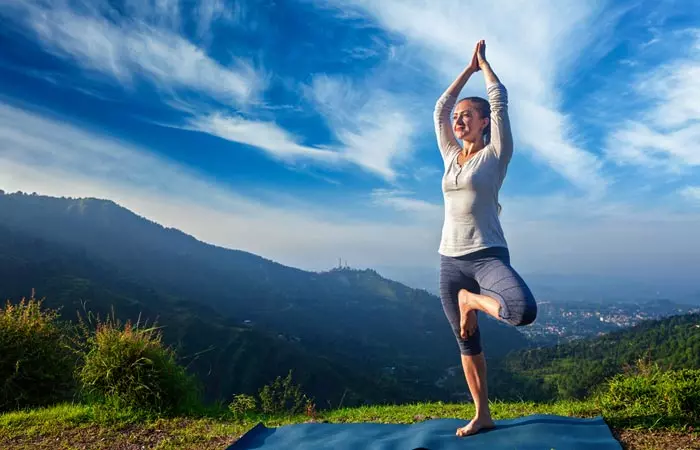
14. Vrikshasana
This posture is a close replica of the steady, yet graceful stance of a tree.The name comes from the Sanskrit words vriksa or vriksha, meaning tree, and asana, meaning posture. For this pose, unlike most other yoga poses, you are required to keep your eyes open so that your body can balance itself.
How To Do It
- Stand absolutely erect and drop your arms to the side of your body.
- Slightly bend your right knee, and then, place the right foot high up on your left thigh. Make sure that the sole is placed firm and flat on the root of the thigh.
- Your left leg needs to be absolutely erect. Once you have assumed this position, breathe, and find your balance.
- Now, inhale, and gently raise your arms over your head and bring them together in a ‘namaste’ mudra.
- Look straight at a distant object and hold your gaze. This will help you maintain balance.
- Keep your spine straight. Note that your body needs to be taut, yet elastic. Take in deep breaths, and every time you exhale, relax your body more.
- Gently bring your hands down from the sides and release the right leg.
- Come back to the original position of standing tall and straight as you did at the beginning of the practice. Repeat this pose with the left leg.
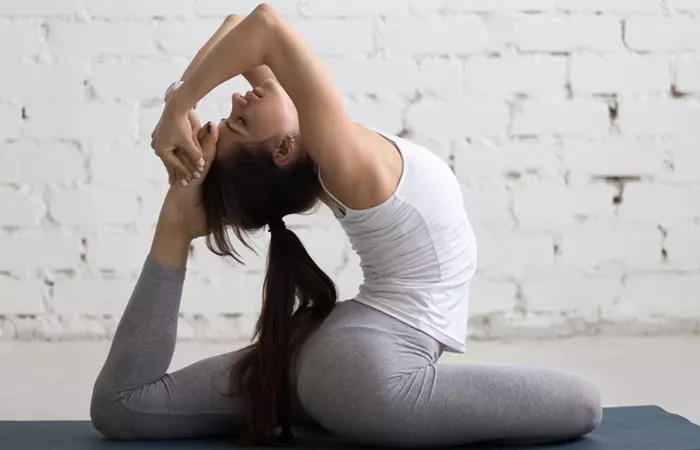
15. Rajakapotasana
The Pigeon Pose is practiced in a seated position. It is a backbend pose that makes the chest puff up, thereby resembling the stance of a pigeon. This is how this asana is named Raja (king) kapot (pigeon) asana (pose). This asana is an advanced yoga pose.
How To Do It
- Start off on your fours, making sure your knees are placed right under your hips, and your hands a little ahead of your shoulders.
- Now, gently slide your right knee forward, such that it is just behind your right wrist. While you do this, place the right shin under your torso, and bring your right foot in front of your left knee. The outsides of your right shin must rest on the floor.
- Slowly, slide your left leg to the back. Straighten your knee, and drop the front of your thighs to the floor. Lower the outsides of your right buttocks on the floor. Place your right heels in front of your left hip.
- You can angle your right knee towards the right, such that it is outside the line of the hip.
- Your left leg should extend itself straight out of the hip. Make sure it is not angled to the left. Rotate it inwards, such that its midline is pressed against the floor. Take a deep breath, and as you exhale, bend your left leg at the knees. Then, push your torso back, and stretch as much as you can so that your head touches your foot.
- Lift your arms up, gently folding them at your elbows. Use your hands to bring your foot towards your head.
- Maintain the upright position of your pelvis. Push it down. Then, lift the lower rims of your rib cage against the pressure of the thrust. To lift up your chest, push the top of your sternum straight up and towards the ceiling.
- Stay in this position for at least a minute. Bring your hands back to the floor and drop your left knee down. Gently slide the left knee forward. Exhale and come up to the Adho Mukha Svanasana. Take a few breaths. Then, come back on your fours and breathe. As you exhale, do the asana with your left leg forward and right leg at the back.
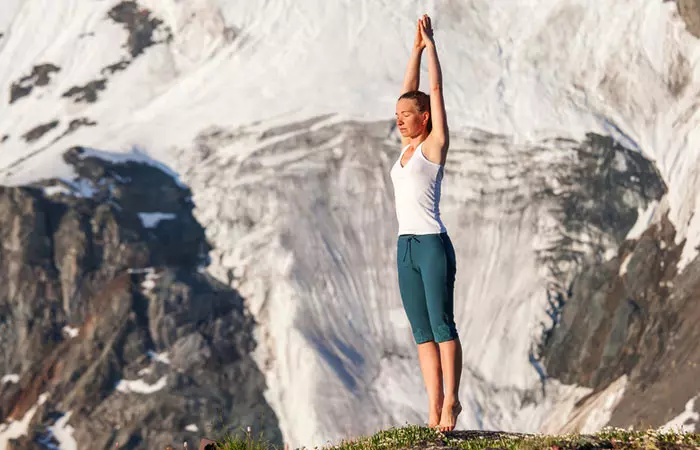
16. Tadasana
Tadasana is an ideal warm-up pose. It improves the circulation of blood, thereby ensuring that your body is ready for the other poses in store. Tadasana is also called the Mountain Pose.
How To Do It
- Stand with your feet flat, heels slightly spread out, and the big toes of your feet in contact with each other. Keep the spine erect, with hands on both sides and palms facing your body.
- Stretch your hands to the front and bring the palms close to each other.
- Inhaling deeply, stretch your spine. Raising your folded hands up above your head, stretch as much as you can.
- Try lifting your ankles and standing on your toes, with the eyes facing the ceiling. If you cannot stand on your toes, you can keep your feet flat on the ground while your eyes face the ceiling.
- Breathe normally and hold the pose for 20 to 30 seconds.
- Inhale deeply, and while exhaling, slowly relax and bring your feet back to the floor.
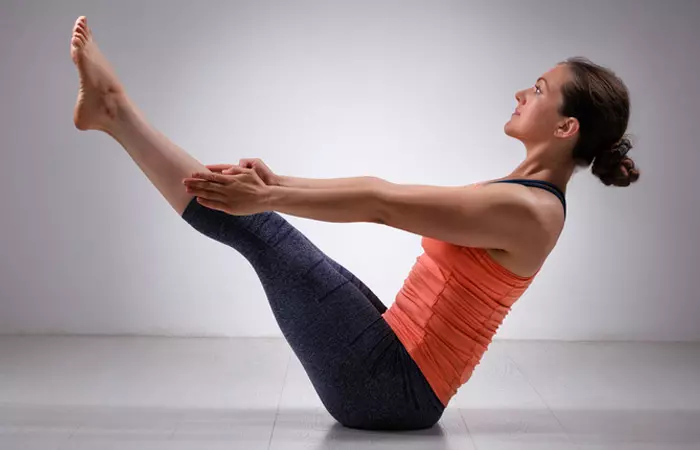
17. Navasana
This pose is named after the shape of a boat that it takes. Nauka in Sanskrit means boat and asana means pose. Naukasana is pronounced as NAUK-AAHS-uh-nuh.
How To Do It
- Lie flat on your back, placing your feet together and your arms beside your body.
- Take a deep breath, and then, as you exhale, lift your feet and chest off the ground. Stretch your arms towards your feet.
- Keep your toes, fingers, and eyes in a single straight line.
- You must feel a stretch in your navel area while the abdominal muscles contract.
- Breathe deeply and normally as you maintain the pose.
- Exhale and release the pose.
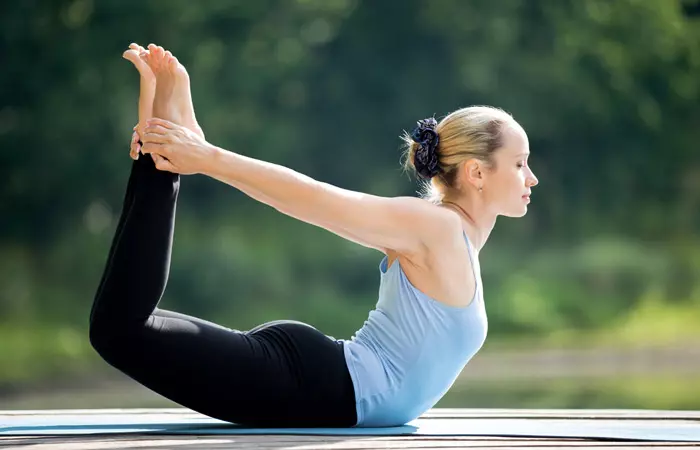
18. Dhanurasana
This asana is a basic yoga pose. This asana resembles a bow, and, therefore, is named so. Dhanur in Sanskrit means bow, and asana means pose. It is pronounced as dah-noo-rah-sah-nah.
How To Do It
- Lie flat on your stomach, keeping your feet hip-width apart and your arms beside your body.
- Now, gently fold your knees and hold your ankles.
- Inhale, and lift your chest and legs off the ground. Pull your legs back.
- Look straight and keep your face stress-free. A smile should help.
- Hold the pose as you concentrate on breathing. Your body should be as taut as a bow.
- As you get comfortable in the pose, breathe long and deep.
- About 15-20 seconds later, exhale and release the pose.
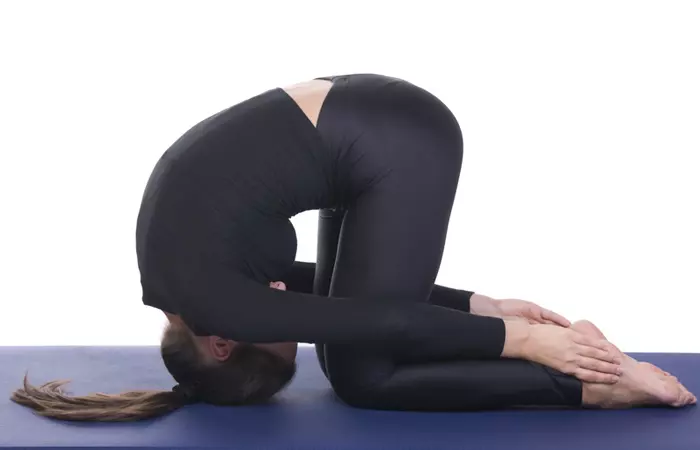
19. Shashankasana
Shashankasana is also called the Hare Pose as it looks like a hare or a rabbit in its final stance. It is an easy asana to perform, and can be done by absolutely anyone, irrespective of their age.
How to do It
- Kneel down, and place your buttocks on your calf muscles and your hands on your thighs. Relax.
- Raise your hands above your head, with your palms facing forward. Ensure that your arms are in line with your shoulders.
- Now, bend forward, and place your hands and forehead on the ground in front of you. Exhale as you do this.
- Roll your shoulders inward, and bring your hands back such that they are still in line with your shoulders but touch your feet.
- Feel the arch in your back, and hold the position for a few seconds as you breathe normally.
- Exhale and come back to the kneeling position.
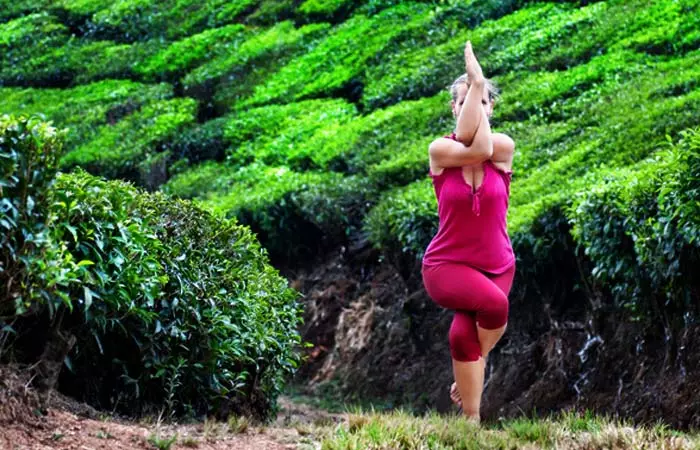
20. Garudasana
Garuda is the Sanskrit term for eagle, but it also means devour. This asana is meant to devour fear, ego, and doubt so that you can make way for positive intentions.
How To Do It
- Stand erect. Gently bend your right knee, and wrap your left leg around your right, such that the knees are stacked over each other. Your left foot must touch your right shin.
- Now, raise your arms to the shoulder height and wrap your right hand around your left, ensuring that your elbows are bent at 90-degree angles and are also stacked.
- Strike a balance in the pose as you gently bring down your hips. Your knees must move towards the midline, instead of leaning to one side.
- Hold the pose for a few seconds as you breathe deeply and slowly. Focus on the third eye and let go of your negative emotions.
- Release the pose, switch the limbs, and repeat the pose.
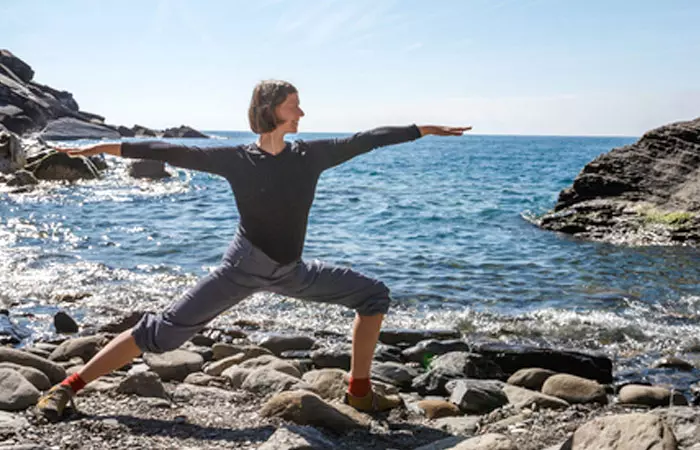
21. Virabhadrasana 2
This asana is named after the mythological character created by Lord Shiva called Veerabhadra. Veera in Sanskrit means hero, bhadra means friend, and asana means posture. This posture is one of the most graceful postures in yoga. It celebrates the achievements of a mythical warrior. This asana is commonly called the Warrior Pose or the Warrior Pose II.
How To Do It
- Stand absolutely straight and spread your legs about three to four feet apart.
- Turn your right foot outwards by about 90 degrees and your left foot inwards by about 15 degrees. You need to make sure that the heel of your right foot is perfectly aligned to the center of the left foot.
- Lift your arms sideways such that they are at your shoulder height. Make sure your palms are facing upwards, and your arms are parallel to the ground.
- Take a deep breath, and as you exhale, bend your right knee. Your right knee should not overshoot your ankle. Your right knee and right ankle should form a straight line.
- Now, gently turn your head and look to your right. As you get comfortable in the pose, you need to push yourself further. Stretch your arms and gently push your pelvis down.
- Stay in the pose as determined as a warrior, and with a smile on your face. Keep breathing.
- Inhale and come out of the pose. Drop your arms as you exhale.
- Repeat the pose on your left leg by turning your left foot outwards by 90 degrees and your right foot inwards by about 15 degrees.
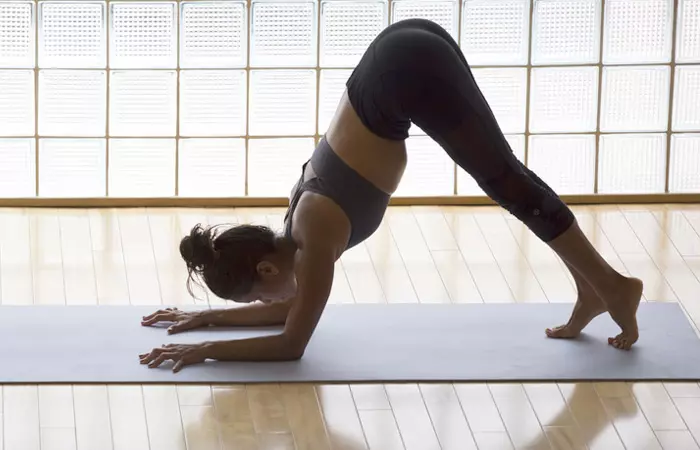
22. Ardha Pincha Mayurasana (Dolphin Pose)
How To Do It
- Begin the asana by getting on your knees and hands.
- Place your forearms on the ground, making sure your elbows and shoulders are in the same line.
- Lift your back and hips as you tuck your toes and make your legs straight.
- Your shoulder blades must be firm and into your ribs. Free your neck by lifting your shoulders away from your ears.
- Walk in towards your arms.
- Take three long and deep breaths as you hold the pose for a few seconds.
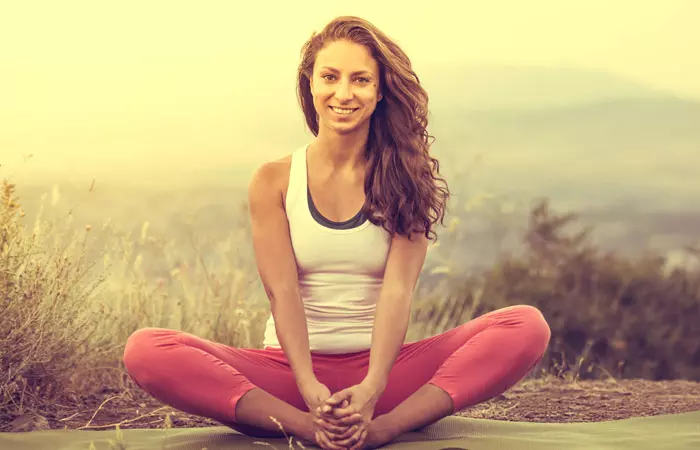
23. Baddha Konasana
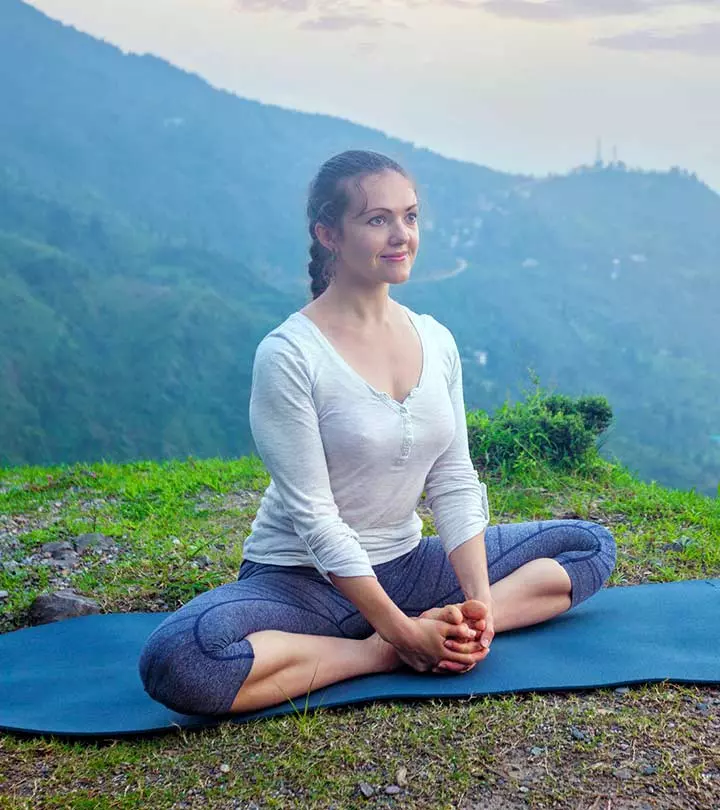
This asana is named after the Sanskrit words baddha meaning bound, kona meaning angle or split, and asana meaning posture. It is also called the Butterfly Pose as the open hips joined by the feet and the up and down movements resemble the stance of a butterfly in motion. And while it is extremely simple, it has a whole lot of benefits to its credit.
How To Do It
- Sit on the floor with your spine erect and your knees bent. Bring your feet close together, and touch the soles of your feet to each other.
- Use your hands to hold your feet together.
- Now inhale. As you exhale, press your knees and your thighs down to the floor. You can use your elbows for a gentle nudge.
- Keep the breathing normal. Flap your knees like a butterfly by moving your thighs up and down.
24. Matsyasana
Matsya in Sanskrit means fish. The Matsyasana was named so because if this asana is assumed in water, you will tend to float like a fish. It is one of the best asanas in yoga for weight gain.
How To Do It
- Lie flat on your back, making sure your legs are together, and your hands are placed comfortably beside your body.
- Place your palms under your hips such that your palms are facing the ground. Now, bring the elbows closer to each other, placing them close to your waist.
- Cross your legs such that your feet cross each other at your middle, and your thighs and knees are placed flat on the floor.
- Breathe in. Lift your chest up such that your head is also lifted, and your crown touches the floor.
- Make sure the weight of your body is on your elbows and not on your head. As your chest is lifted, lightly pressurize your shoulder blades.
- Hold the position only until you are comfortable. Breathe normally.
- Exhale and release the position, lifting your head first, and then dropping your chest to the ground. Untangle your legs and relax.
Yoga for back pain can do wonders. Yoga aids in the strengthening of your spine and improvement of your posture. Yoga also improves blood circulation and lowers stress and anxiety levels. Yoga asanas mentioned above relieve the stress from the spinal cord and help it to stay firm. Try these yoga asanas to receive complete relief from back pain and a step-by-step guide to practice them correctly. Some of these positions may appear challenging at first, but you will get better at them with practice.
Frequently Asked Questions
Is a child’s pose good for lower back pain?
Yes. The child’s pose may stretch your lower back and may provide relief.
How do I know if my back pain is serious?
Your back pain may be severe if you experience numbness, high fever, or intense stomach pain. You must see a doctor immediately.
Read full bio of Tatiana Sokolova
Read full bio of Shirin Mehdi






Community Experiences
Join the conversation and become a part of our empowering community! Share your stories, experiences, and insights to connect with other beauty, lifestyle, and health enthusiasts.