20 Perfect Ways To Get Beachy Waves Every Time
Tips and tricks to flaunt this effortlessly beautiful hairstyle with confidence

Image: Shutterstock
Your hair in stunning beachy waves and the sun kissing your skin as you sit in the golden sand by the ocean in summer. Sounds like the perfect vacation, right? Beachy waves are much more than just a hairdo. They represent that laid-back, carefree feeling that brings sun-kissed days by the ocean to life. That effortless look is often associated with a laid-back lifestyle and to those who wish to emulate that breezy, free-spirited feel.
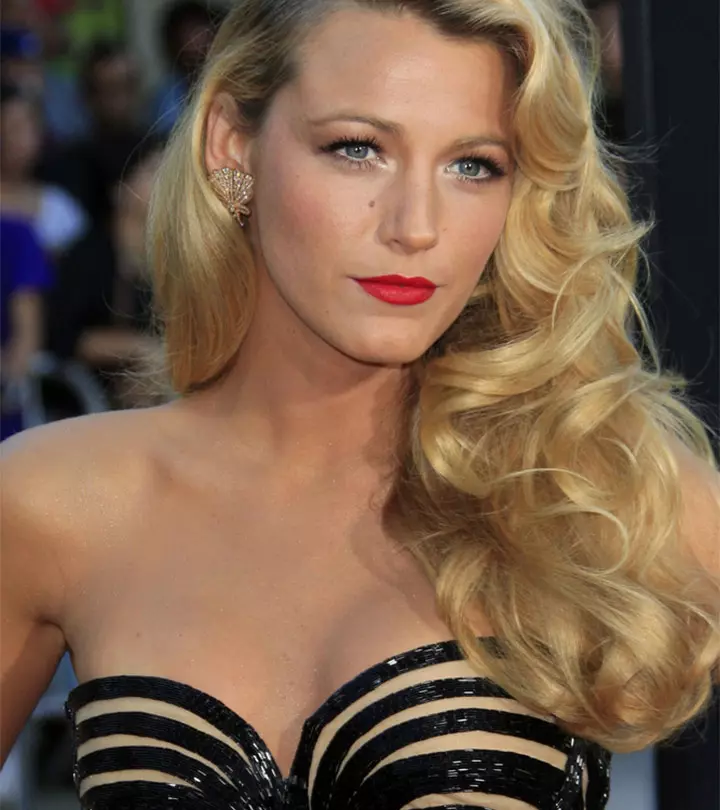
Serena Van Der Woodsen, played by the gorgeous Blake Lively, had us envious of her flawless, loose, and wavy hair. What you need for your hair is a beachy waves tutorial! This article features several techniques for your hair type, length, and personal style. It shows you how to enhance the natural texture of air-dried waves, get the polished finish from heat styling, or achieve the ease of braiding. This versatile hairstyle will not only enhance your total look but also give you that classic tousled look all year round. No matter your hair color, these waves are sure to add oomph to your appearance. Learn how to style your tresses in those naturally loose but very chic waves. Desperate to know more? Keep scrolling down!
 Before You Get Started
- Layers are the best type of haircut that can support a beachy wave style. They will nail the wild, wind-in-the-hair vibe effortlessly.
- Get highlights in golds and browns to add dimension.
- Invest in sea salt spray. This product will help you achieve the perfect texture throughout a casual day in town.
In This Article
What Are Beachy Waves?
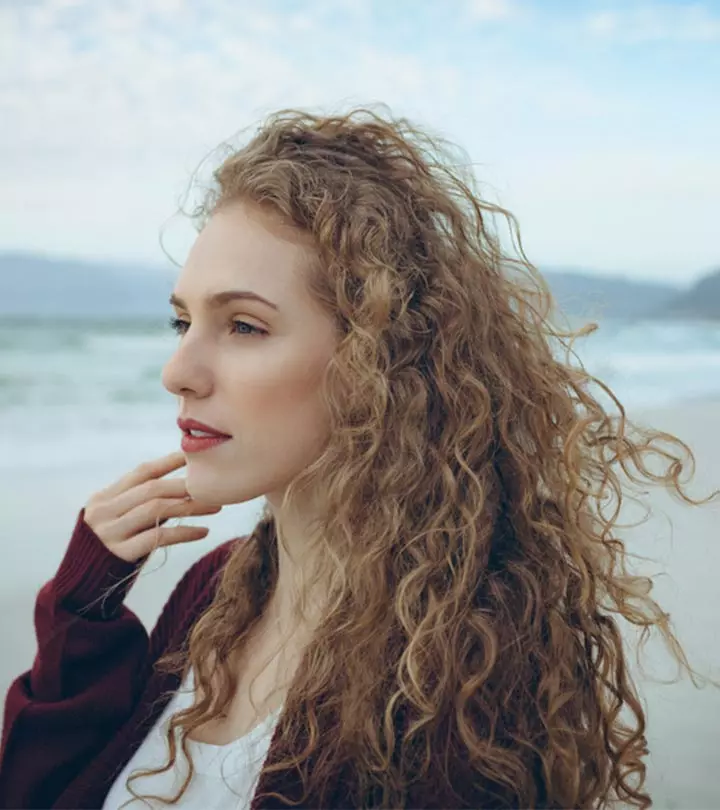
Beach waves refer to loose, tousled waves in the hair, reminiscent of the natural, effortless look achieved after a day at the beach. This popular hairstyle exudes a relaxed and casual vibe, resembling the texture and movement created by saltwater and sea breeze. Achieving beach waves typically involves using a curling wand, flat iron, or braiding techniques to create soft, undulating curls. The goal is to evoke a carefree, sun-kissed appearance, as if your hair has naturally dried in the coastal air. Various products, like sea salt sprays and texturizing mousses, can enhance and maintain the waves while adding a touch of that coveted beachy texture to your locks.
Continue reading to learn how to transform your hair into beachy waves.
Key Takeaways
- You can get stunning beach waves in the comfort of your home by simply using tools like a curling iron, a flat iron, or hot rollers.
- You can also opt for heatless methods – like tying your hair in mini buns or braids – if you don’t want to apply heat to your hair.
- A good-quality hairspray is a must to ensure that the waves last longer.
How To Get Beachy Waves – 20 Easy Tutorials
Before we get into the tutorials, you need to make sure that you have a big can of hairspray on hand. Hairspray sets the waves in place for a longer period. You don’t always need to use heat to get flawlessly wavy hair, so I’ve added a few heatless methods as well.
1. Beach Waves With A Curling Ribbon
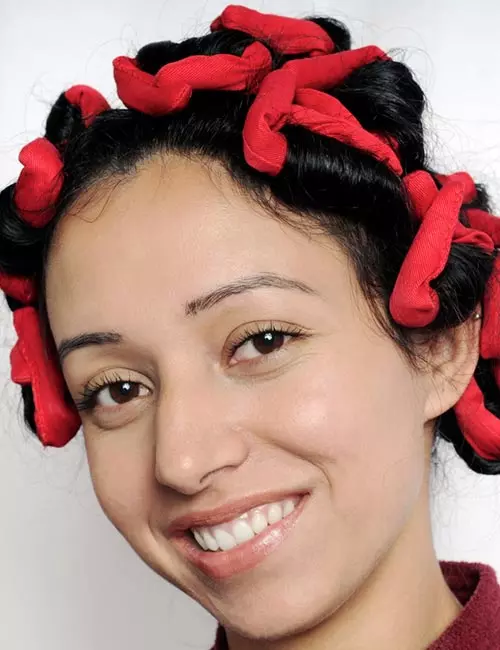
Things You Will Need
- Blow dry
- Curling ribbon
- Serum/Styling creme
- Hair oil
- Scrunchies
- Hair clip
How To Do
- To begin, blow-dry your hair until it is just 80–85% dry. Ensure that you use a style cream or serum to protect your hair against heat before you begin.
- Next, separate your hair into two portions starting from the middle.
- Apply one drop of hair oil, then use your hands to spread and brush it through your moderately damp hair.
- This helps to create smoother curls while shielding the hair from the heat.
- Holding the middle of the curling ribbon, position it just above the head’s crown, and then clip it to keep it in place.
- Take a single segment of the divided hair and secure it with a scrunchie.
- To create beach waves, twist each strand and pass it once under and once over the ribbon before grabbing the next strand and continuing.
- When you are done with a part, flip the curling ribbon’s end under and back, and then secure the ends with scrunchies.
- Repeat to achieve desired results on both sides.
2. Beach Waves On Curly Hair
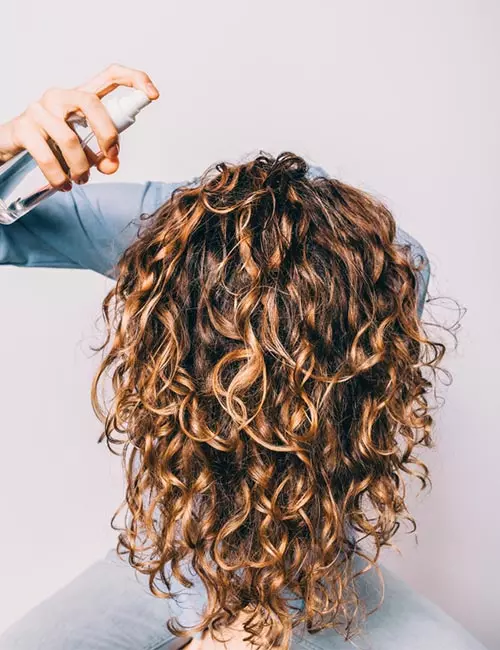
Things You Will Need
- Pick comb
- Curl cream
- Hair oil
How To Do
- Begin with blow-dried hair, divide a one-inch section, and knot the remaining hair back and away from your face.
- Before twisting the part, apply a drop of curl cream.
- Then, divide a tiny hair strand from your hairline into two pieces.
- Flat-twist till halfway and split the two sections of hair into three. Finally, complete the look with a three-strand twist-out from beginning to end.
- Carefully untwist your twists once your hair has dried.
- However, add some hair oil to your hands and spread it evenly across your hair before undoing the twists to smooth out any frizz.
- Finally, lift the hair’s roots with a pick comb to give it the form you choose.
3. Natural Beachy Waves With A Bathrobe
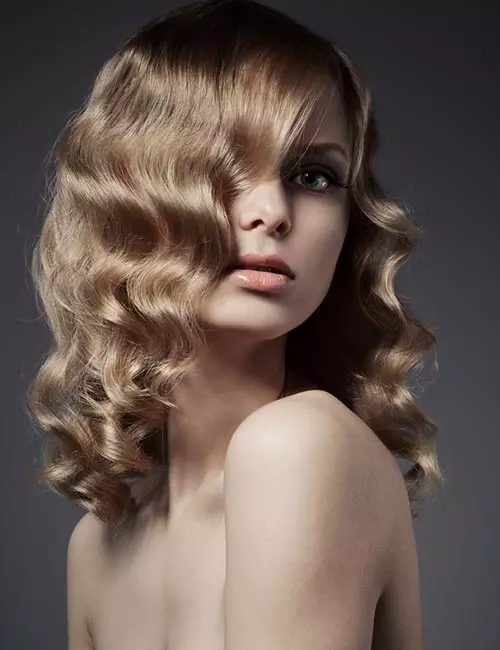
Things You Will Need
- Bathrobe belt
- 4 hair ties
- Hairspray
How To Do
- First, place your robe belt on the center of your head like a headband.
- Then, wrap the belt with two-inch pieces of hair, connecting each segment to form a single, long twist.
- While twisting it into a high bun, lock the end with a hair tie or a big scrunchy.
- Before you go to sleep, repeat this procedure on the opposite side of your head. When you wake up, carefully untwist everything.
- Spray hairspray all over your hair to ensure that the waves stay in place, and then use your hands to separate the waves.
4. Beachy Waves With A Diffuser
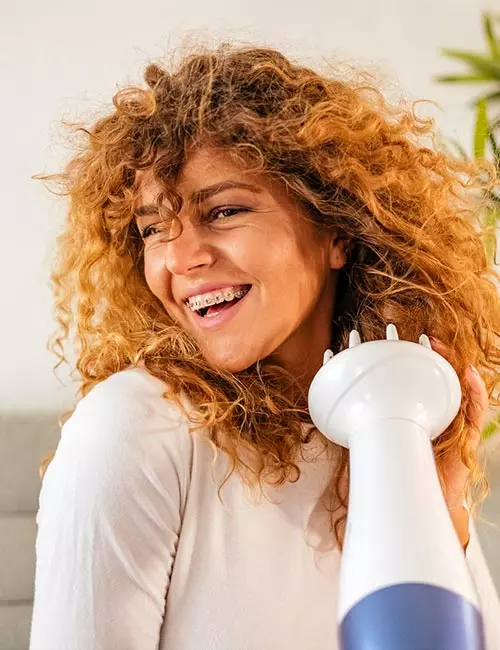
Things You Will Need
- Cream gel
- Diffuser
- Hairspray
How To Do
- Starting with freshly washed hair, use a leave-in conditioner or cream gel and let it air dry for approximately 15 minutes.
- Grab your diffuser attachment while your hair is slightly damp, but not overly so. Then, beginning at the bottom of your hair, carefully twist and scrunch your hair up toward your scalp.
- Once your hair is around 80 or 90 percent dry, repeat with the remaining sections.
- For more volume, bring your diffuser closer to your roots with your head upside down.
- Spritz some hairspray over your beach waves for a natural look.
5. Beachy Waves With Clip-in Extensions
Things You Will Need
- Clips
- Clip-in extensions
- Curling wand
- Comb
How To Do
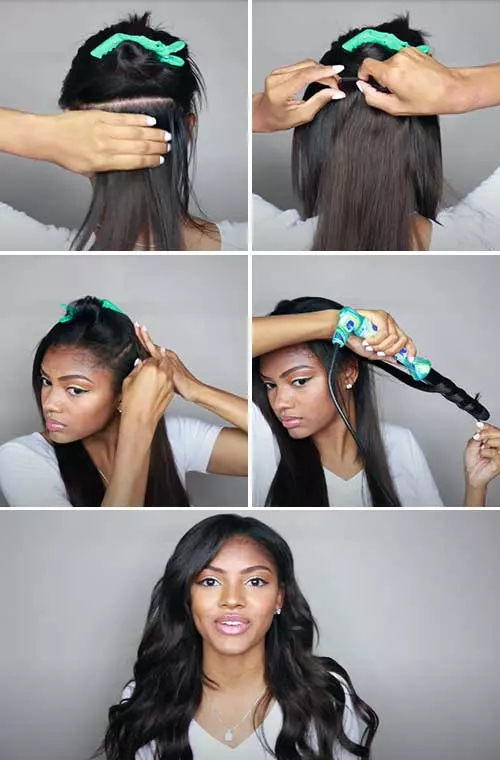
- Begin by brushing your hair out and straightening it.
- Now, clip in the hair extensions by beginning at the nape of your neck and moving upward, clipping section by section, and ending with the pieces near your hairline.
- Use a one-inch curling wand to curl your hair away from the face after you complete clipping in the extensions.
- To achieve loose beach waves, avoid keeping the hair on the wand for too long.
- Focus the wand on the extensions rather than your own hair to prevent heat damage as only a tiny bend is added to the ends to blend everything together.
- Repeat the process on the rest of the sections to achieve the desired result.
6. Beachy Waves With Hair Waver
Things You Will Need
- Hair waver
- Clips
- Flat iron
- Hairspray
How To Do
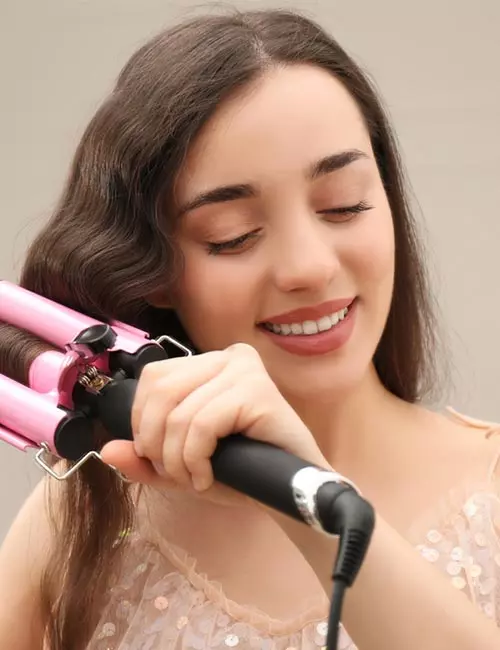
- After a hair wash, allow your hair to naturally air dry, or blow dry while tousling with your hands or using a brush.
- Begin by flat-ironing your hair because the waves will look more finished when you do this.
- Section by section, clamp the iron while holding it vertically on the top sections and horizontally on the lower sections.
- If this is your first time using a hair waver, keep in mind that it might be more difficult to control the iron on short hair.
- Take a small section of the hair and clamp it down for 10-15 seconds, then repeat the process with the remaining sections.
Spray some hairspray to keep your hair in place and you are ready to go.
7. Beach Waves With A Curling Iron
What You Need
- 1 1/4th inch curling iron
- Heat protectant
- Dry shampoo
- Sectioning clips
- Hairspray
How To Do
- Leave your hair unwashed for two days.
- Spray on some heat protectant to protect your hair from heat damage. If your scalp tends to get oily, apply some dry shampoo.
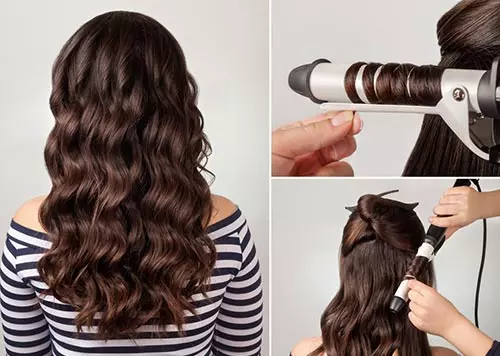
- Divide your hair into two sections: a top section and a bottom section. Clip up the top section of hair.
- With your curling iron, begin curling your hair from the back. Roll your hair around the wand in big sections to get loose waves.
- Point the curling iron diagonally down, with the barrel pointing down. This makes rolling your hair around it easier.
- You can either roll your hair towards or away from your face.Always roll the hair away from the face just as you get close to it.
- Scrunch the curls towards your scalp and release them. Then, twist them in the same direction to amplify the twists.
- Apply some hairspray and mess up your hair to give it a loose, wavy look. If your hair lies flat on the top, backcomb it gently to add volume and height.
 Quick Tip
8. Beach Waves With A Flat Iron
What You Need
- Flat iron
- Moroccan oil
- Volumizing dry shampoo
- Hairspray
How To Do
- Start off by applying some dry shampoo to your locks. The dry shampoo adds texture and volume to your hair, so it doesn’t lay flat from the heat.
- Apply one pump of Moroccan oil from the middle to the ends of your hair.
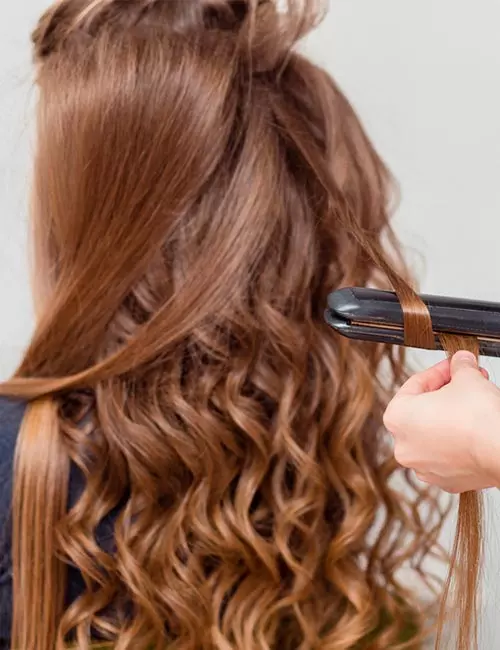
- If you have long or thick hair, divide your hair horizontally into two sections. Clip up the top section.
- If you have thin hair, you don’t need to divide your hair into sections.
- Grab a small section of hair and wrap it within the iron’s barrel from a little below the roots. Clamp the iron, twist it a little, hold it for a second, and then slowly slide the iron down the section.
- Curl all your hair in the same manner.
- Apply some more oil to your curls while messing them up to form blended waves.
 Quick Tip
9. Beach Waves With Hot Rollers
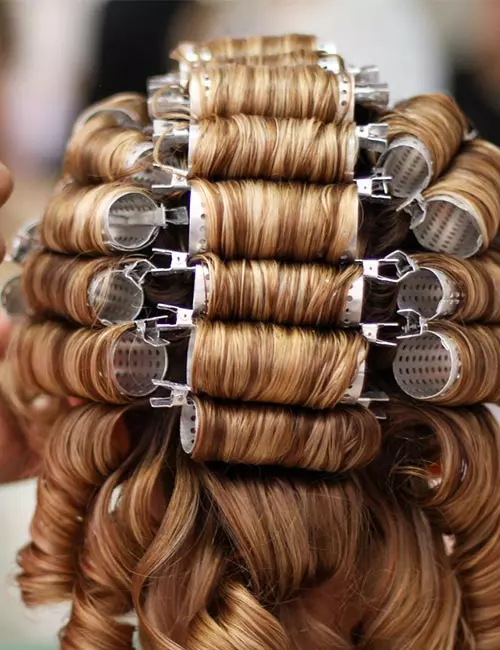
What You Need
- A pack of hot rollers
- Hair clips (though some hot rollers do come with hair clips)
How To Do
- Some packs come with different sizes of rollers. Use the big ones at the front of your head. Use the smaller sizes for where you want defined waves.
- Section off the hair at the top of your head. Grab hair from the front of this section and wrap it around a roller. Then, clip it in place. Repeat the same for the remainder of the hair in that section.
- Once you’re finished with the top section of hair, gather a small section of hair from the side and wrap it around a roller. Repeat the same for the rest of your hair.
- Keep the rollers on for 25-30 minutes. Remove them carefully to avoid disrupting the wave.
- Brush out your hair to make the waves look more natural. You can also run your fingers through the waves to feather them out.
- You can also create beach waves with a straightener by twisting sections of hair around the straightener and sliding it down very gently.
10. Beach Waves With Mini Buns
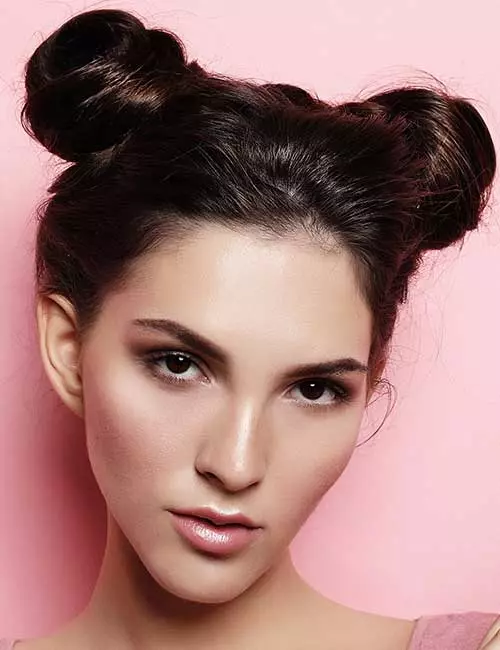
What You Need
- Mousse
- Spin pins or elastic bands
- Bobby pins
How To Do
- Wash your hair and apply some mousse to it.
- Blow dry your hair, so it’s damp but not completely dry. If you want to do this the heatless way, let your hair air-dry.
- Divide your hair in half by parting it down the middle from the front until the nape of your neck. Clip up one section.
- Grab all the hair from the other section and twist it away from your face. As you keep twisting the hair, it will coil up into a bun. Secure this bun with a spin pin or an elastic band.
- Wrap the other section in a bun in the same manner.
- Keep your hair in these two mini buns overnight.
- The next morning, remove the elastic band or spin pins very carefully. Don’t pull them out too fast as it can tangle your hair.
- Run your fingers through your hair to open up the waves and mess them up.
- You can also do final touch-ups with a curling iron if needed.
11. Beach Waves With A Twist
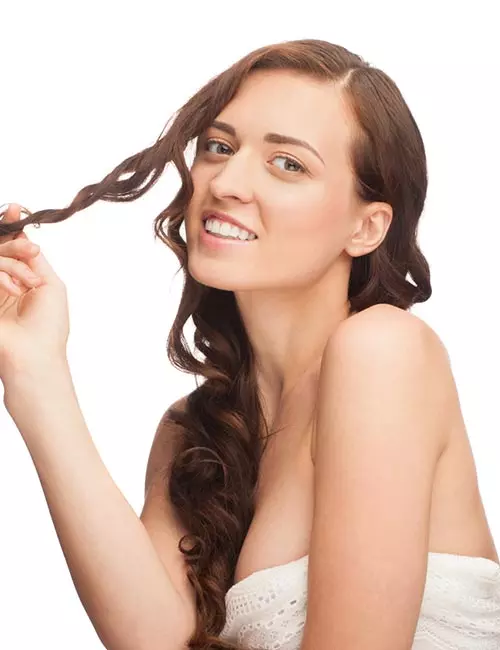
What You Need
- Texturizing spray
- Flat iron
- Hairspray
How To Do
- Spritz some texture spray on your hair.
- Part your hair from the front down the middle till the nape of your neck to divide it into two sections.
- Gather the hair from one section and divide it into two subsections.
- Twist each sub-section individually in a clockwise manner, then twist them around each other. Keep doing this until you reach the end.
- Take your flat iron and clamp it over the twist for a few seconds. Make sure you cover the entire length of the twist.
- Repeat the same on the other side.
- Scrunch up your hair from the ends, all the way to the top.
- Finish off with some hairspray.
12. Beach Waves With A PonyTail
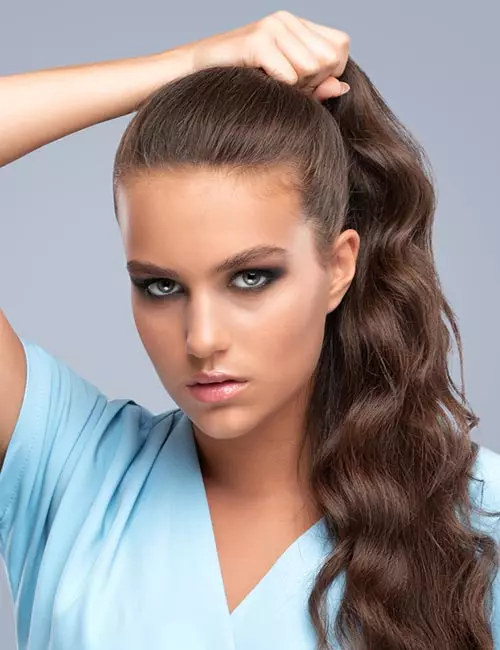
What You Need
- Elastic band
- Curling iron
- Hairspray
How To Do
- Tie up your hair in a high ponytail.
- Grab a small section of hair from the ponytail and curl it with a curling iron. Pass it over to the other side of the ponytail.
- Repeat this until you have curled all the hair in your ponytail.
- Untie the ponytail. Flip your hair back and forth a couple of times to give it a messy look.
- Spritz on some hairspray.
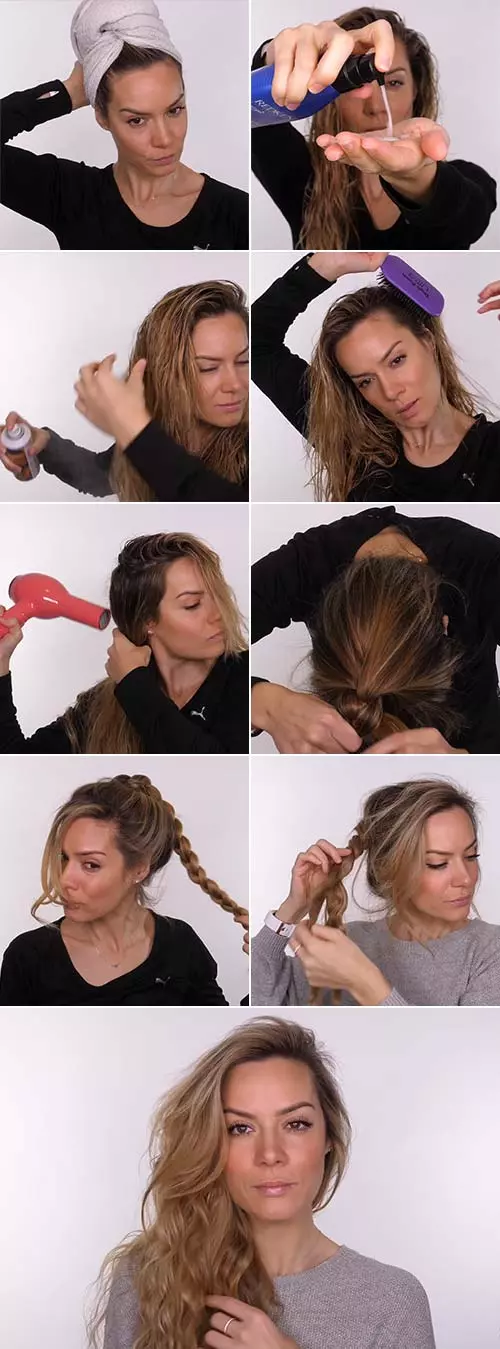
13. Beach Waves With Braids
What You Need
- Elastic band
- Brush
- Mousse
How To Do
- Brush your hair to remove all knots and tangles.
- Bend forward and flip your hair over. Begin weaving a regular three-strand braid near the crown.
- Weave the braid until an inch from the ends of your hair and secure it with an elastic band.
- Leave your hair in the braid overnight.
- Undo the braid gently the next morning.
- Apply some hair mousse to your locks to add volume and definition to your beachy waves.
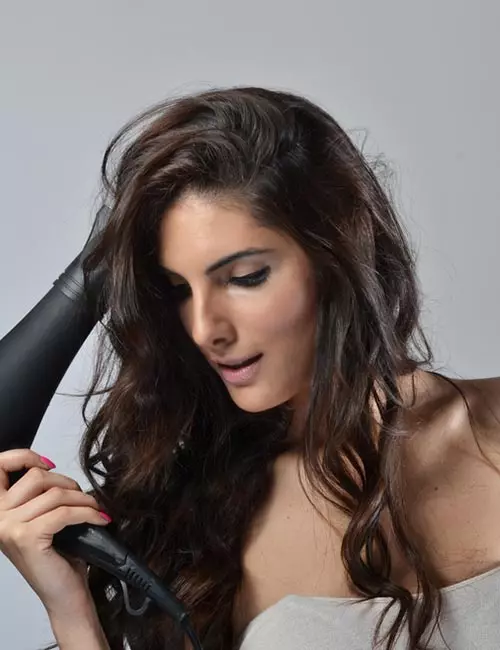
14. Beach Waves With A Blow Dryer
What You Need
- Round brush
- Blowdryer
How To Do
- Grab a section of hair and roll it mid-way around your round brush.
- Set the blow dryer on a medium setting.
- Blow dry the section of hair while slowly working the round brush till the end.
- Repeat the process until you have styled all your hair in waves.
- Finish off with some hairspray.
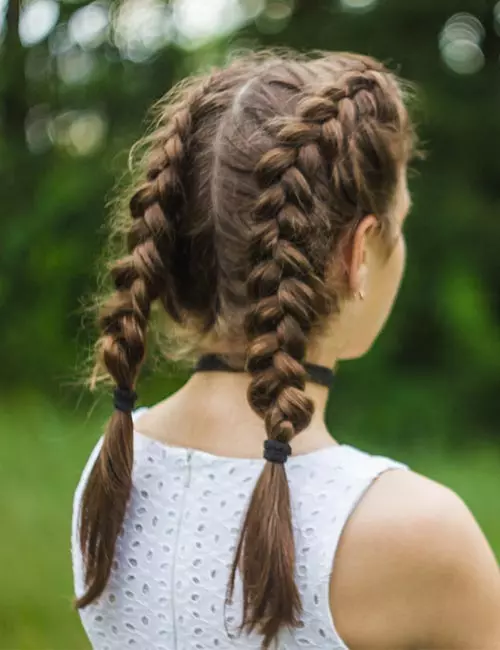
15. Beach Waves With French Twist
What You Need
- Comb
- Elastic bands
- Bobby pins
- Hairspray
How To Do
- Wash your hair and let it air-dry until it is damp. You can also use a blow dryer.
- Part your hair the way you normally would. Part it all the way down till the nape of your neck. This creates two sections. Clip up one section.
- From the loose section, grab a small section of hair from near the parting. Divide it into two subsections.
- Twist both the sub-sections around each other once. Then, add hair to both the sections and twist again.
- Repeat step 4 until you reach the very end. Secure the twist with an elastic band.
- Repeat the same with the other section of hair.
- Wrap both the French twists around your head to form a full crown. Secure them to your head with bobby pins.
- Leave this hairdo in overnight to form the waves.
- Remove the pins and elastic bands the next morning and gently tousle your hair.
- Spritz on some hairspray to finish off the look.
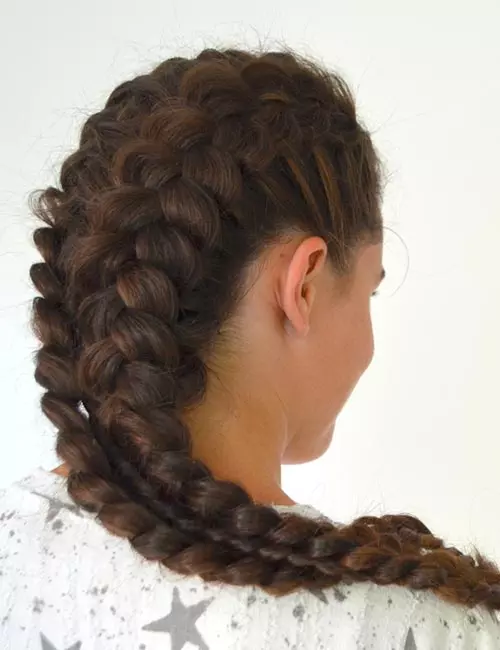
16. Beach Waves With French Braids
What You Need
- Comb
- Elastic band
- Clips
How To Do
- Wash your hair and let it air-dry until it is damp.
- Divide your hair into two equal sections from the front to the back. Clip up one section of hair.
- Pick up some hair from near the parting, from the free section of hair. Divide it into three sections and weave a stitch of a braid.
- Add some more hair to the side sections and weave another stitch. Continue adding hair to the sides as you weave the braid.
- Braid your hair this way until you reach the nape of your neck and clip it to your head.
- Repeat the same process with the other section of hair.
- At the back hairline, merge the tails of both the braids and continue braiding them as one regular braid.
- Secure this braid with an elastic band and leave it on overnight.
- Undo the braid the next morning to reveal your wavy locks.
Annebeth, a PR consultant and beauty blogger, tried creating waves in her hair with French braids. She wanted to recreate Chloe Sevigny’s hair in American Horror Story season 5. About the result she says, “I was very pleased with it, although I can’t say it looks exactly like the example set by Chloe Sevigny. This is a great way to limit the amount of heat-damage while still getting a quick and easy wavy hairstyle that looks soft and romantic (i).”
17. Beach Waves Without Heat
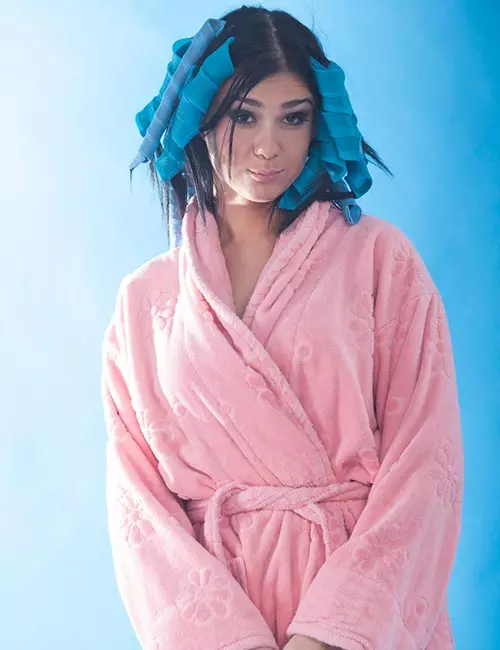
What You Need
- Comb
- Water spray
- Pipe cleaners (you can find these in any craft store)
How To Do
- Start off by making some DIY foam curlers. All you need to do is gather a few pipe cleaners and twist them at the top and at the bottom. You will need enough foam curlers to cover all your hair, so buy the pipe cleaners accordingly.
- Divide your hair vertically into two sections. Pull each side in front of your shoulders.
- Take some hair from the back of one of the sections and spritz some water on it.
- Wrap your hair around a foam curler, starting a little away from the roots. This will give you more natural waves. Twist both ends of the foam curler together to lock your hair in.
- Repeat this process until all of your hair is wrapped around foam curlers. Keep them on for a few hours to make sure the waves set in.
- Remove the foam curlers gently and run your fingers through your hair to finish off the look.
 Quick Tip
18. Beach Waves With Single Dutch Braid
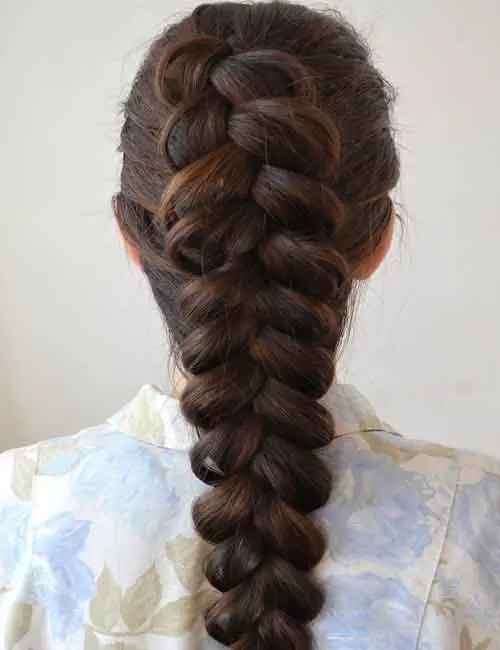
What You Need
- Elastic band
How To Do
- Brush your hair to remove all tangles and knots.
- Pick up a small section of hair from the front and start weaving it into a Dutch braid, making sure the middle section goes over the side sections.
- Keep adding hair to the sides as you weave the braid. Once you reach the nape of your neck, continue weaving a regular braid. Tie it with an elastic band to secure the ends.
- You can pancake the braid to create more loose waves.
- Unravel the braid the next day to unveil your brilliantly tousled waves.
19. Beach Waves With A Simple Twist And Scrunch
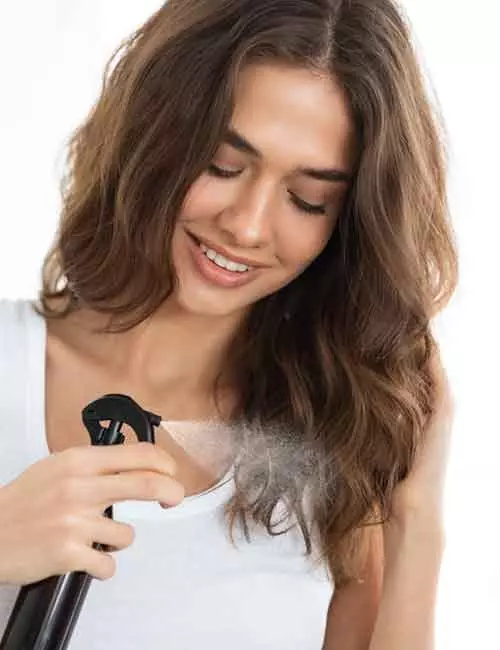
What You Need
- Sea salt spray
- Hairspray
How To Do
- Start off with damp hair. Spritz on some salt spray all over your locks to give them texture. Make sure to spray even on the underside of your hair.
- Twist small sections of hair and scrunch them till the roots. Keep doing this until you’ve twisted all your hair. This will give you some light waves.
- You can also spritz on some hairspray before and after you twist and scrunch your hair as it will help set the waves in for a longer time.
20. Beach Waves With A Twisted Crown
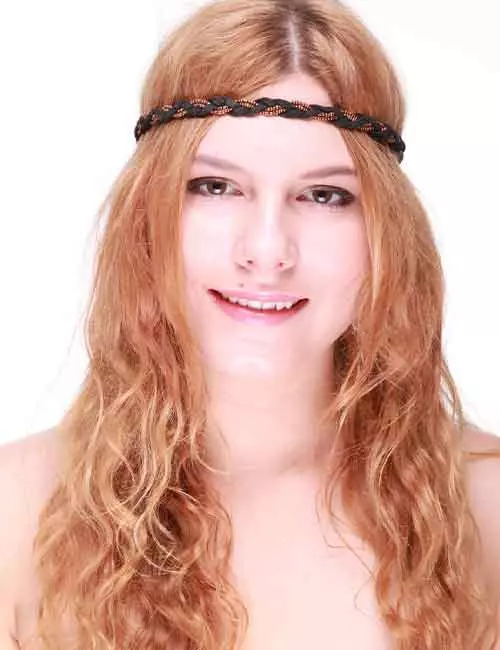
What You Need
- Thick headband
- Bobby pins
How To Do
- Start off with damp hair as this allows the waves to really set in.
- Put on the headband over your head as you would a crown.
- Divide your hair vertically in half (front to back) to create two equal sections. Clip up one section of hair.
- Take all the hair from the free section, twist it, and wrap it around the band. You’ll have to roll it through the headband a few times to make sure it is tight. Pin the ends within the headband.
- Repeat the same with the other section as well.
- Keep your hair up this way when you sleep. Remove the headband the next morning to get some incredible waves.
Infographic: Points To Keep In Mind While Getting Beachy Waves
The wavy, flowy, and loose beach waves look perfect and fabulous on everyone. Though creating them may seem daunting, it is not as tough as you think. On the contrary, it is easy if you know the right way and use the right products. First, however, you should remember a few important points to get the perfect waves.
Check out the infographic below to learn the tips that will help you get those perfect beachy waves. Illustration: StyleCraze Design Team
Beachy waves are the best way to get perfect looks. Many beachy waves tutorials can help you with getting perfect beachy waves and enhance your beauty. You can get beachy waves with a curling iron, flat iron, hot rollers, mini buns, twists, ponytail, braids, blow dryer, french twist, french braids, single dutch braid, and a simple twist and scrunch. Styling your hair in beachy waves is easy and offers a perfect look. Do your research and choose a suitable look for your lifestyle.
Frequently Asked Questions
Can you get a perm that looks like beach waves?
Yes, a wavy perm may give you beach waves. It is a soft and modern form of the classic perm.
What do beachy waves mean?
The deliberately careless, loose, and flowy waves in your hair are generally called beachy waves.
How do you get beach waves in Indian hair?
Indian hair is fairly adaptable to almost all hairstyles. You can use any of the heatless methods or styling tools mentioned in the article to create beach waves in Indian hair.
How long do beachy waves last?
The lasting period depends on a lot of factors, including hair type, styling method, styling tool, product used, etc. On average, beachy waves stay for anywhere between a few hours to 2-3 days.
What are the three types of beach waves?
The three types of beach waves are- loose, defined, and textured waves. Loose waves are soft and flowier; defined waves have a bit more structure than loose waves, while textured waves are voluminous with a tousled and messy look.
Can straight hair get beach waves?
Yes, people with straight hair can easily get beach waves by using almost any of the methods mentioned in the article and tools like a curling iron, straightening iron, or curling wand.
What length is best for beach waves?
Beach waves can be done on any hair length. However, it is comparatively easier to create waves on long hair than on short hair.
Discover the secret to effortless beach waves for short to medium-length hair using a flat iron from the video below. Master the technique to achieve that sun-kissed, tousled look in no time.
Illustration: Perfect Ways To Get Beachy Waves Every Time
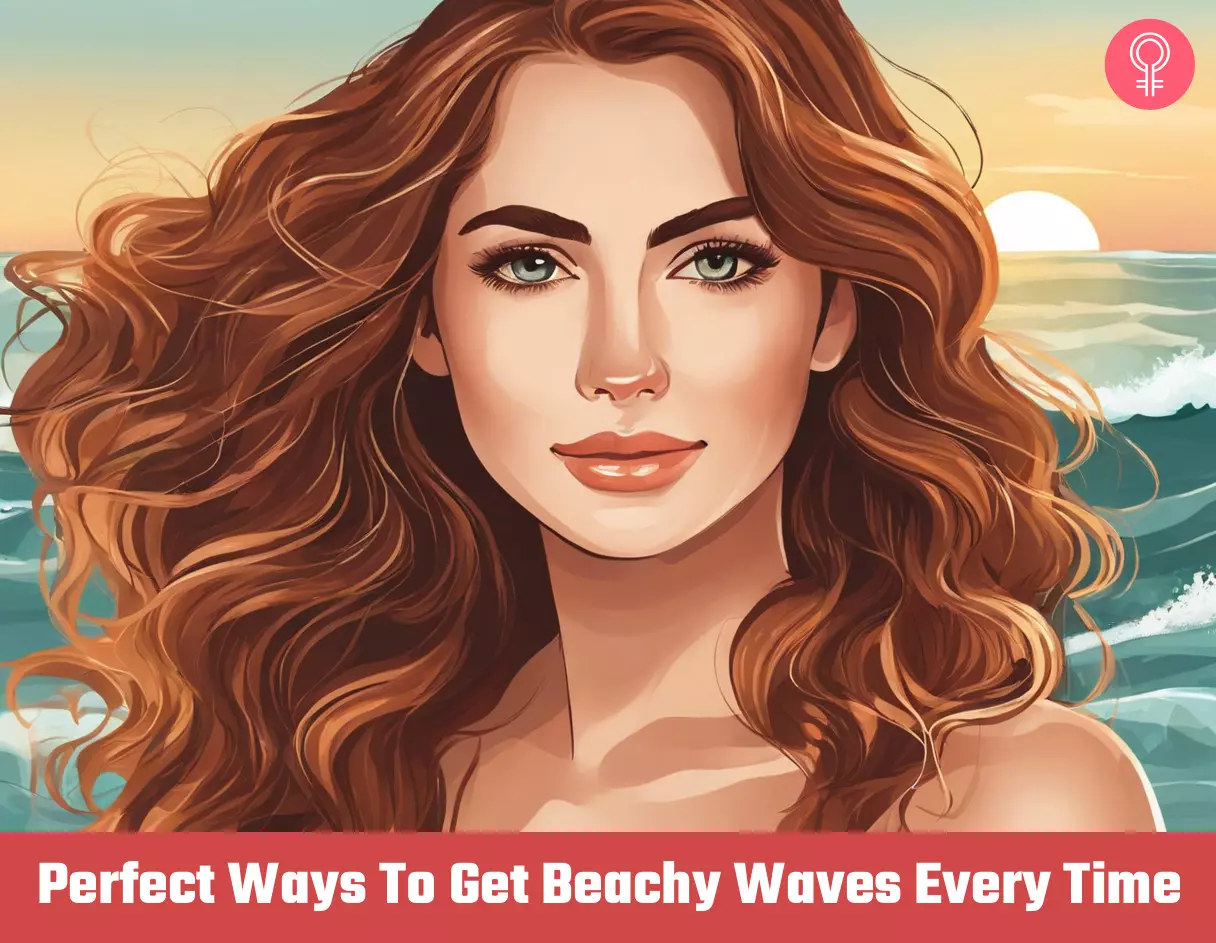
Image: Stable Diffusion/StyleCraze Design Team
Personal Experience: Source
StyleCraze's articles are interwoven with authentic personal narratives that provide depth and resonance to our content. Below are the sources of the personal accounts referenced in this article.
i. Beauty: easy, overnight beachy waves inspired by Chloe Sevignyhttps://stylingdutchman.blogspot.com/2016/01/beauty-easy-overnight-beachy-waves.html
Read full bio of Quarita Futrell
Read full bio of Anjali Sayee
Read full bio of Shatabdi Bhattacharya
Read full bio of Anu Pallavi







Community Experiences
Join the conversation and become a part of our empowering community! Share your stories, experiences, and insights to connect with other beauty, lifestyle, and health enthusiasts.