A Comprehensive Guide To The Different Types Of Braids
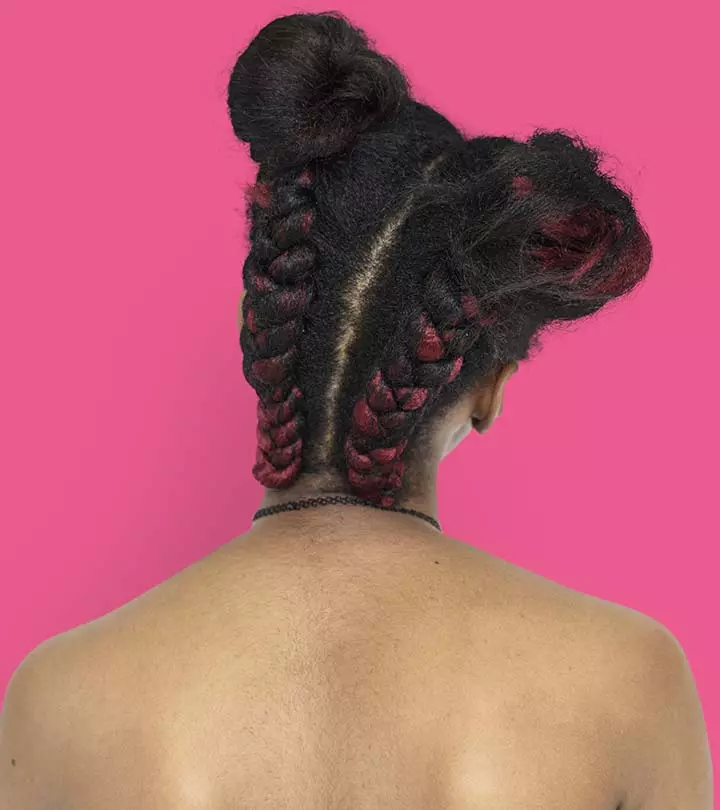
The art of braiding is ancient, but these styles have never gone out of trend!
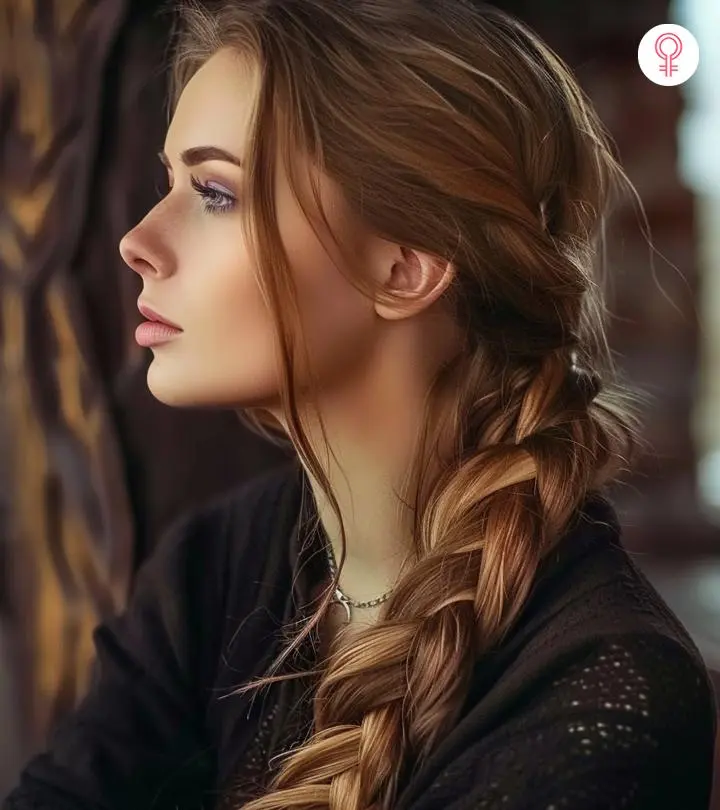
Image: Midjourney/ StyleCraze Design Team
Remember those days when you sported a simple ol’ three-strand braid to school! Now, everyone has a personalized version of the braid! From a French braid to braid twists, if you are baffled by the umpteen types of braids, let us simplify things for you. It can be a wedding or a business meeting, going to the gym or on a date, you can find a braid for every occasion. Braids are a protective hairstyle that shields your hair from damage. Also, on days when you have not washed your hair but suddenly have to go somewhere, braid hairstyles can be lifesaving. And you can pair it with literally any other hairstyle: ponytails, updos, twists, and loose hair. Not to mention, there is a braid for every mood – messy, neat, and everything in between. That is how versatile braids are! To help you navigate your way through this big world of braids, here is the complete guide to all the different braid styles, how to braid hair, and how you can try all these different styles out! Keep reading to know more!
 Before You Get Started
- It is easier to braid wavy and curly hair as they have more grip and texture to hold the braid compared to silky, straight hair.
- Adding a volumizing powder will add grip to silky hair making it easier to braid.
- Using a texture/micro crimping iron will also give grip to the hair. The downside, however, is that you see the crimp effect that you may not want to see.
- One or two-day old hair has better grip for braiding than freshly washed hair.
- Tighter braids may last 2-3 days on straight hair if set with hairspray and protected with a silk scarf while sleeping.
- Braiding is used to do protective styles on natural 4A-C hair that can last for up to 12 weeks.
In This Article
The Different Types Of Braids
Discover our collection of different types of braids, from classic three-strands to intricate fishtail styles, perfect for any and every occasion!
1. Viking Waterfall Braid
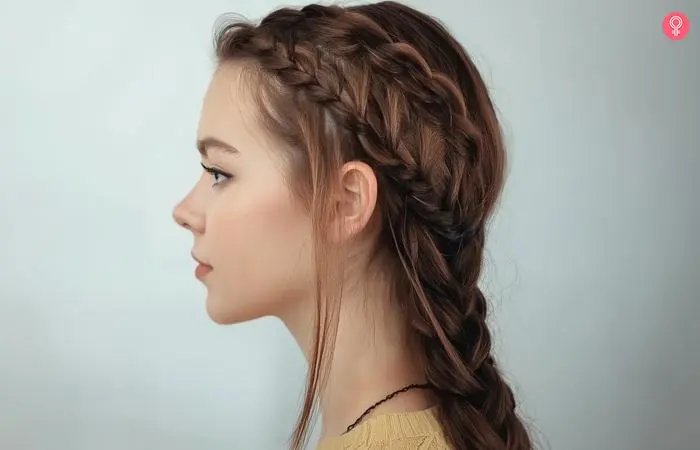
This Viking braid is a complex yet beautiful braiding style. It’s intricate and enhances the look of a traditional waterfall braid. While you start off in this stunning braid, you can end this hairstyle with braiding hair styles like the Dutch, French, or three-strand braids.
What You Need
- Hairbrush
- Hair elastic
How To Style
- Detangle your hair with a flexible brush or wide-toothed comb.
- Take an inch-wide section of hair on the right side at the front.
- Divide it into three parts and weave a waterfall braid. A waterfall braid is like a French braid, but you add a new section of hair to
- the top and drop every bottom section of hair.
- Drop the bottom section after every stitch till you reach the crown, then pin it into place.
- Start braiding the dropped strands of hair into thin three-strand braids.
- Continue with the original waterfall braid, but don’t drop any sections of hair. Just add the thin braids into each stitch.
- Finish it with a simple three-strand braid and then secure it with a hair elastic.

2. Halo Braid
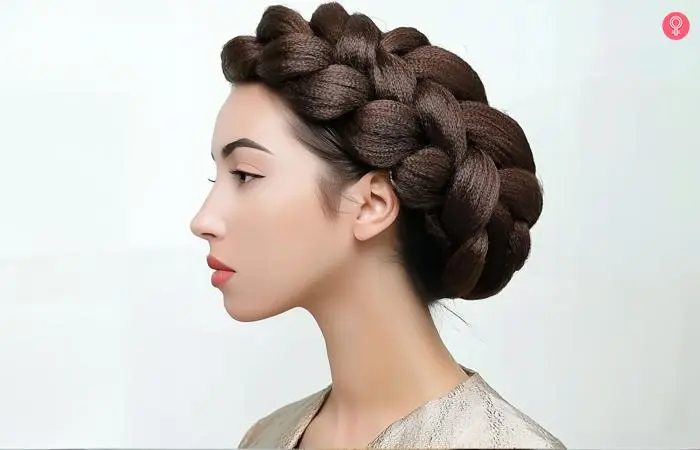
Much like crown braids, halo braids are also wrapped around the head. However, the braiding pattern is slightly different, as halo braids follow the Dutch braiding style rather than the French method. In French and regular braided hairstyles, the side sections of the braid go over the middle section. In the Dutch braid, the side sections of the braid go under the middle section. This makes the braid stand out rather than lay flat with the hair.
What You Need
- Hair brush
- Hair color elastic tie/bands
- Bobby pins
How To Style
- Comb your hair and create a side part.
- Take some hair from the deep side of the parting and separate it into three sections.
- Begin weaving a Dutch braid with these sections. Keep adding hair to the side sections with every stitch.
- Follow the curve of your hairline as you weave the braid to create the halo circle.
- Use a hair elastic to tie the braid at the end.
- Wrap the Dutch braid’s end around your head to complete the halo and secure it with bobby pins.
3. Simple 3 Strand Braid

The most basic of braids, the simple 3 strand braid is one of the most common braids for women that each one of us has grown up with. It’s also probably one of the first and easy braided hairstyles you learned to do all by yourself. This simple braid can be styled into an endless number of hairstyles by playing around with their sizing and textures.
What You Need
- Hairbrush
- Hair elastic
How To Style
- Brush out all the knots and tangles in your hair.
- Divide your hair into 3 equal sections.
- Flip the left section over the middle section.
- Now, flip the right section over the middle section (that was previously the left section).
- Keep repeating steps 3 and 4 by alternately flipping the left and right sections of hair over the middle section until you have braided till the end.
- Secure the ends with a hair elastic.
4. French Braid
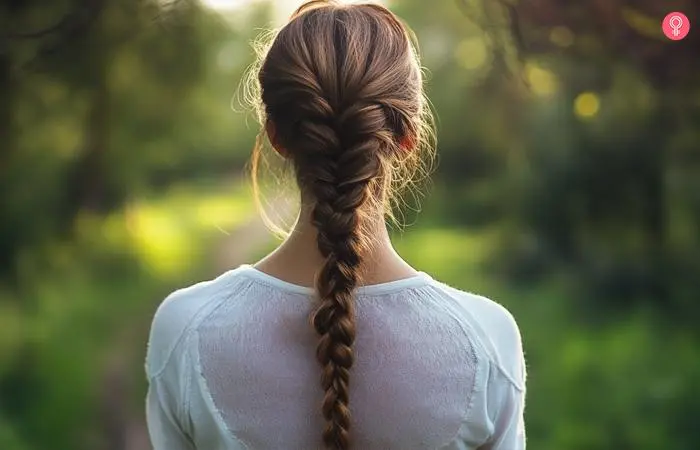
Now, here’s another classic braid that is a classic style around the world. The French braid is the most simple and chic way to keep your hair out of your face on a hot summer day. It also is the perfect hairstyle for work or school. It may take you a little bit of practice to get the hang of French braiding, but once you do, it will take you less than 3 minutes to do it perfectly. For a quick guide, here’s a simple French braid tutorial to help you master different French braiding styles. But, let’s first start with the basic steps.
What You Need
- Hairbrush
- Hair elastic
How To Style
- Brush out all the knots from your hair.
- Pick up the front section of your hair (from between your temples) and divide it into 3 sections.
- Simply braid it in a stitch.
- Second stitch onwards, add a 2 inch section of hair from outside the braid to each of the side strands before flipping it over the middle strand of the braid.
- Once your French braid has reached the nape of your neck and you’ve run out of hair to add to it, simply braid the rest of the way down and secure the ends with a hair elastic.
- You can tug apart and loosen the braid, aka pancaking the braid, to make it look more voluminous.
 Fun Fact
5. Fishtail Braid
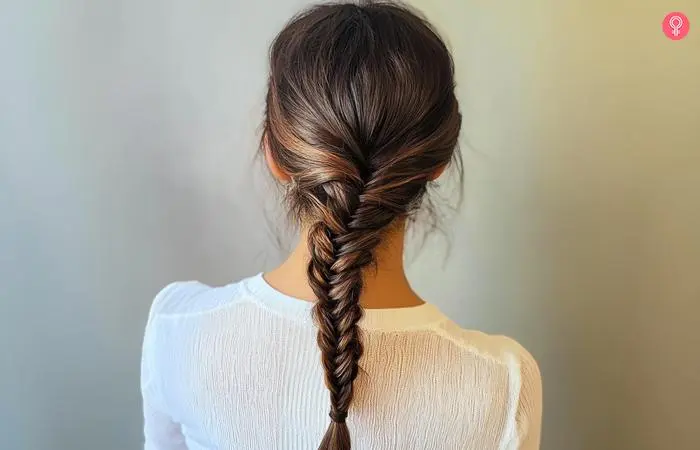
Perhaps the most intricate of braids, the fishtail or herringbone braid is a favorite when it comes to hairstyles for fancy occasions. This trendy braid involves delicately weaving thin sections of hair together to create a symmetrical effect that looks like the perfectly aligned scales on a fish’s tail. If you are wondering how to do a fishtail braid, it is all about mastering this precise technique to achieve that elegant look.
What You Need
- Hairbrush
- 2 hair elastics
How To Style
- Detangle your hair with the help of a hairbrush.
- Gather all your hair and tie it into a ponytail.
- Divide your ponytail into 2 equal sections.
- Pick up a thin section of hair from the outer side of the left section, flip it over and add it to the inner side of the right section of your ponytail.
- Now, pick up a thin section of hair from the outer side of the right section, flip it over and add it to the inner side of the left section of your ponytail.
- Keep repeating steps 4 and 5 alternately until you’ve fishtail braided till the end of your hair.
- Secure the ends with a hair elastic.
- Cut off the hair elastic at the top of your braid to finish off the look.
Celebrity hairstylist Andrea Claire adds, “The base and structure of this braid is better if you can just jump right into the fishtail. As you get used to executing this braid, you can weave it without the ponytail. Remember, your goal is to avoid the initial tying off into a ponytail step.”
6. Dutch Braid
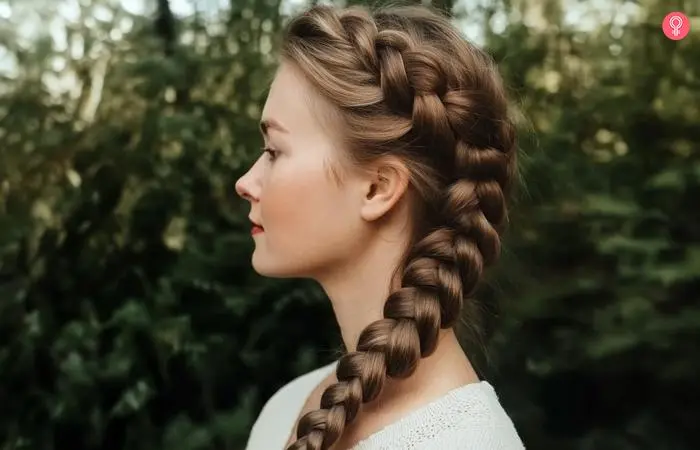
A Dutch braid is nothing but a French braid done in reverse. This braid look has some great dimension to it because of the way it sits on top of your hair. The Dutch braid can be incorporated in a half up style to give it a flirtatious vibe or styled with a bun to make it work appropriate.
What You Need
- Hairbrush
- Hair elastic
How To Style
- Brush out all the knots and tangles in your hair.
- From between your temples, pick up the front section of your hair and divide it into 3 sections.
- Braid it for one stitch by flipping the side sections under the middle section.
- In each stitch of braid, start adding hair from outside the braid to the side sections before flipping them under the middle section.
- Once your Dutch braid has reached the nape of your neck, simply braid the rest of the way down and secure the ends with a hair elastic.
7. 4 Strand Braid
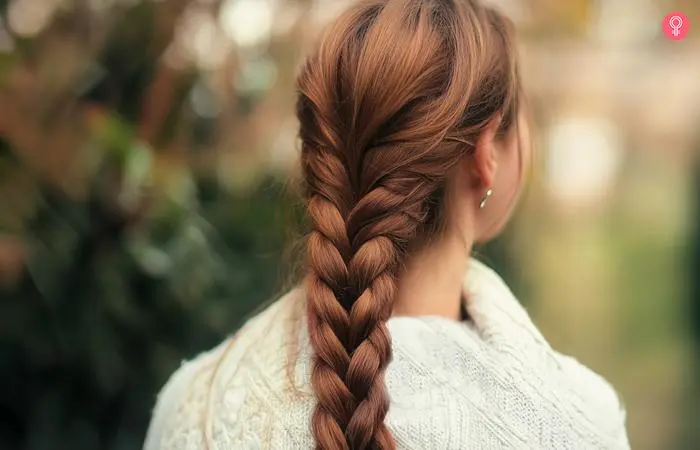
A 4 strand braid is a fun way to shake things up when you’re bored of the same old 3 strand braid. This cool twisted braid is a cute hairstyle that you can sport to class. The best part about the 4 strand braid is that at first glance it looks like a regular braid, and then makes people do a double take!
What You Need
- Hairbrush
- Hair elastic
How To Style
- Brush your hair to remove all knots and tangles.
- Part it down the middle or brush it all back.
- Divide your hair into 4 equal sections and number them in your head as 1, 2, 3, and 4.
- Now, start braiding them by flipping section 1 under section 2 and over section 3.
- Then, flip 4 over section 3 and under 4.
- Now renumber the sections as 1, 2, 3, 4 in your head and follow the over under-over-over-under pattern repeatedly until you’ve braided right till the end.
- Tie up the ends with a hair elastic.
8. Rope Twisted Braid
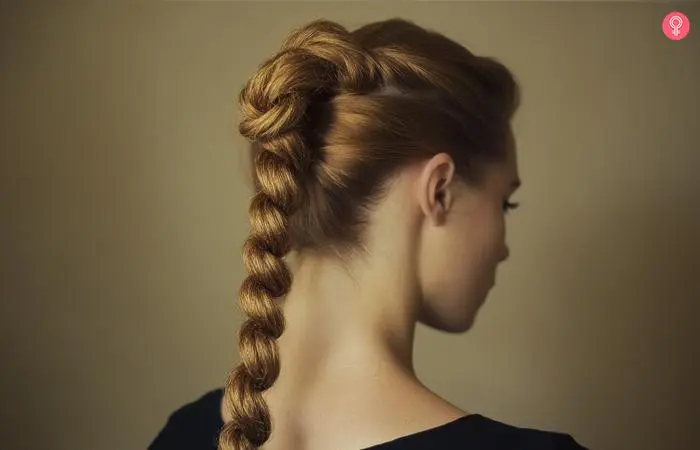
When it comes to braiding, it doesn’t get easier than a rope twisted braid. Since it involves just twisting 2 sections of hair together, it takes about 2 minutes to perfect this adorable braid. The rope braid is perfect to be sported on days when you’re running late and have to be out of the door immediately.
What You Need
- Hairbrush
- 2 hair elastic
How To Style
- Brush out all the knots and tangles in your hair and tie it into a high ponytail.
- Divide your ponytail into 2 sections. Add some hairspray or powder for grip.
- Twist the 2 sections individually in a clockwise direction till the very ends. Add a little more hairspray to help hold the roped hair from unraveling.
- Intertwine these twisted sections with each other in an anticlockwise direction till the end.
- Secure the ends with a hair elastic.
9. Pull Through Braid
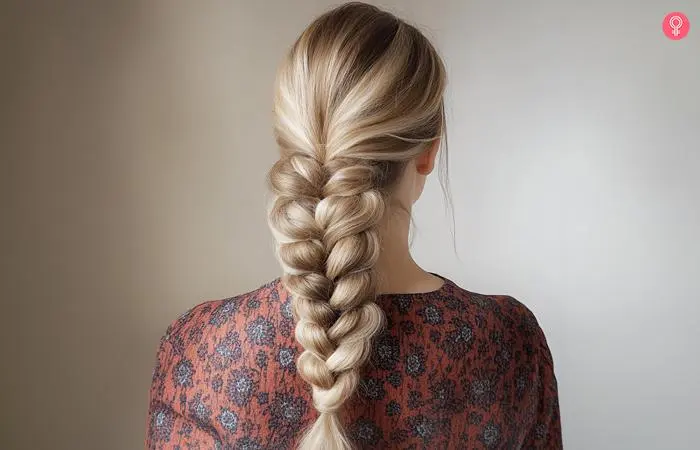
All you ladies with fine textured hair, listen up. Here’s a gorgeous braid that will make your hair look super voluminous. The pull through braid is an ultra trendy braid that involves tying your hair into a bunch of ponytails and pulling them through each other to create a braided effect.
What You Need
- Hairbrush
- Hair elastics
How To Style
- Brush your hair to remove all the knots and tangles in it.
- Pick up a section of hair from the top of your head and tie it into a ponytail.
- Pick up another section of hair from right under the first ponytail and tie it into another ponytail.
- Split the first ponytail in half.
- Bring the two sections of the first ponytail together under the first ponytail (so that the second ponytail is encased between them) and tie them with a hair elastic.
- Now, gather some hair and tie a third ponytail under the second one.
- Split the second ponytail in half, bring the ends together underneath the third ponytail, and tie them with a hair elastic.
- Keep repeating this process until you run out of hair to tie into additional ponytails.
- At this point, there will be 2 ponytails hanging loose at the nape of your neck.
- Do one final stitch of pull through braiding with it to finish off the look.
 Quick Tip
10. Reverse Braid
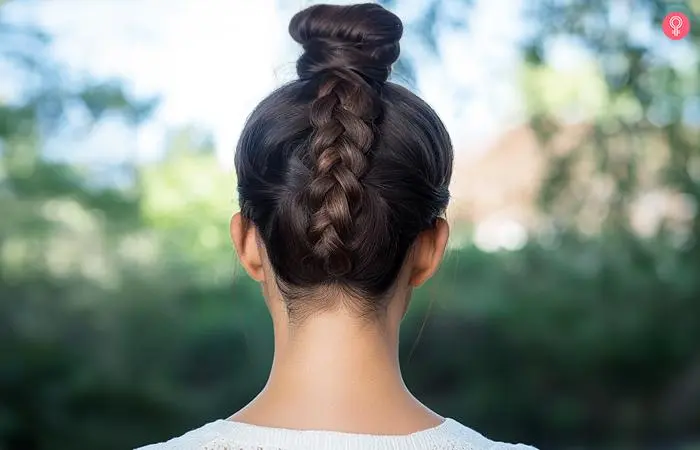
Reverse braid is exactly what its name suggests it to be. This quirky braid starts from the nape of your neck and goes up your head to create a stunning look for your bun. It can also be sported under a ponytail and is perfect for workouts and sports practice. It is one of the simple yet classy braided hairstyles for long hair.
What You Need
- Hairbrush
- Hair elastic
- Bobby pins
How To Style
- Brush out all the knots and tangles from your hair.
- Bend your head forward and flip all your hair in front of you.
- Pick up a section of hair from the nape of your neck and divide it into 3 sections.
- Start Dutch braiding them by flipping the side sections under the middle section and adding more hair into the braid with each subsequent stitch.
- Once your Dutch braid has reached the crown of your head, tie all your hair in a ponytail.
- Roll your ponytail into a bun and secure it to your head with some bobby pins.
- You can tug apart and loosen the braid to give it a softer look.
11. Waterfall Braid
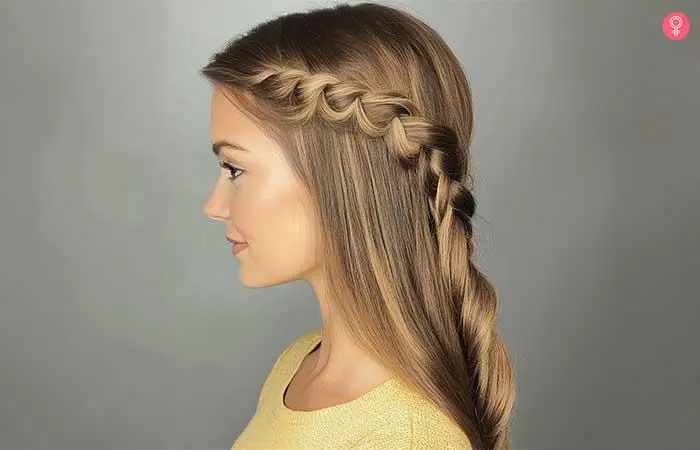
When it comes to stunningly beautiful hairstyles, nothing can beat the waterfall beauty. This delicate braid looks exactly the way you would imagine it – like a waterfall of hair on the side of your head. Because of its gorgeous and feminine vibe, waterfall braids are the perfect do to sport on a wedding or prom. If you are looking for a more complex and elegant variation, you can also go for the feathered or ladder braid.
What You Need
- Hairbrush
- Bobby pins
How To Style
- Brush your hair out to remove all knots and tangles.
- Part your hair on one side.
- From the side of your parting with more hair, pick up a 3 inch section of hair from the very front and divide it into 3 sections.
- The section closest to the top of your head is your top section, then there’s the middle section, and the section closest to your ear is the bottom section.
- Do a simple 3 strand braid for one stitch.
- Now, leave the bottom section and pick up a new section of hair from right next to it to flip over the middle section. This will create the waterfall effect.
- Add more hair from the top of your head to the top section before flipping it over the middle section.
- Keep repeating steps 6 and 7 until your waterfall braid has reached the back of your head.
- Do a simple braid for 3-4 more stitches before pinning down the braid at the back of your head. Make sure you pin it underneath your hair to hide the bobby pins from view.
12. Milkmaid Braids
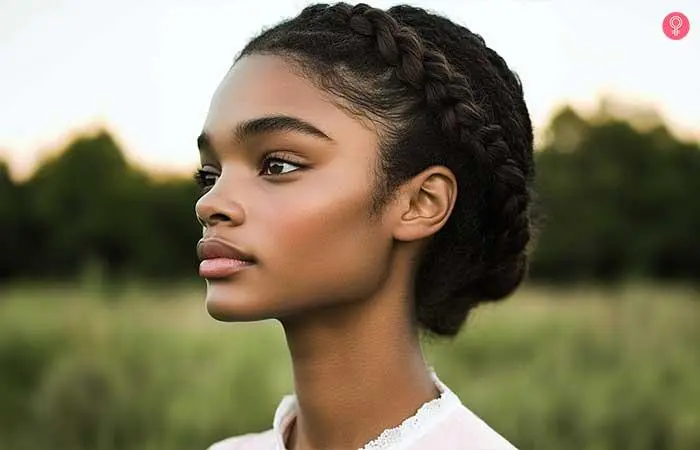
Classy, elegant and oh-so-sweet – milkmaid braids are the best hairstyle to wear if that’s the vibe you’re going for. Though this braid looks like you’ve taken ages to perfect it, it’s actually super simple to do and takes less than 5 minutes. Milkmaid braids are especially popular as a wedding hairstyle as they make anyone who sports them look like an absolute angel.
What You Need
- Hairbrush
- Rat tail comb
- Hair elastics
- Bobby pins
How To Style
- Brush out all the knots and tangles from your hair.
- With the tail end of your rat tail comb, part your hair down the middle.
- Continue parting your hair till the nape of your neck to divide your hair into 2 equal sections.
- Do a simple 3 strand braid with the section on the right and tie up the ends with a hair elastic.
- Repeat step 4 with the section of hair on the left.
- Pancake and loosen both braids to make them look wider and give them more dimension.
- Pull out a few strands of hair from the front to frame your face.
- Pick up your right braid, place it across the crown of your head and pin down its end wherever it falls on the opposite side of your head.
- Insert some bobby pins along the length of this braid to secure it firmly to your head.
- Repeat steps 8 and 9 with your left braid, making sure to tuck its ends under the right braid to hide it from view before pinning it to your head.
Maria Aiello, a YouTuber, takes on the challenge of Dutch braiding her hair, sharing a beginner’s guide for her audience. She shares some tips with viewers, saying, “Just make sure that your hair is thoroughly combed out because you don’t want any knots. I am starting with wet hair. I just find it so much easier to braid (i).”
13. Pigtail Braids
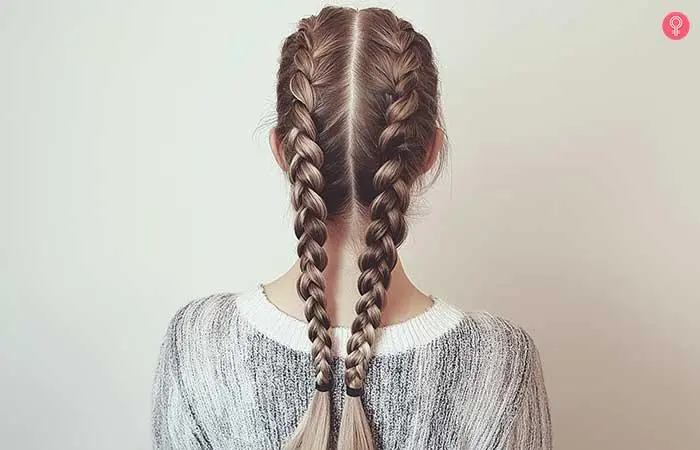
These twin braids on either side of the head radiate an innocent, youthful, and carefree spirit. You can style them in various ways, such as tying them with ribbons or wearing a hairband. Because of their playful vibe, they are perfect for occasions like a casual day out with friends, music festivals, and laid-back beach picnics.
What You Need
- Hairbrush
- Rat tail comb
- Hair elastics
How To Style
- Brush your hair to remove any tangles or knots.
- Create a straight part down the middle of your head with a rat tail comb, dividing your hair into two equal sections.
- Start French braiding the first section of hair till you reach the base of your head.
- Use a hair elastic to secure the end of the braid. Repeat the process on the other side.
- Pancake both the braids (pulling and loosening the segments) to give them a volumized appearance.
Popular cosmetologist and hairstylist, Laura Dale, also suggests a unique way to incorporate a scarf into a braid hairstyle. She states, “For a stylish twist, weave a scarf into a braid, then wrap the braid into a low bun. This adds texture, color, and a chic, effortless vibe while securing your style all day.”
Now that you have seen some amazing braiding styles, here are some tips to make sure your braids are on point always. Keep reading!
Key Takeaways
- Braid hairstyles are versatile and can be worn at all types of occasions. They are especially helpful for last-minute unwashed hair styling needs.
- Some braid styles are also considered protective hairdos for black hair.
- Wavy or textured hair types have a better grip for braids. Those with silky straight hair may require a texturizing or holding spray.
- Braiding one or two-day-old hair is ideal for a stronger braiding grip compared to freshly washed and dried hair.
Tips To Keep In Mind Before Braiding Your Hair
Before you begin braiding your locks, here are a few tips to keep in mind.
- Start With Clean, Dry Hair
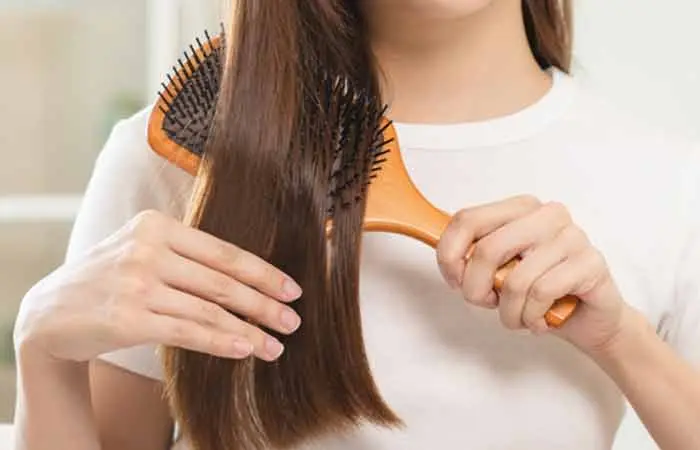
Before braiding, you need to make sure your hair is clean and completely dry. Braiding damp hair may lead to breakage and dirty hair can cause build-up, making the process more difficult. Using a small amount of leave-in conditioner can help smooth your hair out and reduce frizz.
- Detangle Thoroughly
Tangles can make braiding difficult and messy, so be sure to detangle your hair with a wide-tooth comb beforehand. Start at the ends of your hair and work your way up to avoid breakage.
- Section Your Hair Evenly
Even sections are key to neat, professional-looking braids. Use a comb or your fingers to divide your hair into equal sections before braiding your locks. For more intricate styles like box braids or cornrows, use a rat-tail comb to create clean lines for precision.
- Use Tension Wisely
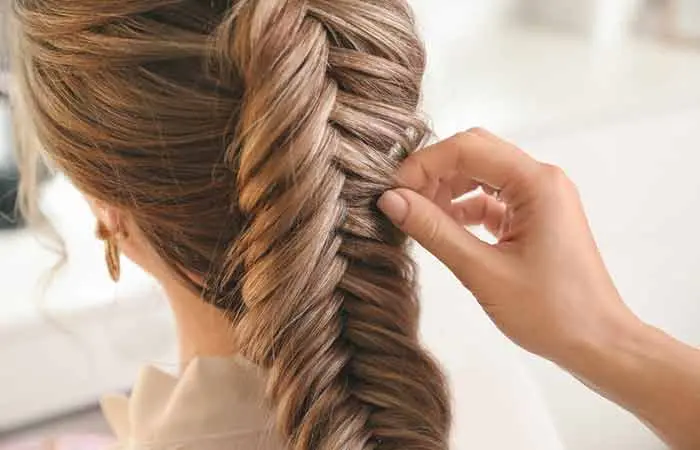
Avoid weaving the braid too tightly as this can damage your hair and scalp. Tight braids can lead to discomfort and even hair loss over time, especially around your hairline. Hair specialist and stylist, Kate Ross, further opines, “When braiding, avoid pulling too tight, especially around your hairline. Too much tension can lead to breakage and even those pesky little bald spots. Instead, aim for a snug but gentle grip.”
- Secure The Ends Properly
Use small elastic bands that are gentle on your hair to keep your braids from unraveling. You can also apply a small amount of styling gel to the ends before securing them to ensure they stay in place without frizzing or coming loose. Another great tip by hair stylist, Kate Ross, is, “If you want your braids to last, wrap your hair in a silk scarf before bed. It reduces friction and keeps your braids staying in place and frizz-free.”
- Moisturize And Protect While Braiding
Throughout the braiding process, don’t forget to keep your hair moisturized, especially if you have dry hair. Use a lightweight oil to keep your hair hydrated.
Following these tips will make sure your hair looks pretty and stays protected as well.
Infographic: A Complete Guide To 3 Types Of Braids You Can Try At Home
There was a time when a simple three-strand braid was enough. Today, there are several fashionable braids you can experiment with – be it for work, a nice date, or on days when you are feeling lazy, we have got you covered. We have rounded up a comprehensive guide on the three most unique and stylish braids you can try at home. Check out the infographic below to know more! Illustration: StyleCraze Design Team
Braids are handy in protecting your hair from damage and sporting a new look for every occasion. From the 3-strand braid to milkmaid braids, the different types of braids discussed in this article look classy and are suitable for specific occasions, needs, and conditions. For example, French braids are ideal in summer as they keep the hair off the face. Similarly, fishtail braids are a perfect fit for fancy occasions. So, choose from the above list of numerous types of braids and amp up your look as per the demand of the occasion!
Frequently Asked Questions
What are the four braids called?
The four types of braids are regular braid, fishtail braid, French braid, and Dutch braid.
Which braids last the longest?
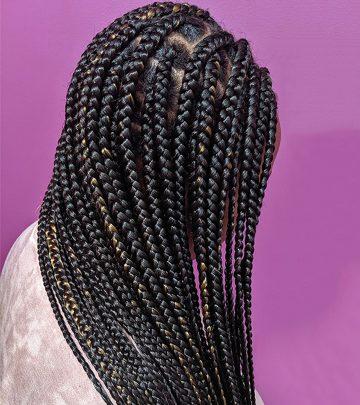
African protective braid and twist styles, like cornrows, box and Goddess braids, last the longest. Since thin sections of hair are weaved into these braids and the ends are sealed with hot water, these braids last for 1-3 months.
What is a regular braid called?
A regular braid is commonly called a 3-strand braid as you weave the braid with your hair divided into three sections.
What are 2 braids called?
Two braids (one on each side of the head) are called pigtails or twin tails.
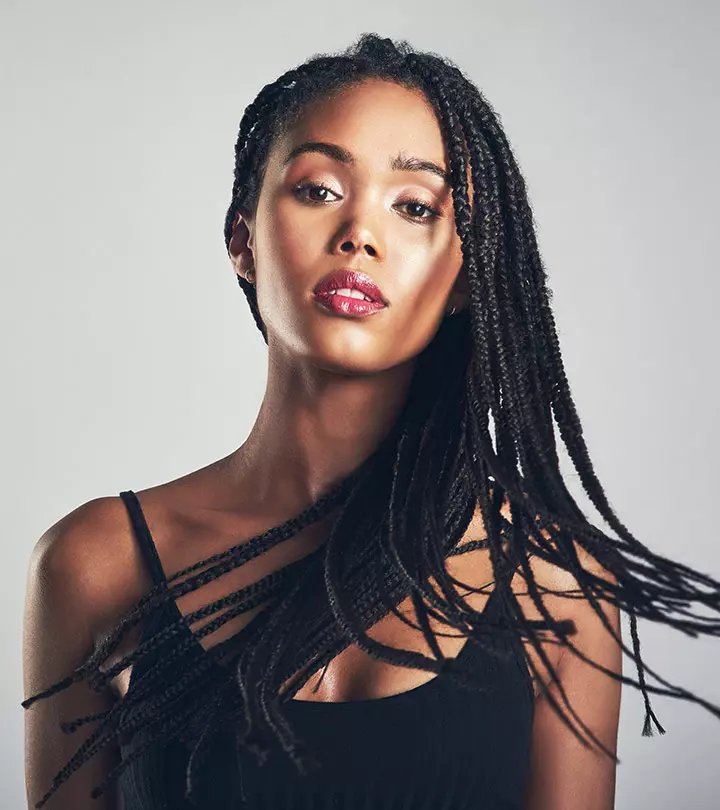
What are micro braids?
Micro braids, as the name suggests, are thin protective braids that are smaller than regular-sized cornrows, twists, and other African braids.
Name some other types of braids that can be created using multiple strands of hair?
Four-strand braid, five-strand braid, six-strand braid, seven-strand, eight-strand, nine-strand, and ten-strand braid are a few types of braids that can create looks ranging from simple and elegant to complex and striking.
Illustration: A Comprehensive Guide To The Different Types Of Braids
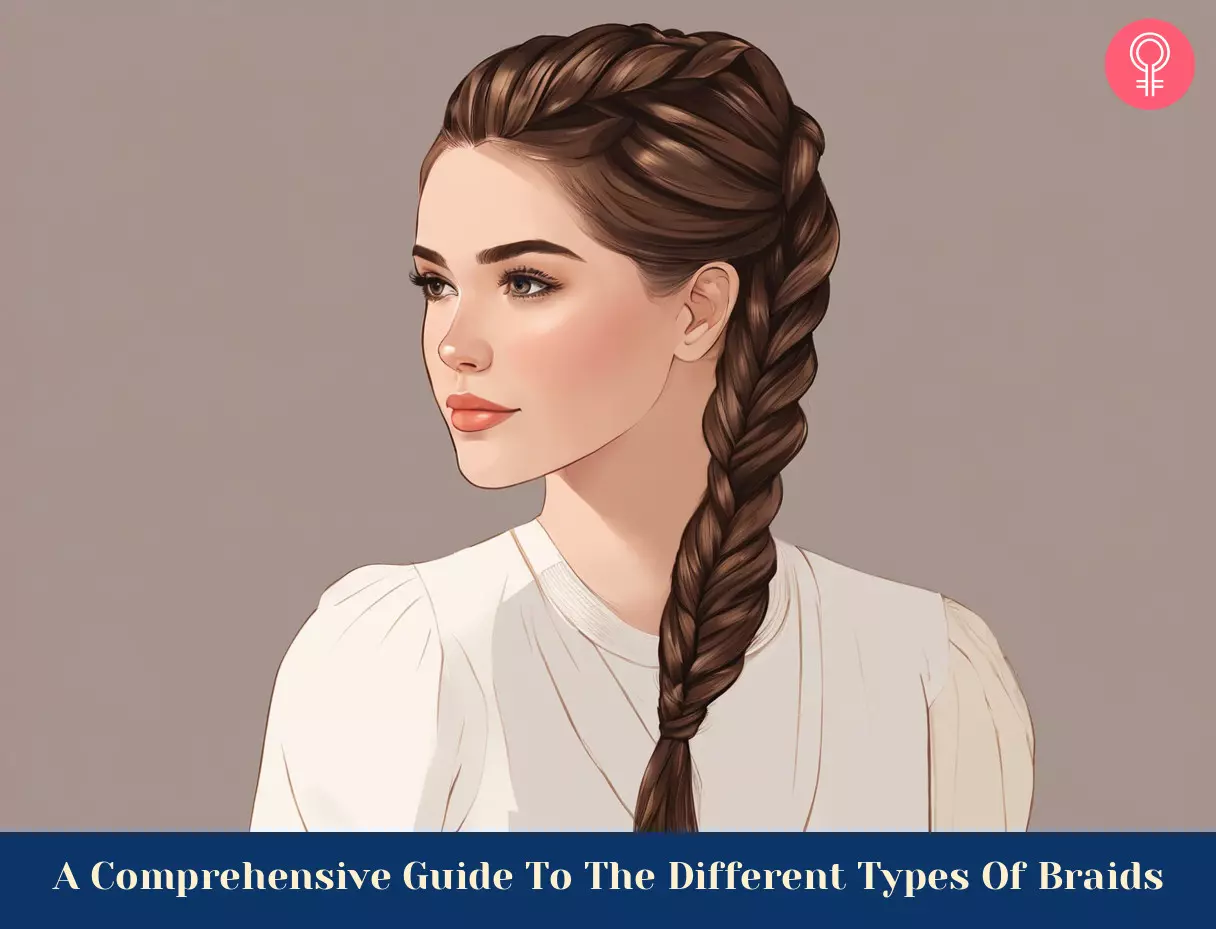
Image: Stable Diffusion/StyleCraze Design Team
Learn how to create 10 beautiful and easy braids for any occasion in this following video! From French braids to fishtails, become a pro at creating these hairstyles.
Personal Experience: Source
StyleCraze's articles are interwoven with authentic personal narratives that provide depth and resonance to our content. Below are the sources of the personal accounts referenced in this article.
i. Beginners Guide to Dutch braiding your own hair!https://www.youtube.com/watch?v=D0xwHfpLh90
Read full bio of Andrea Claire
- Laura Dale is a Hair Expert and Licensed Cosmetologist with over 20 years of experience. She has graduated from Seminole State College of Florida, and has worked as a Global Education Director for beauty brands specializing in hair care. As a Beauty Editor, Laura is passionate about sharing her love for beauty products and hair tools.
 Laura Dale is a Hair Expert and Licensed Cosmetologist with over 20 years of experience. She has graduated from Seminole State College of Florida, and has worked as a Global Education Director for beauty brands specializing in hair care. As a Beauty Editor, Laura is passionate about sharing her love for beauty products and hair tools.
 - Kate Ross has a diploma in Cosmetology and over 8 years of experience in styling. She specializes in innovative hair solutions, including extensions, human hair wigs, and toppers at Irresistible Me (a beauty company specializing in human hair extensions and wigs). Her approach combines artistry with practicality to create effortlessly beautiful looks tailored to every client’s needs.
 Kate Ross has a diploma in Cosmetology and over 8 years of experience in styling. She specializes in innovative hair solutions, including extensions, human hair wigs, and toppers at Irresistible Me (a beauty company specializing in human hair extensions and wigs). Her approach combines artistry with practicality to create effortlessly beautiful looks tailored to every client’s needs.
Read full bio of Arshiya Syeda
Read full bio of Subhrojyoti Mukherjee
Read full bio of Anu Pallavi









Community Experiences
Join the conversation and become a part of our empowering community! Share your stories, experiences, and insights to connect with other beauty, lifestyle, and health enthusiasts.