11 Awesome Exercises For The Pear-Shaped Body Type
Build a workout routine that targets the hips, thighs, and legs—the heavier regions for this body shape.
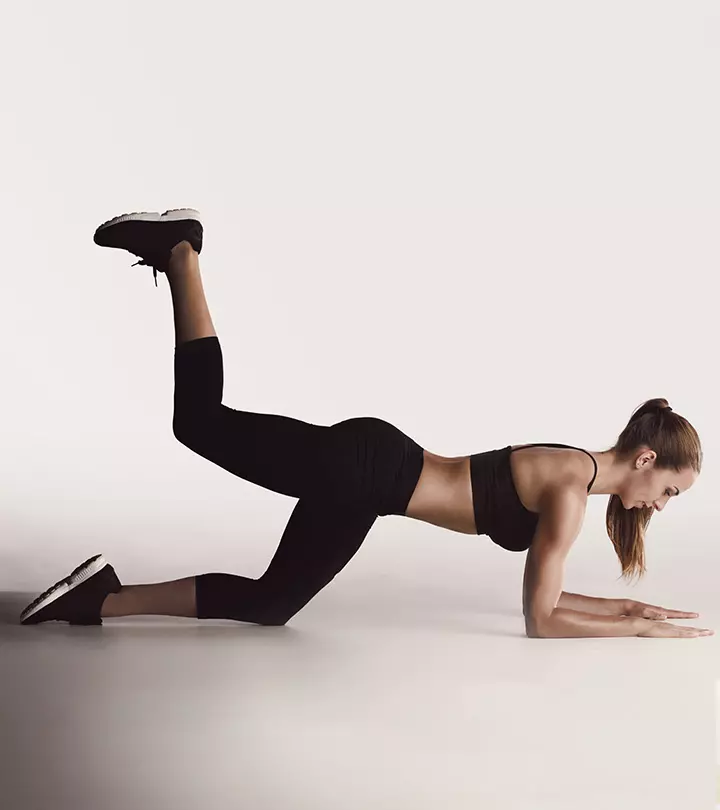
Image: shutter stock
The exercise regimen that’s best for you should match your goals, needs, and individual body type. There is no “one size fits all” regimen – we all have different bodies and responses to exercises! Genetics and hormones largely determine where we store fat and build muscle mostly easily. While you can’t change your genes or “spot reduce” fat by doing exercises for one area, you can optimize your exercise program to target muscle tone to reduce the chubby and plump areas based on your shape.
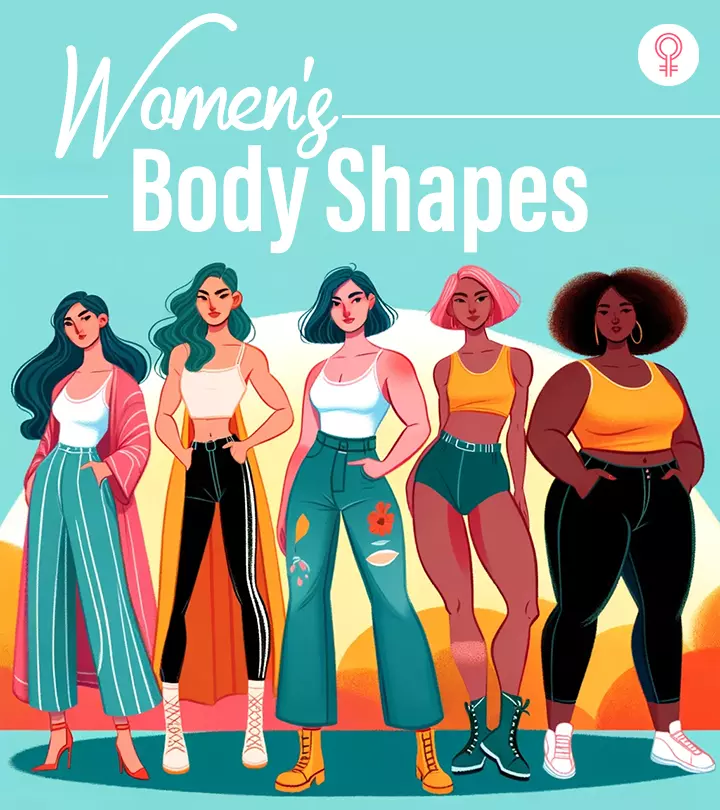
For example, women are often categorized into pear- and apple-shaped body types, while being considered overweight or full-figured with no silhouette. A pear-shaped or triangle-shaped body stores more fat in the thighs and hips and has slimmer shoulders and a narrow waistline. In contrast, an apple-shaped body stores more fat around the stomach area, with broader shoulders and narrower hips. The best way to know if you are pear-shaped is to measure your waistline an inch above your navel and measure your hips around their widest part. If your hips are significantly larger than your waist, then you likely have a pear shape. But don’t worry, there’s nothing inherently wrong with having a pear shape! It just means your estrogen levels may be higher than other women’s, as estrogen promotes fat storage around the hips and thighs. Pear-shaped women tend to be more conscious about the fat in their hips, legs, and thighs, so adding lean muscle mass with strength training and extra exercises for these areas can help create a more toned, tighter, and proportionate look.
Make sure your workout routine is balanced and works your entire body so you develop proportionate full body strength. You can add more exercises for areas you want to target – i.e. hips, glutes, and thighs for pear-shaped women.
 Workout Blueprint: Exercises For The Pear-Shaped Body Type
- Frequency: 3 to 5 times a week
- Benefits: Help tone, shape, and strengthen the lower body
- Equipment Needed: Exercise mat, stability ball, dumbbells, kettlebell, and a step platform
- Space Required: Large area
- Assistance Required: Yes, for certain exercises if you are a beginner.
- Who Should Avoid: Individuals who have been advised to avoid these exercises, with existing injuries, or may be pregnant individuals.

In This Article
Best 11 Exercises For A Pear-Shaped Body
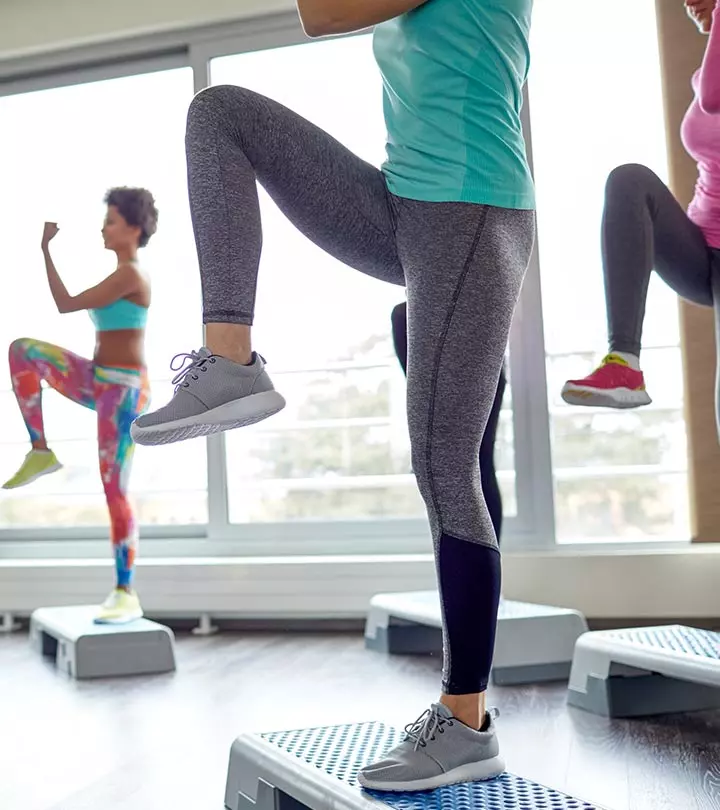
1. Step Up With Knee Lift And Bicep Curl: Great For Glutes, Hips, And Thighs!
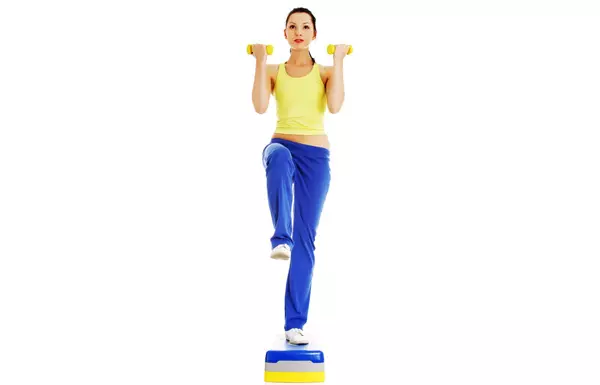
- Stand with the step in front of you, feet shoulder-width apart, back straight, dumbbellsin both hands. Make sure the step height is appropriate so you have a 90-degree bend in your leg when your foot is on the step.
- Step on it with your left foot. Make sure your heel is on the step.
- Put all your weight on the left foot as you engage your abs to bring up the right knee to waist level. Use your glutes to pull yourself up, and don’t let your knee roll in or out. Keep your torso stable by pulling your shoulders down and bracing your abs.
- Curl both biceps at the same time by bending elbows next to your ribs, bringing up the dumbbells to your chest, and then lowering them down with control. You can tap the right foot next to your left or keep it up to challenge your balance.
- Release the right foot and lower down with control, bending your left knee and making sure your knee doesn’t roll in as you come down.
- Repeat on the opposite side. Do 15 reps on each side.
2. Push Up With Leg Lift On Stability Ball:
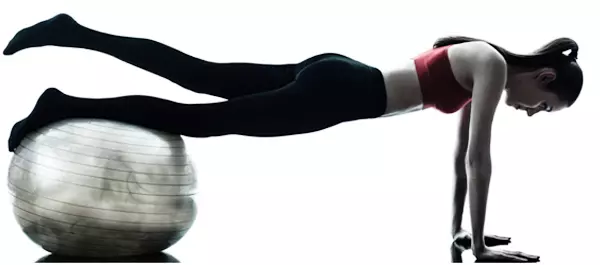
- Lie facedown on a stability ball, hands hanging down in front.
- Walk forwards with your hands, letting the ball roll down your body untilyour shins are resting on it.
- Come to a plank with the tops of your feet on the ball – make sure that your wrists are beneath your shoulders, your abdominals are in, and your back and legs are straight as in a push-up starting position.
- Perform a push-up: bend your elbows out to 45 degrees by squeezing your shoulder blades together without letting your back arch or head drop.
- Return to the starting push-up position by straightening your arms, separating your shoulder blades, and pulling your shoulder down.
- Engage your glutes to raise your right leg slightly above the ball, no higher than in line with your hip. Press into your right hand (same hand as the foot that lifts) to stabilize your torso. Really brace your abs, avoid tilting or rounding your shoulders, and keep your spine still.
- Lower leg onto the ball and repeat push-up, this time with the left leg raise.
- Do 12 reps on each side.
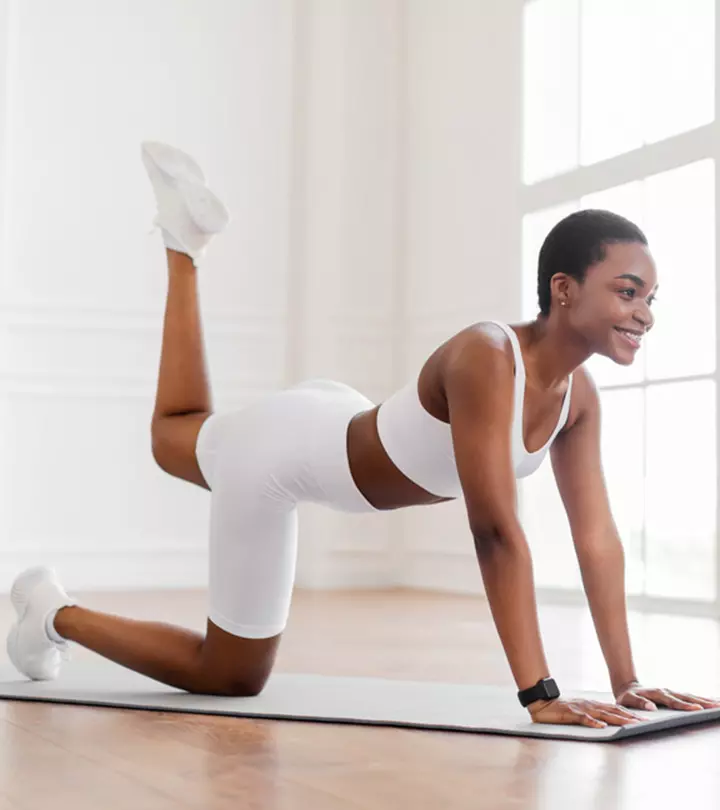
3. Donkey Kick:
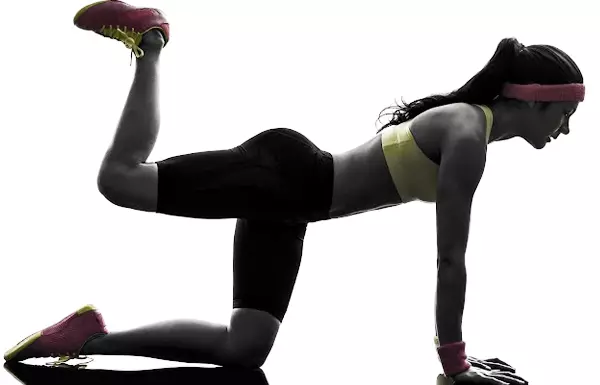
- Come to hands and knees: wrists beneath shoulders, knees beneath hips, arms straight, shoulders down, abdominals in. Keep your back flat and neck and head in line with your spine.
- Engaging your abs, lift and extend your left leg straight back in line with your hip. Then bend your left knee perpendicular to the floor so that your thigh is parallel to the floor. Do not let your lower back arch – squeeze your glutes.
- Try to lift your left thigh slightly higher by squeezing your glute, not arching your lower back. Hold for a few seconds and straighten the leg back in line, making sure your lower back doesn’t arch and your torso stays stable.
- Lower leg down to starting position.
- Repeat on another side. Do 5 reps on each side.
 Fun Fact
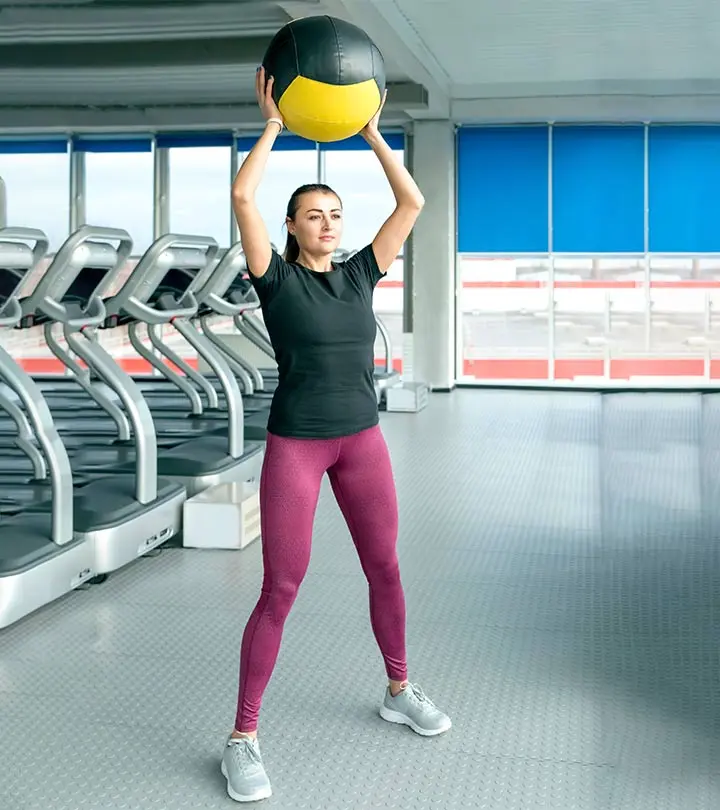
4. Woodchopper Squat:
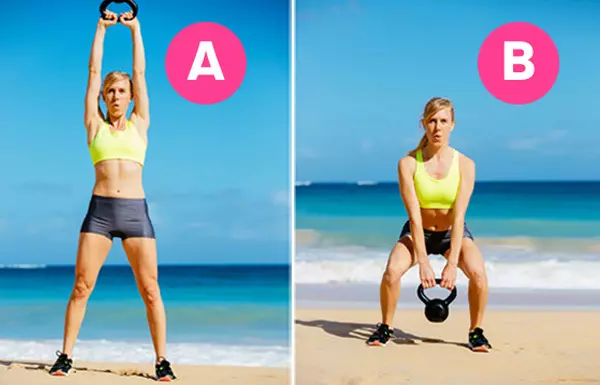
- Stand with feet slightly wider than hip width apart, abdominals engaged, chest open, and back straight. Hold a dumbbell or kettlebell with both hands in front of your chest.
- Raise the weight overhead, extending your hands overhead slightly behind your head without letting your rib cage flare outward.
- Lower the dumbbell powerfully towards your hips, bringing your arms down in one swift motion, as if chopping wood. Keep your arms straight as you squat at the same time by sending your hips back, bending your knees, and keeping your lower back flat.
- Keep the dumbbell lowered, but not touching the floor, at the bottom of the squat. Do not round your spine. Ensure that knees press out over centers of feet and weight stays back towards heels.
- Straighten your legs and bring your hips underneath you to come up from the squat, squeezing your glutes. Bring the weight to your chest and repeat.
5. Split Squat With Triceps Extension:
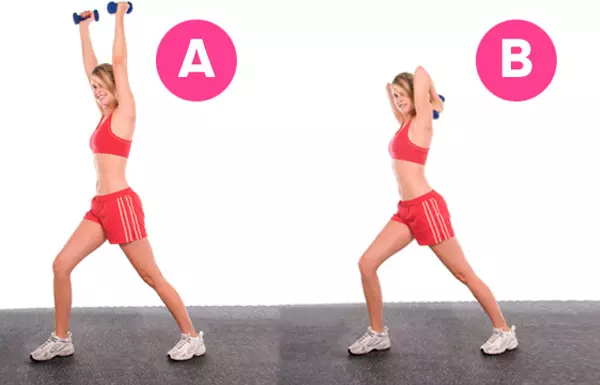
- Stand in a split squat lunge position: front foot planted on the floor with leg straight, and back leg straight behind you with heel all the way up so you are balanced on the ball of your foot. Brace your core and keep your hips square.
- Hold one dumbbell at your chest with both hands.
- Bring the dumbbell up, extending both hands overhead. Do not let your lower back arch or ribcage flare.
- Lower the dumbbell behind your head, keeping your forearms parallel to the floor, and the back of your upper arms perpendicular (elbows forward) without hunching your shoulders.
- At the same time, perform a split squat, bending both knees to 90 degree angles while making sure your knees track over the centers of your feet.
- Pause for 2 counts. Straighten your arms overhead by pressing through your triceps, straightening your legs at the same time. Keep your shoulders down.
- Return the weight to your chest.
- Do 10 reps on one side and then switch to the other.
6. Reverse Table Top with Leg Lift:
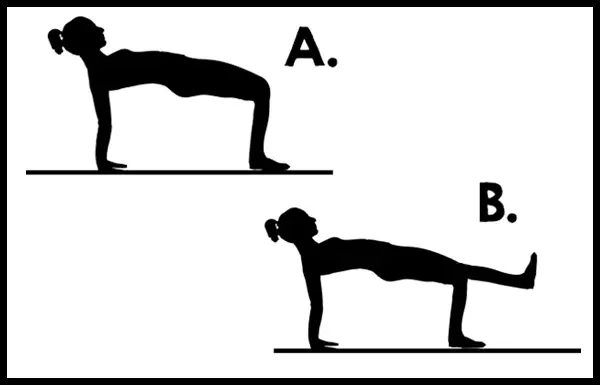
- Sit on the floor with knees bent, feet flat on the floor, back straight and your palms on the floor behind you, fingers pointing out to the sides.
- Push off from the palms and feet, raising your hips to form a reverse tabletop so your hips are up in line with your knees and legs are bent at 90-degree angles. Be sure to use your abs to avoid arching your lower back. Press your shoulders down and lift your chest up – make sure your arms are straight.
- Hold for a few seconds and then lift one leg up, knee bent so that your lower leg is perpendicular to the thigh and parallel to the floor.
- Keep your hips square as you lift your leg – don’t let your pelvis or torso tilt or wobble. Really engage your abs and glutes.
- Hold for a few seconds and lower your leg to the reverse tabletop with control. Repeat leg lift on the other side.
- Do 10 reps on either side.
7. Squat with Front Raise
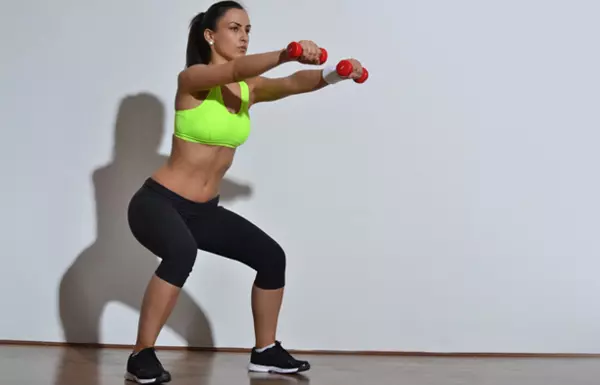
- Stand with feet slightly wider than hip-width apart, toes turned out slightly, abs in, shoulders down, back straight. Hold one dumbbell in each hand with arms down by your sides.
- Lower your body into a squat, sending your hips back and bending your knees over the centers of your feet (do not let knees roll inward), shifting your weight back towards your heels. Keep your abs in and back flat.
- At the bottom of the squat, raise your arms out in front to shoulder level, palms down. Keep your arms straight and shoulder-width apart, and do not let your shoulders lift. Don’t let your wrists buckle.
- Lower arms down by your sides.
- Come up from the squat by straightening your legs and bringing your hips underneath you, squeezing your glutes.
- Do 12 reps.
8. Mountain Climber:
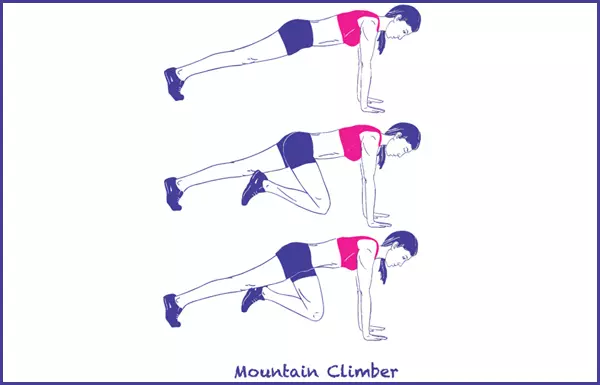
- Come into a plank on your hands. Keep wrists straight below shoulders and a straight line from head to heels, pulling your abs in and engaging your glutes to prevent your lower back from arching. Pull your shoulders down and lengthen through your upper back.
- Draw your right knee into your chest, using only your abs, keeping your right foot off the floor. Hold for a couple of seconds and extend your right foot back into the plank.
- Do not let your hips wiggle or weight shift back behind your wrists.
- Repeat on the other side. Do 10 reps on either side.
 Quick Tip
9. Swiss Ball Chest Press:
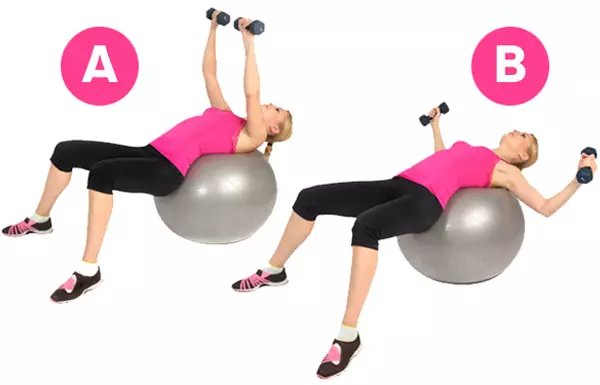
- Sit on top of a stability ball with dumbbells in both hands. Keep your feet on the floor.
- Slowly roll your back down the ball till the middle of your upper back is flat on the ball and your knees are at a 90-degree angle, feet flat on the floor.
- Engage your abs to keep your back pressed into the ball. Squeeze your glutes and push into your heels.
- Bring the weights to your shoulders with your palms facing each other. Press the dumbbells up over your shoulders with palms facing each other, keeping your shoulders down. Then turn palms to face away from you.
- Slowly lower your arms, keeping your palms facing away from you and bending your elbows out to the sides so that your upper arms are just above parallel to the floor. Make sure your arms open evenly.
- Contracting your chest muscles, press the dumbbells over your chest. Keep your shoulders down and fully straighten your arms. Brace your abs and glutes to keep your spine still.
- Hold the top position for a few seconds and then lower and repeat.
- Do 12 reps.
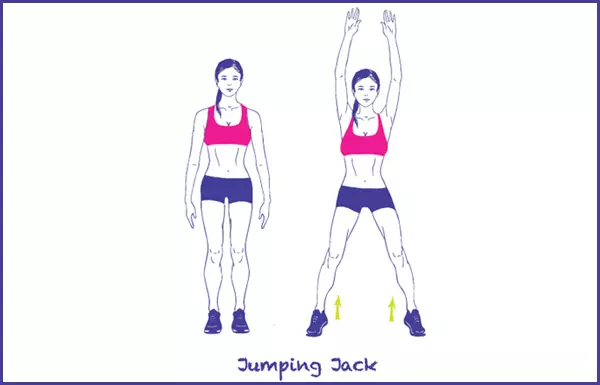
10. Jumping Jacks:
Jumping jacks are one of the best body composition exercises. Kelly, a blogger with a pear-shaped body, began a HIIT training routine. She writes, “I’ve started doing HIIT training for half an hour 4 times a week, and although I still don’t practically enjoy it, it’s a small time commitment for visible results (i).” Her experience brought about a noticeable increase in strength. She says, “I feel stronger each day.” While her weight loss progress on the scales was gradual, the changes were reassuring, and she also received compliments from others.
- Stand with feet hip width apart and arms by your side.
- Jump up, opening feet to the side and arms overhead.
- Jump in, bringing feet together and arms down by your sides.
- This is one jump. Do 2-3 sets of 10 each.
- For more challenge and glute work, turn your legs out when you jump out.
11. Shoulder Taps:
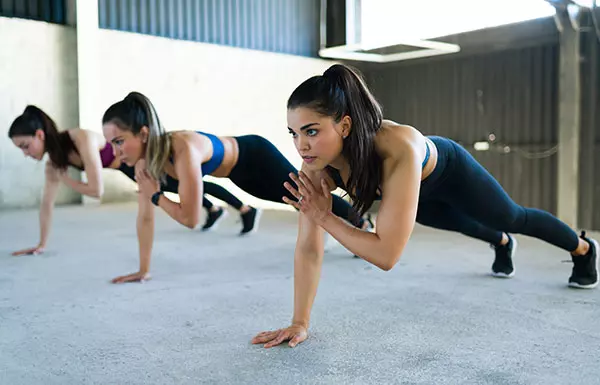
- Start with a high plank position. Keep your hands under your shoulders and ensure your body is positioned in a straight line from head to toe.
- Tighten your core muscles to stabilize your body.
- Exhale and lift your right hand to touch your left shoulder. Avoid rocking or swaying.
- Place your hand back on the floor as you inhale.
- Now, lift your left hand and touch your right shoulder, and place it back on the mat. This is one repetition.
- Do 2 to 3 sets of 15 to 20 reps.
Women with pear-shaped bodies tend to be more curvy and store more fat in the hips and thighs and have narrow shoulders, waists, and bust, and as a result often want to target the muscles of the thighs and glutes. The above mentioned exercises specifically target the thigh, hips, and leg muscles, which will help tone, shape, and strengthen the lower body of pear-shaped women. Combine these exercises with full-body workouts and proper posture to get your voluptuous, pear-shaped body into the proper shape and form.
Alongside these exercises, you can also try a few fashion hacks to make your pear-shaped body look more appealing. A well-fitting outfit can significantly improve the appearance of your body shape. Here are some helpful dos and don’ts to keep in mind.
Key Takeaways
- A pear-shaped body type mostly stores fat around the hips and thighs with slimmer shoulders and waist.
- Exercises like donkey kick and woodchopper squats help in achieving a toned core and waist.
- Increase the reps of these exercises gradually to improve your endurance and strength.
- Combine these exercises with full body workouts and proper posture to get a strong and healthy form.
Fashion Dos And Don’ts For A Pear-Shaped Body
Do:
- Opt for A-line skirts and dresses to flatter your hips and thighs.
- Pick high-waisted pants to define your waist and elongate your legs.
- Wear fitted tops or jackets that highlight your shoulders and upper body.
- Add bright colors or patterns to your upper body to balance your shape.
- Try structured blazers to create a balanced, streamlined look.
- Opt for pointed-toe shoes to elongate your legs and create a balanced look.
- Choose heels or wedges to lengthen your silhouette.
- Wear ankle-strap sandals to draw attention upward and balance your proportions.
Don’t:
- Wear low-rise jeans or pants that draw attention to your hips.
- Wear overly tight bottoms like skinny jeans that may emphasize your lower half.
- Go for bulky fabrics or heavy embellishments around the hips and thighs.
- Wear tops that are too loose or shapeless, as they can make your proportions seem unbalanced.
- Wear overly chunky or bulky shoes that can make your legs look shorter.
- Get shoes with heavy details around the ankle as they can add bulk to your lower half.
- Wear flats with a round toe, which may shorten the appearance of your legs.
Infographic: No-Equipment Exercises For Pear-Shaped Bodies
Pear-shaped bodies store more fat in the hips and thighs. But, there are several exercises that can help you tone your body, strengthen the lower body, and get the hourglass figure of your dreams. While most exercises require equipment like dumbbells for best results, there are a few exercises that you can do even if you don’t have them.
Check the infographic below to know some no-equipment exercises you can try to tone your pear-shaped body.
Some thing wrong with infographic shortcode. please verify shortcode syntaxA pear shaped body is defined by a bottom-heavy body, narrow waistline, and slim upper body features. The above mentioned exercises that target the thighs, hips, and leg muscles, help tone,shape, and strengthen the heavy lower body of pear shaped people. Along with these, maintaining the right posture, following the steps and reps accurately, and aiming for a full body workout would help keep your pear-shaped body in proper shape and form.
Frequently Asked Questions
Is it possible to change a pear-shaped body?
Maybe. You can modify your diet and exercise routine in order to transform your pear-shaped body to some extent. However, the changes may be limited due to the influence of genetics on your overall body shape.
Can walking influence a pear-shaped body?
While it is true that walking can work on your leg muscles and tone them, it may not be sufficient to modify your pear body shape.
Is a pear-shaped body feminine?
Yea, a pear-shaped body is considered very feminine as it comes with wide hips. Many people believe that women with wide hips are more fertile.
Is cycling good for pear shapes?
Yes. A pear-shaped body has fat accumulation in the hips, buttocks, and thighs. So, it is important to do lower-body exercises like cycling. Further, if you wish to lose some pounds, cycling is one of the best cardio exercises for weight loss.
Start toning your thighs and hips with this simple workout for pear-shaped bodies! Watch this video to feel and look your best.
Personal Experience: Source
StyleCraze's articles are interwoven with authentic personal narratives that provide depth and resonance to our content. Below are the sources of the personal accounts referenced in this article.
i. if not now, when?https://priclipear.wordpress.com/2018/09/17/if-not-now-when/
Read full bio of Gabbi Berkow
Read full bio of Shirin Mehdi
Read full bio of Arshiya Syeda
Read full bio of Himanshi Mahajan



Community Experiences
Join the conversation and become a part of our empowering community! Share your stories, experiences, and insights to connect with other beauty, lifestyle, and health enthusiasts.