How To Do A Donut Bun: 2 Easy Styles And Step-By-Step Guide
Flaunt your tresses in this versatile topknot hairstyle to look stylish and trendy.
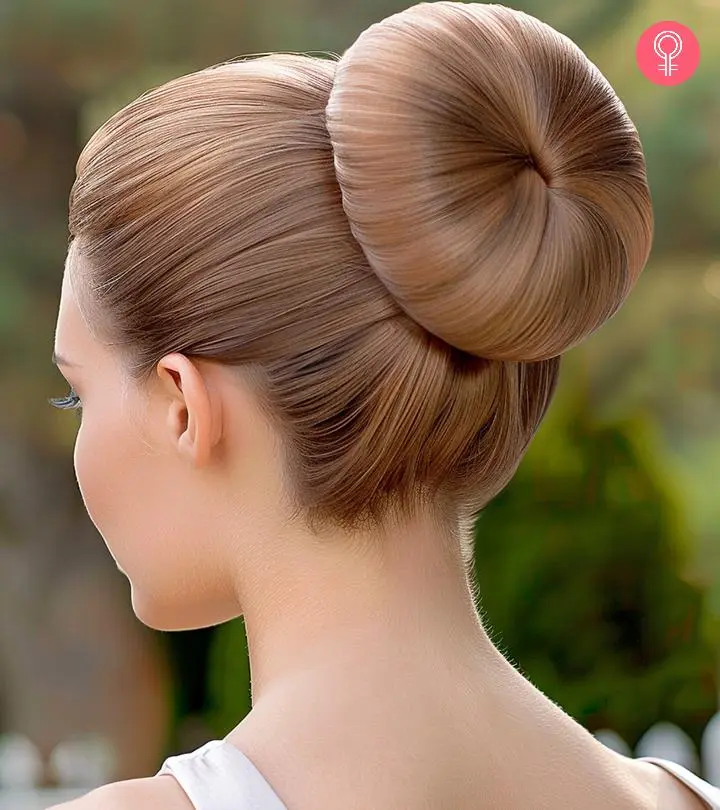
Image: Midjourney/ StyleCraze Design Team
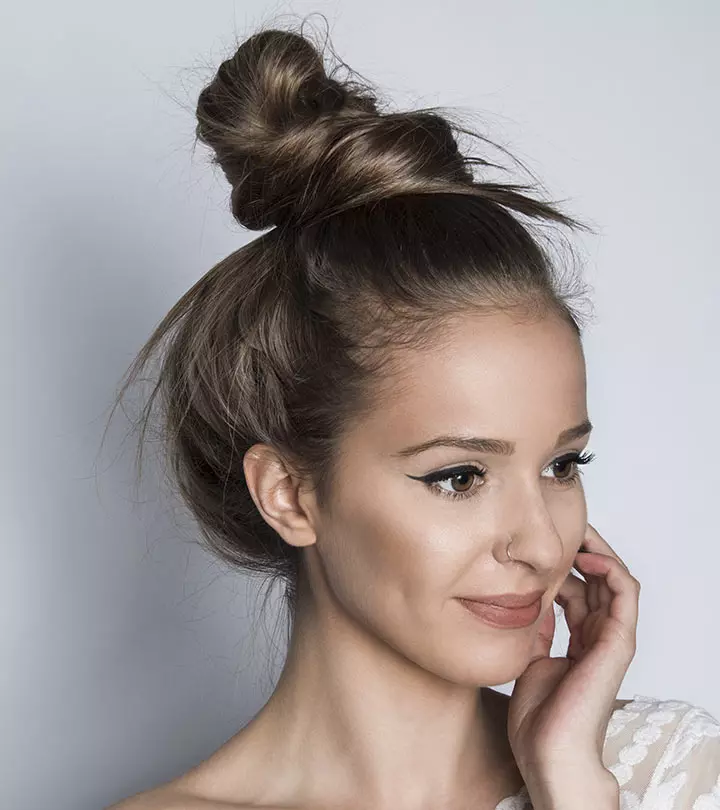
No, we’re not discussing glazed baked goods, but something equally delicious — the donut bun! This hairstyle has been flooding our feed for years now, so we decided to break it down for you. Keep reading to learn how to do a donut bun yourself. But first, here’s some insight into this hairstyle. The donut bun is a versatile topknot hairstyle that takes not more than 5 minutes to tie. This hairstyle has become a favorite among many because you can experiment with it and add your unique twist to it.

The bun ideally sits on your crown and looks like a doughnut, hence it’s name. You can find a donut bun hairdo for any mood, season, occasion, or personality. Furthermore, it goes amazingly well with any attire, be it a flowy gown, a statement pants-suit, or casual jeans and sweatshirts. So, it means you can head out to work, leave to be a bridesmaid at a wedding, and then party all night long with the same hairstyle! And when we say that the donut bun is versatile, we mean you can style it with almost any other hairstyle or outfit. You can pair it with braids or a half-up, half-down look. You can style it sleek and neat or messy and cute — donut bun works incredibly well both ways. Once you learn how to style your hair in a donut bun to perfection, you can play around with it to personalize it with your creative touch.
 Before You Get Started
- Face Shape: A top donut bun looks great on oval faces as it defines the cheekbones and emphasizes your features.
- Preparation: Always detangle your hair before tying it in a donut bun to prevent hair damage and breakage.
- Precaution: Avoid keeping your hair tied in a donut bun (or any bun) for too long as it may cause hair breakage.
- Hair Texture: A donut bun is ideal for almost all hair textures. But if your hair is extremely curly or thick, use some hair gel to slick down your tresses first.
- The Bun Maker: Ensure that the donut bun elastic is sturdy and not worn out. Otherwise, the damaged elastic of the bun will stick out and ruin the bun.
So let’s jump right in! Keep reading to learn how to make a bun in a graceful manner! Then try it out and add your own flair to it!
Things You Need:
- A Donut Bun (easily available at a fancy store)/A Piece Of Elastic
- A Tail Comb
- Some Plastic Rubber Bands
- Some Bobby Pins
- Hair Spray/hair mousse/hair gel
In This Article
2 Ways Of Styling The Classic Donut Bun
1. Braid Wrapped Donut Bun
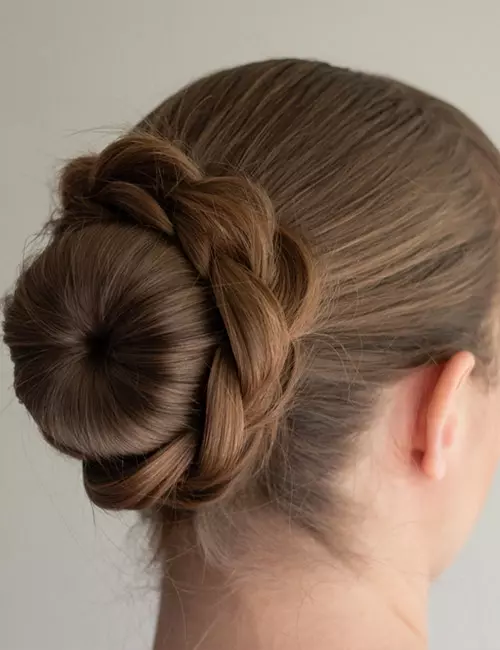
A braid wrapped around the donut bun! This simple twist to the classic updo makes it fun and quirky. Try this variation of the donut bun with your casual outfits on a summery day out with friends. Add some cute hair clips at the side to enhance the look of this chic formal hairstyle.
Procedure:
- Make a ponytail like you normally do for a donut bun.
- Take a section of hair from the ponytail and make a 3-strand braid.
- Make a basic donut bun. Then, take the braid you made earlier and wrap it around the bun.
- Secure the braid with bobby pins and spritz some setting spray.
2. Front Wrapped Donut Bun
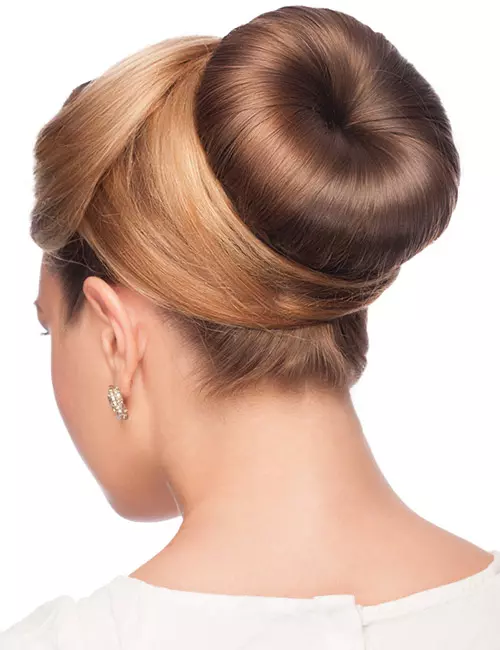
Going for a formal gathering and do not want the slicked-back front look with the donut bun? Try this wrapped style instead. The front hair wrapped around the bun will uplift the hairdo and make your face appear smaller. This modern donut updo for long hair will turn heads wherever you go!
Procedure:
- Brush your hair and create a middle partition.
- Separate a section of hair from both sides and comb back the rest of the hair.
- Make a high ponytail at the back and then make a donut bun.
- Now, take the hair section from the right and wrap it on the left side of the bun.
- Take the other section and overlap it over the already wrapped section.
- Secure everything with some bobby pins and you are good to go!
You can pin fragrant flowers or ornamental clips on the wrapped section to elevate the hairstyle. Wear a scarf or bandana if you want a boho look.
 Quick Tip
Key Takeaways
- The donut bun is one of the most trendiest and flexible topknot hairdos that can be done in minutes.
- The versatile hairstyle can be adapted for both casual and formal events. It effortlessly complements countless outfits from chic gowns and office suits to cutesy tees and baggy hoodies.
- The donut bun is best suitable for oval face shapes and helps in accentuating the cheekbones.
- Use hair gel while creating a donut bun if you have curly or thick tresses.
- There are two simple ways of creating the modest hairdo, namely, the braid-wrapped donut bun and front wrapped donut bun.
A DIY Step – By – Step Guide For Doing The Donut Bun:
Step 1:
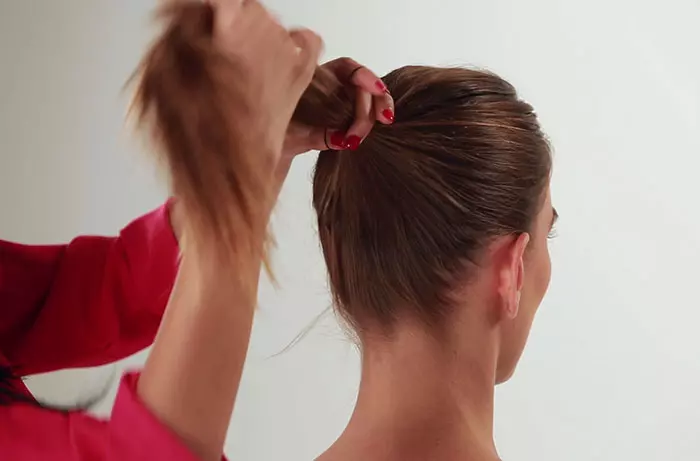
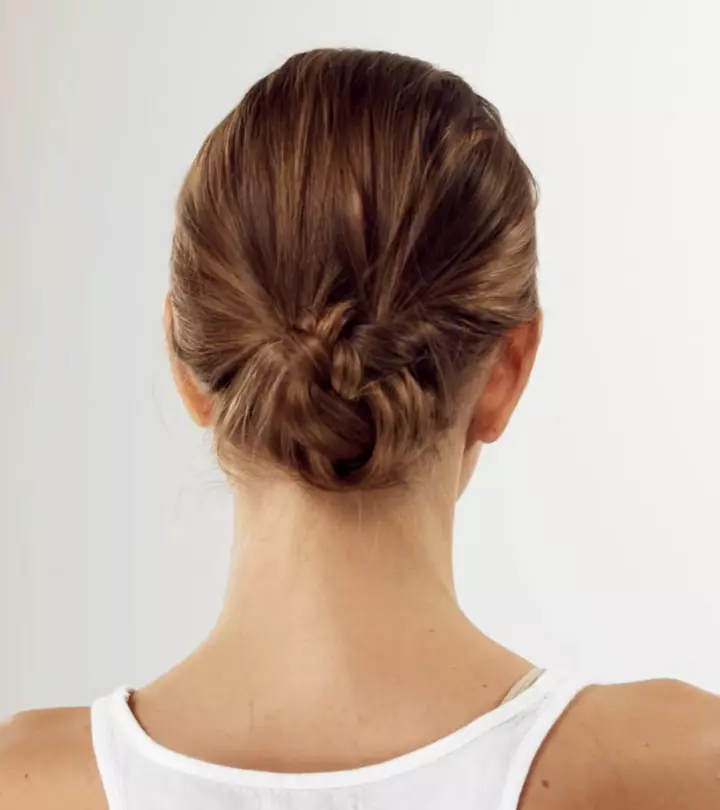
Ensure your hair is dry and prepped well. Detangle it with a wide-toothed comb and spray some heat protectant to minimize damage from heat styling. Push all your hair behind with a tail comb, and hold it into a neat ponytail. Tie it up using a rubber band. This is for a basic and neat air hostess bun, but the neatness quotient really depends on the hairstyle you want to sport. If you want a messy look, or if you want a French braid in the front, you need to make allowance for that before you start the bun. In case you want the bun on the side, you will have to create your ponytail accordingly.
Step 2:
Slip the donut bun, or the elastic, into the ponytail.
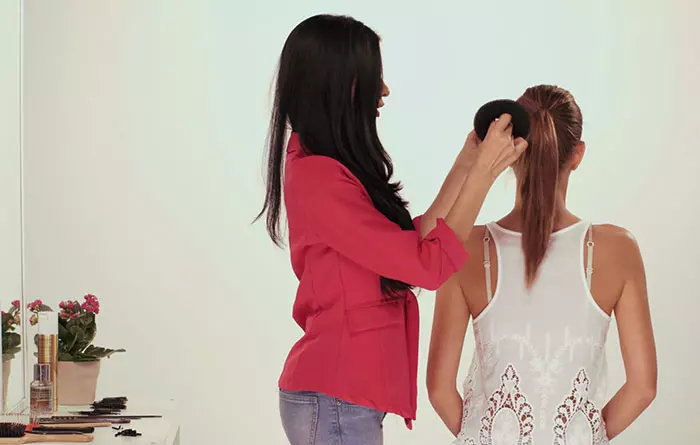
Then, cover the bun with your hair; you will have to use your hands to hold the hair tight.
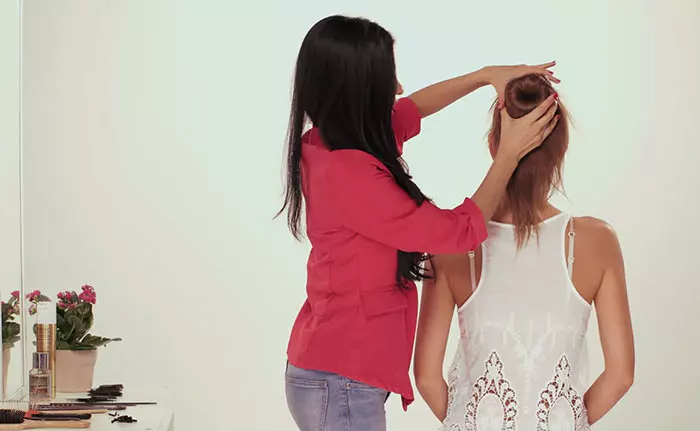
Once that is done, you could use another rubber band to secure it.
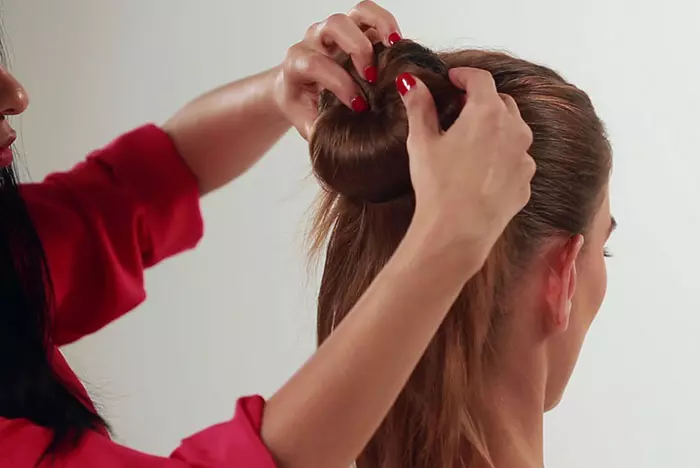
This step is the most important, and can also get a little tricky. With a little practice, you will attain perfection. Initially, you might want to use a mirror that will allow you to see how you work the bun. Once you master the technique, it is going to be much simpler.
Step 3:
Now, you must be wondering what to do with the remaining hair that is sticking out.
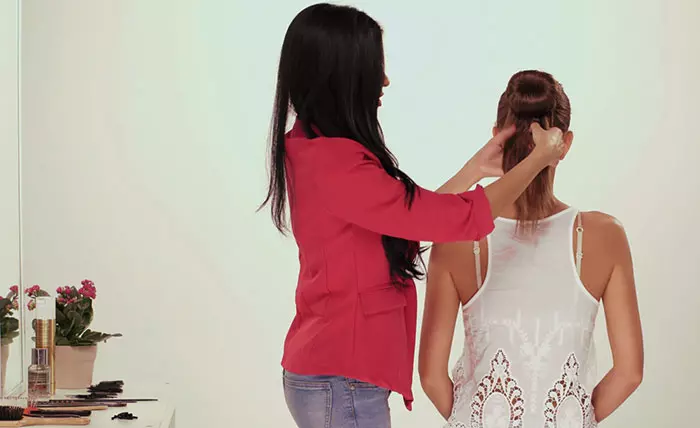
Well, all you need to do is divide it into two parts, and twirl each part around the bun.
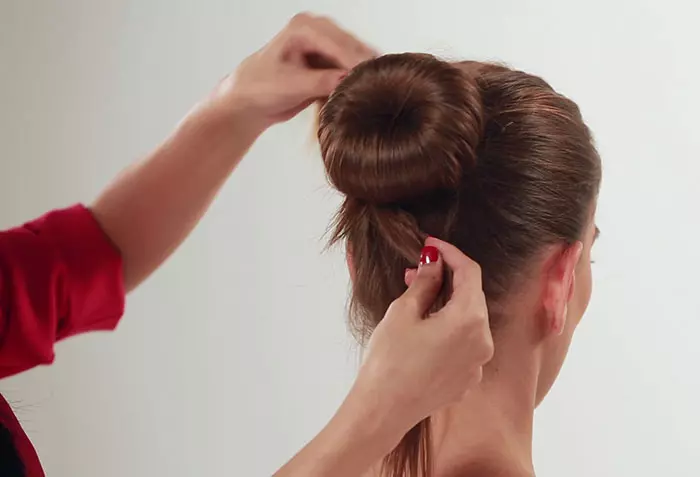
Secure this excess hair with bobby pins. In case you want to amp up this simple bun, you could braid the leftover hair, and then secure it to give your bun a fancy frame.
 Quick Tip
Step 4:
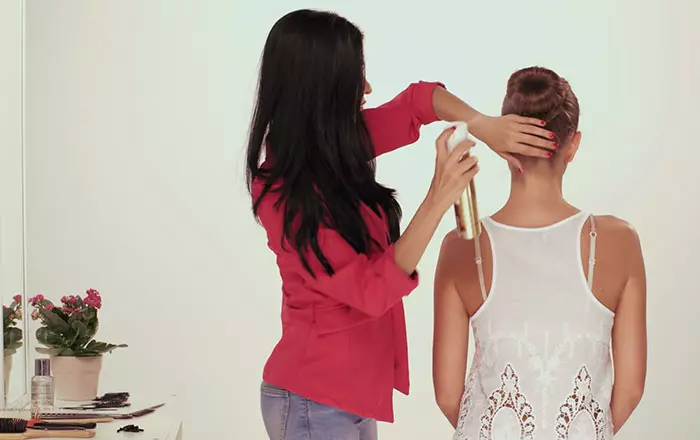
Spritz some hair spray to neaten the stray strands of hair, and to keep the bun in place for a longer duration. Use your tail comb to put all the hair in front in place. There you go – another quick fix hairstyle in your beauty look book!!
Also, you can find many videos and blogs that show you how to add a personal touch to a donut bun. So your updo always looks different.
Marta Lúthien, a physicist and blogger, shares her experience of wearing donut buns and how she does them in her personal blogs. She discovered her enhanced love for donut buns while cosplaying as Missy (Doctor Who) and warns against wearing them too often or too tight. She says, “In order to prevent any major traction issues, I also wear a top knot only sporadically, or alternate them with braids or buns/ponytails at middle/low height (i).”
Infographic: The Classic Donut Bun Tutorial
The donut bun is the perfect cheat code updo that looks elegant and flawless for a formal event. While it might need a little getting used to at first, once you master it your classy bun will take only a few minutes to achieve.
Scroll down for an infographic you can use as a quick reference for a donut bun tutorial.
Some thing wrong with infographic shortcode. please verify shortcode syntax
The donut bun is a perfect hairstyle for an everyday look. It is a versatile top knot you can try. You can create this hairstyle with simple steps, which is why it’s a big fashion trend. It is suitable for any occasion and looks pretty on all hair types. But how to do a bun? The instructions in this step-by-step guide explain how to do it easily. Also, spritz some hairspray to set the hair strands. It also keeps your bun in place for a longer duration.
Frequently Asked Questions
How do you tie a donut bun with short hair?
Use a small hair donut for short hair. Pull the hair into a low ponytail and put it through the donut. Secure the ends of the hair with bobby pins around the hair donut. If the bun is loose, pin it with the hair on your head.
What size hair donut should I get?
The size of a hair donut ranges from small to large. Get a large donut bun maker for long hair and a small one to create a cute bun for short hair.
How do you do a donut bun with a sock?
Cut the toe end of a sock and roll it up through itself to make a hair donut.
Some thing wrong with illustration image shortcode. please verify shortcode syntax
Wondering how to create a hair donut? Then check out this easy-to-follow tutorial video and learn how to create this unique style.
Personal Experience: Source
StyleCraze's articles are interwoven with authentic personal narratives that provide depth and resonance to our content. Below are the sources of the personal accounts referenced in this article.
i. Hairstyles – Top knot donut bunshttps://rionashairblog.blogspot.com/2017/12/hairstyles-top-knot-donut-buns.html
Read full bio of Danielle Wilkinson Brucklacher
Read full bio of Anjali Sayee
Read full bio of Asmita De
Read full bio of Aparna Harry






Community Experiences
Join the conversation and become a part of our empowering community! Share your stories, experiences, and insights to connect with other beauty, lifestyle, and health enthusiasts.