How To Do A Hair Wrap: Different Methods To Style
Discover easy hair wrap techniques for a vibrant, no-commitment style boost!
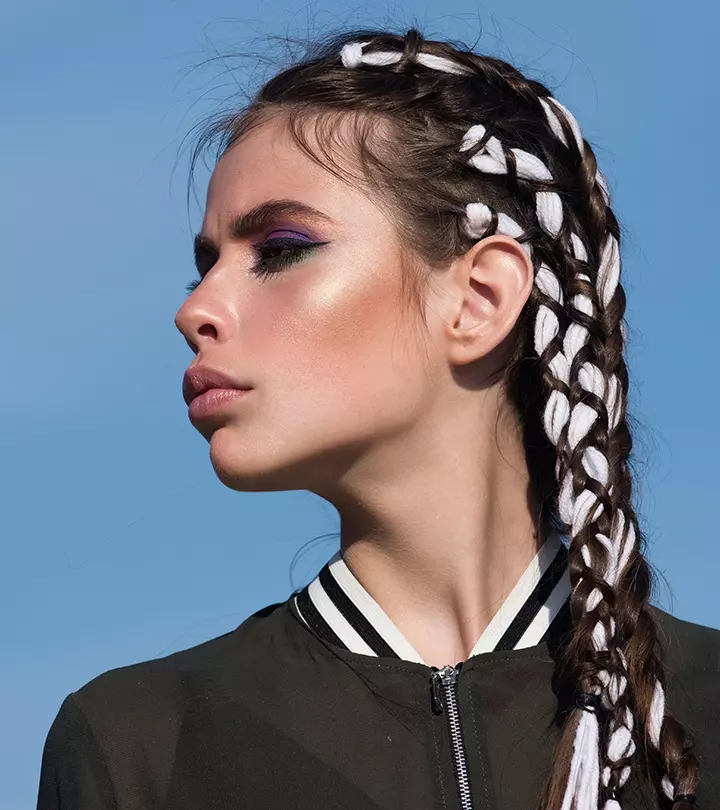
Image: Shutterstock
Learning how to do a hair wrap is a simple yet impactful way to infuse your regular hairstyle with a pop of color. Hair wraps are core expressions of personality and style that anyone can enjoy, ideal for achieving a vibrant look without permanent dye. They offer a laid-back vacation vibe while making a bold style statement. Once a tell-tale sign of a free-spirit, the hair wrap has seen a recent spike in its reputation, trending among those who wish to sprinkle originality into their daily hair routine without worrying about hair damage from dyes. With a myriad of styling possibilities that come with no strings attached, it is clear why hair wraps continually capture the interest and imagination of fashionistas everywhere. Learn how to do a hair wrap and the different styles of it through this article. Scroll down to read more!
 Before You Get Started
- Do not try hair wrapping wet hair, as it can damage your locks. It is better to work on damp or dry hair.
- This hairstyle works on all hair types and healthy hair textures.
- Ensure to follow a hair care routine so your hair is healthy before you try this hairstyle.
In This Article
Different Types Of Hair Wraps
These wraps can be a fun DIY fashion project, ideal for shaking up your style. Diving into the world of hair wraps, you will find quite a variety to choose from, such as:
- Simple Thread Wrap
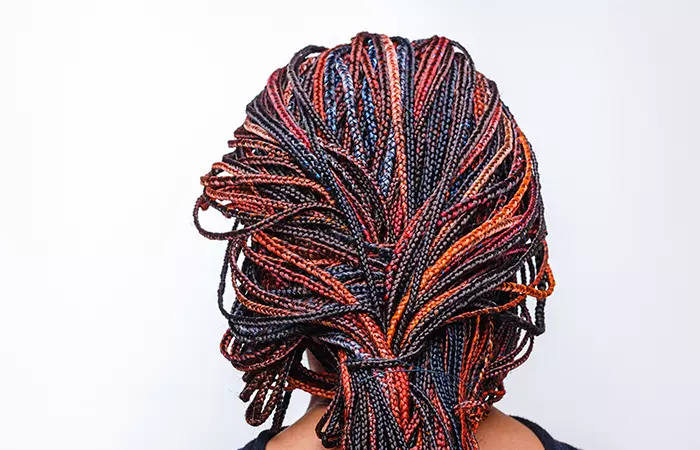
This style is created by intricately wrapping embroidery threads around a section of braided hair. You can choose an array of colorful threads and spiral them tightly for a classic, streamlined look. While you can braid your hair and then wrap it around with colorful thread, this is a more traditional method of hair wrapping where you weave the thread with the braid. It is the go-to starting point for anyone interested in learning how to do a hair wrap.
- Beaded Wrap
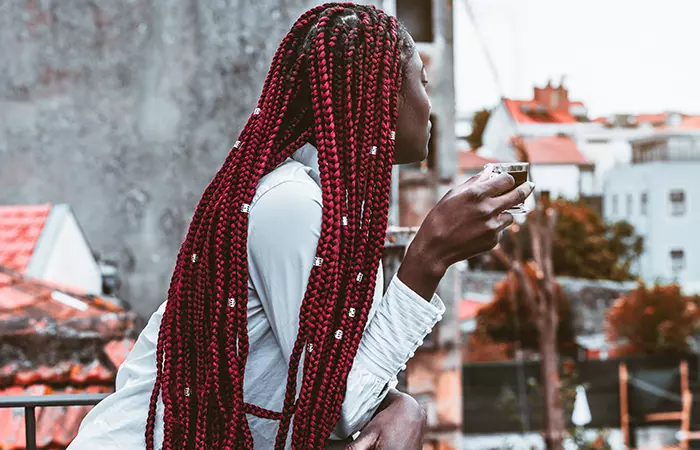
This wrap intertwines sparkling beads with the hair wrap process for those who like a bit more shine. Select beads that complement or contrast with your thread colors and weave them into your braid for an eye-catching effect. This style brings a playful and decorative touch to an otherwise simple hair wrap.
- Chunky Yarn Wrap
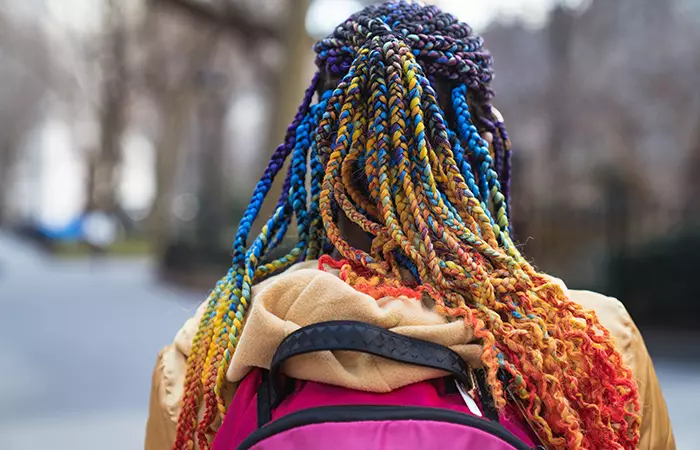
If bold and textured is more to your taste, then this wrap will surely capture your interest. This creative hair wrap style stands out for its volume and tactile appearance that are achieved by swapping traditional threads for sturdier yarn. Its thickness makes a fashionable impact, making it a fun way to style your kinky twists. Just make sure your hairs are trimmed to give your mane that healthy look.
- Signature Wrap
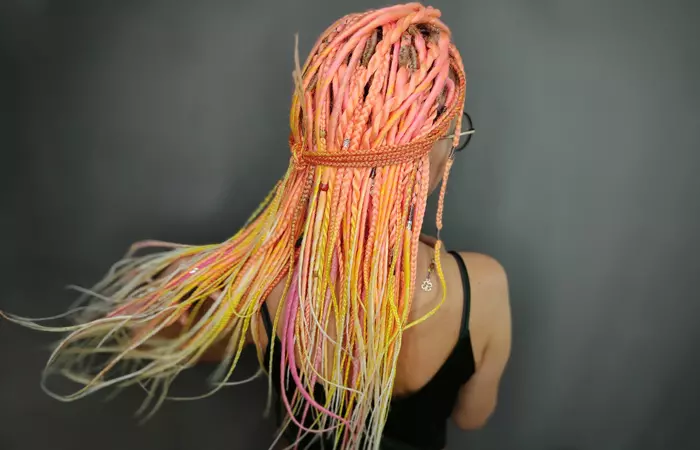
This beautiful hair wrap combines different textures and elements, from threads to yarns and beads to charms, allowing you total freedom to create a wrap that’s as unique as you are. Personalize each twist and turn to make a hair wrap masterpiece that reflects your personality and style. It leaves you with colored strands of braided hair that resemble friendship bracelets.
These styles are just a starting point. Feel free to experiment with colors, textures, and embellishments as you master how to do a hair wrap.
 Did You Know?
Now that you are acquainted with the different types of hair wraps, it is time to consider what you’ll need to create your own. Crafting a hair wrap can be incredibly rewarding and a form of personal expression. Get ready to channel your inner artist as we step into the nitty-gritty of everything you’ll need for hair wraps.
Key Takeaways
- Hair wraps integrate color and creativity into your look without permanent change.
- Hair wraps come in various styles, including beaded, yarn, and signature designs.
- To keep hair wraps vibrant, minimize water exposure, and handle with care.
- Removing a hair wrap simply requires cutting the bottom knot and unwinding.
- They are a fun, commitment-free way to try colors and protect your hair.
Things You Need For Hair Wrap
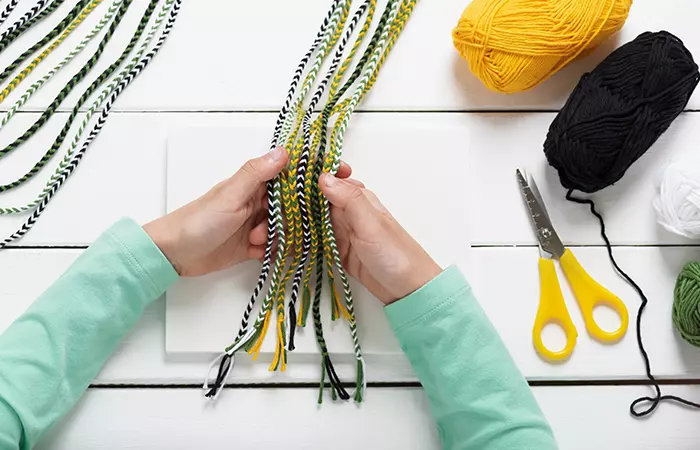
When you are getting ready to dive into crafting a hair wrap, ensure you have the right supplies on hand first. Here’s a clear-cut list of the essentials for when you decide it’s time to learn how to do a hair wrap:
- Colorful Embroidery Floss, Thread, Or Yarn: Gather a selection of your favorite colors. Whether it’s rainbow shades for a vibrant wrap or subtle tones for a more muted approach, these threads will form a colorful cocoon around your hair.
- Hair Comb Or Hair Brush: A comb is essential to tease the hair you are going to wrap and manage any rogue strands.
- Scissors: You will need a sharp pair of scissors for cutting your thread to the desired length. Precision is important for a neat finish.
- Hair Ties, Elastics, Or Rubber Bands: These will be used to tie off the end of your hair braid and keep your wrap secure at the start and finish.
- Beads, Charms, Or Feathers (Optional): Personalize your wrap by adding in some decorative elements. Pop on some beads or charms wherever you want them to shine through.
- Bobby Pins: You can use them to hold the colorful threads in place while you are braiding it in.
- Hair Extensions: You can also use extensions or hair weaves (for a natural look) if you have shorter hair or curly hair.
- Hair Serum: You can use hair serum to make your hair more shiny and manageable.
These tools and materials create the foundation for a great hair-wrapping session—now, you only need to bring your creativity and patience to the mix!
With your essential tools and decorative elements at the ready, transitioning from prep to action is your next exciting step. From the initial braid to the final knot, this step-by-step guide will walk you through each stage so you can add a personal touch to each wrap. So, roll up our sleeves and start your wrapping process!
How To Do A Hair Wrap?
Ready to wrap up your style with some flair? Let’s get into how to do a hair wrap. Depending on the look you are aiming for, there are a few different methods to consider. Whether you want something simple and chic, playfully intricate, or uniquely whimsical, there’s a wrapping style just for you.
1. Simple Hair Wrap Method
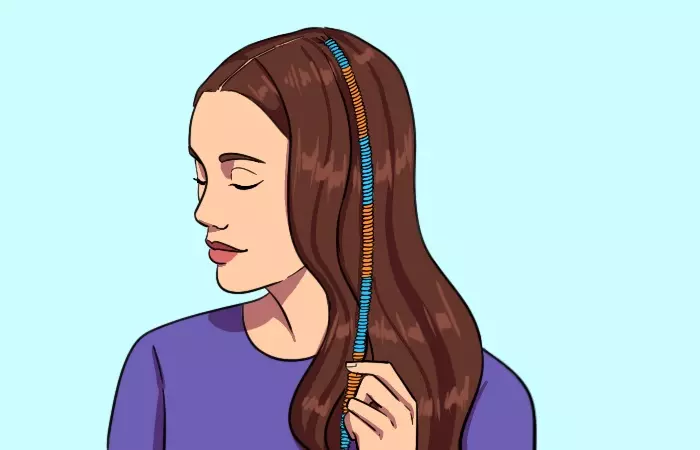
- Start with well-combed and detangled hair. You can add a serum or texturizing powder or spray for better grip.
- Braid a section of your hair and secure the end with a hair elastic.
- Cut threads 2-3 times longer than the strand; use multiple colors if desired.
- Use a bobby pin to secure it in place while wrapping.
- Securely tie threads at the base of a small, tight braid.
- Wrap the first color thread continuously and tightly around the braid.
- Tie off the current thread to change colors, then choose the next color and continue wrapping.
- When finished, double-knot the thread at the bottom of the braid and cut off excess thread.
Jessica, a blogger, shares her experience of tying a hair wrap on her daughter’s hair. She shares a tutorial, advising, “For designs or patterns, you can do a lot with just wrapping the string. You can make each color a certain length and do patterns that way. Or alternate colors after wrapping each piece of string once around the hair… If you want something a little more complicated, and you can also make Xs around the solid colors you have (i).“
2. Forward Knot Hair Wrap Method
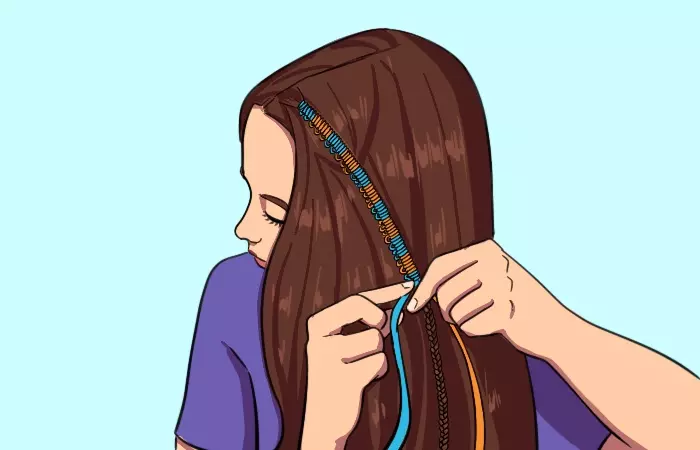
- Start with a braided section of hair with a thread tied at the start of the braid.
- Make a forward knot by looping the thread over and under the braid, pulling it through the loop, and tightening it.
- Continue the knots until ready to change color, then simply use a new thread and repeat.
- Secure the end with a finishing knot and trim excess thread when done.
3. Chinese Staircase Hair Wrap Method
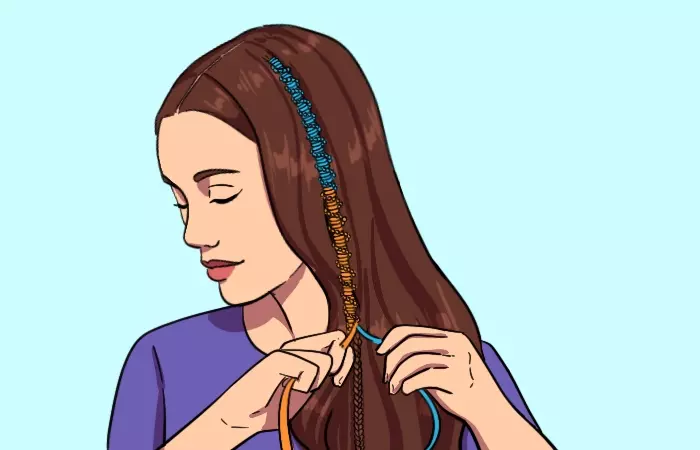
- Prepare a braided section of hair with a thread tied at the top.
- Make a ‘4’ shape around the hair and loop the thread through, pulling it to the top of the braid. Keep doing this in the downward direction.
- Keep repeating the knotting motion to build the wrap, ensuring a consistent spiral pattern as you move down the braid.
- Change thread colors as you go by tying in a new thread and continuing the knot pattern.
- Knot the final thread securely at the end of the braid and trim off the excess embroidery thread.
- You can add beads and charms to the braid to add more oomph. This is an optional step.
As you become more comfortable wrapping those braids, it’s also important to note the added perks of this trendy technique. From protecting those precious strands to providing a palette for color play, hair wraps do more than just make a fashion statement. Learn more in the next section.
Benefits Of Hair Wrapping
Wrapping your hair is not only about taking your style quotient up a notch. Delving into the benefits of wrapping hair, one finds it’s much more than a fleeting fashion trend.
- Locks In Moisture: Keeping your hair enclosed in threads helps retain its natural moisture, combating dryness.
- Non-committal Color Experimentation: Wraps let you test out colors without using dyes, sparing your hair from chemical exposure.
- Styling Break: Hair wraps provide a hiatus from everyday hair styling tools and techniques, reducing heat and manipulation damage.
- Self-Care: Learning how to do a hair wrap can be a serene and meditative DIY practice, offering a mindful break in your routine.
- Easy To Change: Unwrapping is simple, making it easy to switch up styles without any commitment or stress to your hair.
- Long-Lasting: Hair wraps, when done right and maintained with the right care, can last for months to a year.
- Cultural Significance: Hair wraps symbolize heritage, identity, and spirituality in various cultures.
Apart from these benefits, hair wraps can also benefit the environment. This is true for hair wrap varieties made from upcycled materials or sustainable fabrics like cotton or bamboo. These eco-friendly accessories are also reusable, which reduces waste. You may also use your old scarves or fabric scraps as hair wraps to create stylish looks, making them even more planet-friendly.
Ultimately, wrapping your hair strikes the perfect balance between self-expression and hair protection, reflecting personal style while nurturing the health of your hair.
 Trivia
After exploring the benefits of hair wraps, the next step is learning how to make them last. This will ensure that you can enjoy the safeguarding of your strands and the added spice of color without commitment. So, as we transition from understanding the advantages of wrapping hair, focus on the best practices and maintenance tips that will help prolong the life of your hair wraps.
Tips To Maintain Hair Wraps Last Longer
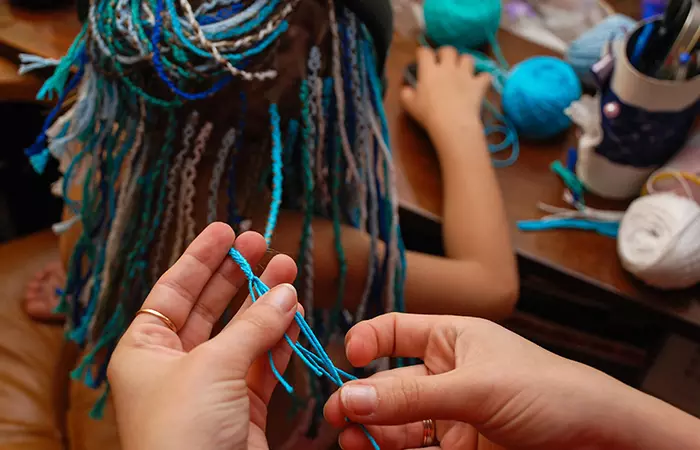
Caring for your hair wraps properly ensures they continue adding a pop of color and personality to your hair for as long as possible. Here are some tips to help your hair wraps stand the test of time:
- Keep It Dry: While hair wraps can be washed, minimizing moisture exposure helps them last longer. Try to keep them dry whenever possible – tuck them away under a shower cap when bathing.
- Gentle Washing: If you find your hair wrap needs a clean, do so gently with a mild shampoo, and avoid heavy scrubbing. Lightly pat it dry after.
- Avoid Harsh Chemicals: Keep your wrapped strands away from bleaches, dyes, or other harsh chemicals that could degrade your wrap or cause the colors to bleed.
- Sun Protection: Just as ultraviolet rays can harm your skin, they may also fade the vibrant colors of your wraps. Protect them with a hat or scarf when spending long periods outdoors.
- Tidy Trims: With time, the ends of your wrap might fray. Carefully trim any untidy fibers with scissors to keep your hair wrap looking neat.
Remembering these tips not only extends the life of your wraps but also leaves your hair healthier. And when the time comes for a new look, unwinding a well-maintained wrap is hassle-free. Make these tips an essential part of your wrapping routine if you want to do a hair wrap that endures.
Now that you are equipped with pro tips to keep your hair wrap looking lively and lasting longer, you may wonder about the day it’s time to bid farewell to that colorful twist. Whether you are ready to return to your natural hair or are keen to explore a new wrap design, removing the wrap is your next step. Learn how to do it in the section below.
How To Remove A Hair Wrap String?
When the time comes to remove your hair wrap, doing it carefully is crucial to avoid snags or damage to your hair. Here’s your straightforward guide on the removal process of a hair wrap string:
- Start at the bottom of your wrap and find the knot where the threads are tied off.
- Using a pair of scissors, carefully snip the knot. Make sure to do this without catching any of your hair strands in the cut.
- Begin to slowly unwind the threads from the bottom up, unraveling the wrap with gentle, patient tugs.
- If you encounter some resistance as you go, pause and gently work out any tangles in the thread or hair.
- Once unwrapped, there may be small bits of thread residue. Comb your hair gently to clear out any lingering pieces.
It is also important to remember not to leave your wraps on for more than a month. Remember, the key here is patience. Give yourself time for this process, especially if you are keen to protect your hair from breakage. When it is time for a new wrap, referring to how to do a hair wrap step by step will come in handy for your next creative expression.
Learning how to do a hair wrap is a fun way to add some style to your look without damaging your hair. Not only does wrapping your hair allow you to experiment with different styles, but it also offers some protection for your strands. When you are ready for a change, removing your hair wrap is just a matter of following simple steps with care. In the end, whether you keep it simple or mix in eclectic beads, a hair wrap is your personal touch to your hairstyle, and how you choose to rock it is all part of the adventure.
Frequently Asked Questions
How long is it ideal to wear a hair wrap?
You can keep a hair wrap on for 2-3 weeks. But, ensure it is not too tight to avoid hair damage.
What hairstyles can I wear with thread hair wraps?
Hair wraps can complement various hairstyles, including braids, twists, updos, or ponytails. You can also experiment with protective hairstyles like bantu knots, box braids, and marley twists.
How long does a typical hair wrap take to complete?
A typical hair wrap can take anywhere from a few minutes to half an hour to complete, depending on the complexity and length of your hair.
Can I do a hair wrap on any hair type?
Yes, you can do a hair wrap on any hair type, whether it’s straight, wavy, curly, or coily.
Can I swim or shower with a hair wrap?
Yes. While you can swim or shower with a hair wrap, it is best to keep it as dry as possible to extend its lifespan.
If you love colors and quirky styles, hair wrap is a great idea without the commitment of hair colors. You can use multiple colors on one section of hair. Here’s an informative video with the full tutorial on doing hair wraps with multiple color threads. Check it out below.
Personal Experience: Source
StyleCraze's articles are interwoven with authentic personal narratives that provide depth and resonance to our content. Below are the sources of the personal accounts referenced in this article.
- Hair Wraps!
https://theladyandtheunicorn.blogspot.com/2011/07/hair-wraps.html
Read full bio of Jessica Shults
Read full bio of Aparna Harry
Read full bio of Anjali Sayee
Read full bio of Vaishali Sinha



Community Experiences
Join the conversation and become a part of our empowering community! Share your stories, experiences, and insights to connect with other beauty, lifestyle, and health enthusiasts.