How To Remove Acrylic Nails At Home Easily – Tips To Follow
Save yourself that expensive trip to the salon by safely removing acrylic nails at home.
While applying acrylic nails is an easy idea to glamorize your look by adding length to your nails, removing them can be quite cumbersome.
However, knowing how to remove acrylic nails can make the whole process less painful. Ideally, we suggest getting it done by professionals at a nail salon, but if time and money are constraints for you, there are a few easy steps on how to get acrylic nails off at home, too. In this article, we show you how to remove nail extensions at home. Keep scrolling!
 Keep In Mind
- Trim The Acrylics: If you have very long acrylic nails, trim them first before attempting to remove them.
- Buff Your Nails: After removing acrylic nails, use a glass nail file to buff and smoothen your natural nails.
- Time Out: Taking a break from acrylic nails for three to six months is recommended by experts to protect your natural nails.
- Caution: Improper or careless removal of acrylic nails can lead to significant long-term damage to your natural nails, leaving them thin, weak, and even tender and raw.
In This Article
Essential Tools For Removing Acrylic Nails At Home
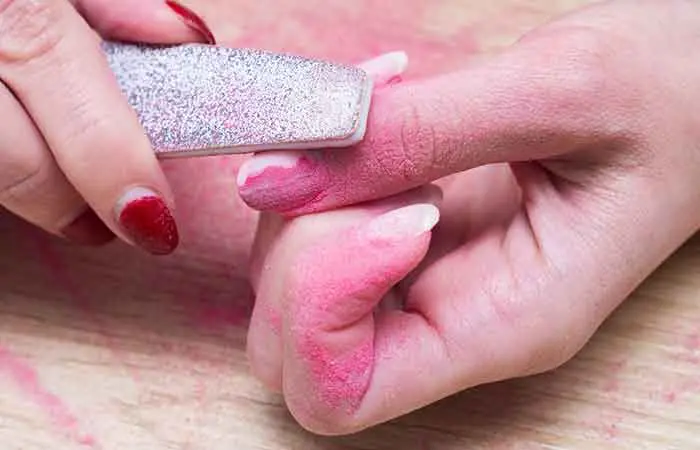
Removing acrylic nails at home can be done safely with the right tools and patience. So, before getting to the procedure, here are the essential tools you will need to ensure a damage-free removal process.
- Nail Clippers: To trim the nails for faster removal process
- Nail File: To buff the surface and break the seal of the acrylic.
- Acetone: To dissolve the acrylic nails. Use 100% acetone for best results.
- Cotton Balls: To soak the acetone and place on your nails to break down the acrylic.
- Aluminum Foil: To wrap and secure the cotton in place. This helps the acetone stay in contact with the acrylic, speeding up the removal process.
- Cuticle Pusher: To gently push off the softened acrylic without damaging your natural nails.
- Nail Buffer: To smooth the surface of your natural nails and remove any remaining residue or roughness.
- Cuticle Oil: To restore moisture in the nail area after the drying removal process.
- Moisturizing Hand Cream: To hydrate and soothe the skin around your nails.
With these tools in hand, you are ready to safely remove acrylic nails at home without causing damage to your natural nails.
Note: Assess the health of your natural nails before removing the acrylic nails. If the nails feel too brittle or the acrylic isn’t coming off easily, discontinue the process and get professional help from nail technicians.
Key Takeaways
- Acrylic nails can glamorize your look, but removing them is difficult.
- You can take off acrylic nails easily at home with acetone.
- You can also remove them using various household items like dental floss or a business card.
How To Remove Acrylic Nails Safely At Home
Acetone is your best savior when it comes to removing acrylic nails at home. This strong liquid-based chemical is the primary solvent in nail polish and paint removers (1). You must be wondering how such a strong ingredient can be safe on your skin. Well, nail polish removing formulas contain a small amount of acetone, which causes a little dryness, and in some rare cases, a slight redness, therefore, it is relatively safe for use (2). That said, undiluted acetone should be used in very small quantities as a last resort to remove acrylic nails as it can cause irritation and inflammation. Make sure to take the necessary safety measures, and you will be fine. If you want to know more about how to soak off acrylic nails, check out this video.
How To Remove Acrylic Nails With An Acetone Soak-Off
While acetone can be your best friend when removing acrylic nails easily at home, here are a few things you need to know before you open the bottle:
- Use acetone in a well-ventilated space or near an open window always, as its fumes can be strong and potentially harmful if inhaled in large quantities.
- Avoid direct skin contact with acetone as it can be drying and irritating to the skin. Wash with soap and water immediately if direct contact occurs.
- Avoid using acetone in areas with any cuts, open wounds, or irritated skin to prevent exacerbated irritation.
- Soak nails in acetone for the shortest time possible to avoid over-drying or weakening the natural nails. Typically, 10 minutes is enough.
- Apply a nourishing oil or cream to the acetone-treated area to restore moisture and prevent cracking or peeling of the nails, cuticles, and surrounding skin.
- Avoid inhaling acetone fumes directly. This can cause headaches, dizziness, or irritation to the respiratory system.
- Store acetone away from heat sources, open flames, and sparks, as it is highly inflammable.
- Limit the use of acetone if your nails are weak, damaged, or have a history of peeling to protect them from weakening further.
By taking these precautions, you can safely use acetone for acrylic nail removal while protecting your nails and skin from damage. Here are a few methods that you can try to take off acrylic nails expertly using acetone.
Method 1 – How To Take Off Acrylic Nails Using Acetone And Warm Water
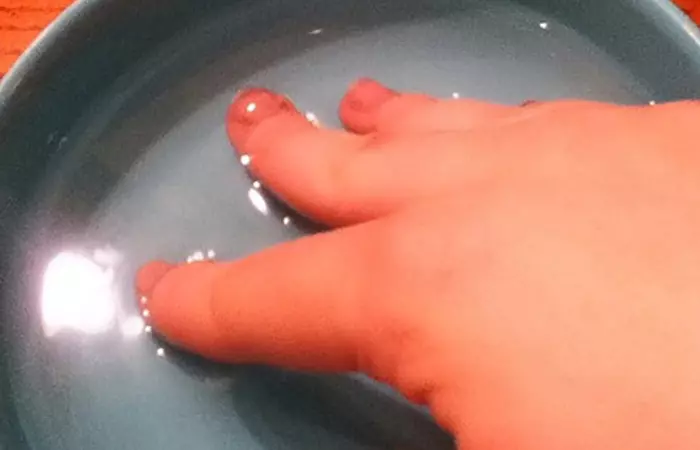
The first method involves dipping your nails in acetone. Here’s how to take off acrylic nails at home.
Things You Will Need
- Acetone
- Orange sticks
- Petroleum jelly
- Nail clippers
- Warm water
- Tweezers
- Two bowls
Step By Step Process
- Clip your nails as short as possible and pry your cuticles with the orange stick.
- Fill up one bowl with acetone and another one with warm water, and put the bowl containing acetone inside the warm water bowl to warm it up gently.
- Apply a generous amount of petroleum jelly on the skin surrounding your cuticles. This will protect them from the harsh, drying effects of acetone.
- Now, dip the entire length of your nails in the bowl containing acetone and wait for 30-40 minutes.
- Check if the acrylic nails have gone soft, and you should be able to pull them out gently with tweezers. If you feel resistance and are wondering how to get acrylic nails off fast, then do not yank, just soak them in acetone for some more time.
Using acetone and warm water to remove acrylic nails can come with potential challenges, such as skin irritation, difficulty in removing the acrylic nails, or over-drying. Make a note of the following tips to ensure a smooth process:
- Apply petroleum jelly generously around the cuticles before using acetone, to protect the skin from its drying effects.
- Monitor the process carefully and do not soak the nails for excessive periods to prevent overexposure to acetone.
- Clip your nails as short as possible before starting to reduce the amount of product and time needed for removal.
- Do not try to forcefully pull off the acrylic nails if they do not loosen after 40 minutes. Instead, use a coarse nail file to gently file the acrylic surface and thin it for acetone to penetrate better. Then soak it for a short period again to check for your skin’s reaction. If it still does not loosen, it is best to visit a salon and seek help from a professional for a safe acrylic nail removal process.
Kirsten, a blogger, shared her experience of removing acrylic nails at home and the most ideal way of doing so: “The easiest way to remove acrylic nails at home is to soak them in acetone. Most nail polish removers contain acetone (i).” However, she also suggests that acetone may cause skin irritation so being careful is necessary too.
 Quick Tip
Method 2 – How To Remove Acrylic Nails Using Acetone And Aluminum Foil
- Acetone
- Nail clippers
- Nail buffer or file
- Cotton balls or pads
- Aluminum foils
- Petroleum jelly
- Optional (Acrylic Removal Nail Cap Holders)
Step By Step Process
- Clip the acrylic nails as short as possible
- File away the topcoat, nail polish, or any color to avoid creating a mess or get your hands full of color.
- Apply petroleum jelly on the skin surrounding the cuticles. Now, soak the cotton pads in acetone and place it on your nails.
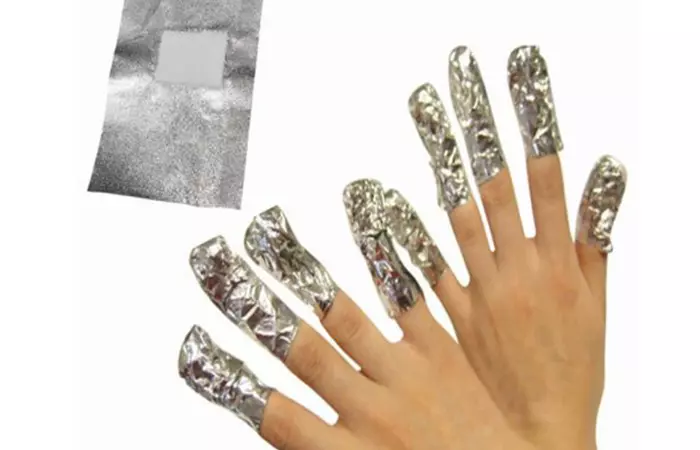
- Tear a piece of aluminum and wrap it over the cotton pad or ball so that it stays in place (You can also put the nail holder caps on to help the aluminum stay in place and ensure the body heat stays inside the aluminum, which will help quicken the removal process).
- Wait for 25-30 minutes.
- Pull the aluminum foil gently, and the acrylic nail should come off with it. If you feel resistance, keep it wrapped for some more time.
Note: Be cautious when using acetone for long periods of time as they can have extremely drying effects on your skin. To prevent skin irritation, apply petroleum jelly around the cuticles before starting. Be careful when handling acetone-soaked cotton pads and foil to avoid spills, and consider using acrylic removal nail cap holders for added stability and ease.
Method 3 – How To Remove Acrylic Nails With Acetone And Plastic Bags
While it may not be environment-friendly, this is an easy way to remove your acrylic nails without much trouble.
Things You Will Need
- Nail clippers
- Acetone
- A large ziplock bag
- Wooden cuticlei A layer of clear dead skin along the bottom bed of the fingers or toes that protects the nail root. stick
- Nail buffer
Step By Step Process
- Clip your acrylic nails as short as possible. Be careful not to snip off your real nails.
- Take a large ziplock bag and fill it with just enough acetone to submerge your nails fully.
- Tilt the bag to one side so that the acetone collects in one corner.
- Stick your hand inside the bag and let your nails soak in the acetone for 15-20 minutes.
- After 20 minutes, try scraping off the acrylics gently using a wooden cuticle stick.
- If you feel resistance, soak them again for 5 minutes and repeat the process.
- Use a soft foam buffer to get rid of leftover residue.
If you have sensitive skin or want to avoid using harsh products like acetone, you can try out methods that use everyday items to remove fake nails, instead of acetone.
Ensure the ziplock bag is securely sealed, and handle it carefully to prevent acetone from leaking. After removal, moisturize your nails and cuticles to counteract the drying effects of acetone. Learn how to take off acrylic nails without acetone in the next section.
How To Remove Acrylic Nails Without Acetone
Method 1 – Removal Of Acrylic Nails Using Acetone-Free Nail Polish
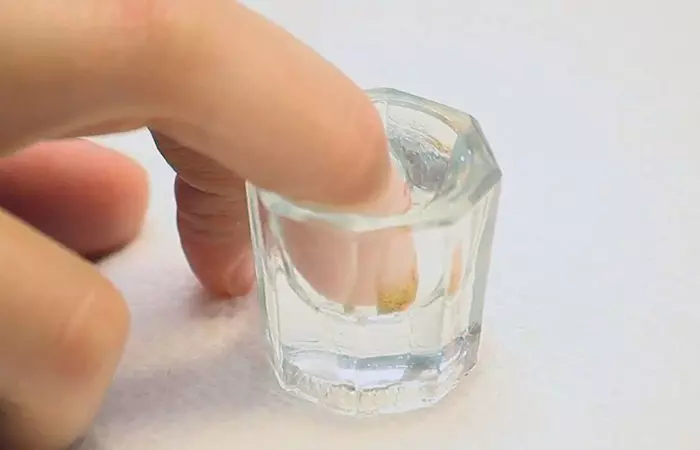
Want to know how to take off acrylics without acetone? Yes, it’s possible though it will take a little time, but if you plan to avoid acetone, your regular nail polish can also help you get acrylics off. Check on how to get off acrylic nails with regular nail polish below.
Things You Will Need
- Acetone-free nail polish remover
- Tweezer
- Bowl
- Nail clippers
Step by Step Process
- Clip the acrylic nails as short as possible.
- Pry the edges with the pointy end of the tweezers.
- Pour acetone-free nail polish remover in a bowl.
- Soak the nails in the nail polish remover for 30-40 minutes.
- Once you feel the nail loosened, pull it out gently with tweezers. If it does not come out easily, soak for some more time.
Quick Tip:
Normal acetone-free nail polish remover tends to evaporate after some time. Hence, keep adding nail polish remover from time to time. If the acrylic nails do not loosen after the recommended soaking time, avoid forcing them out with tweezers; instead, soak for an additional 15 minutes and try again. Avoid direct contact with the remover and consider applying petroleum jelly around the cuticles to protect them.
Method 2 – How To Remove Acrylic Nails With An Electric File/Nail Bit
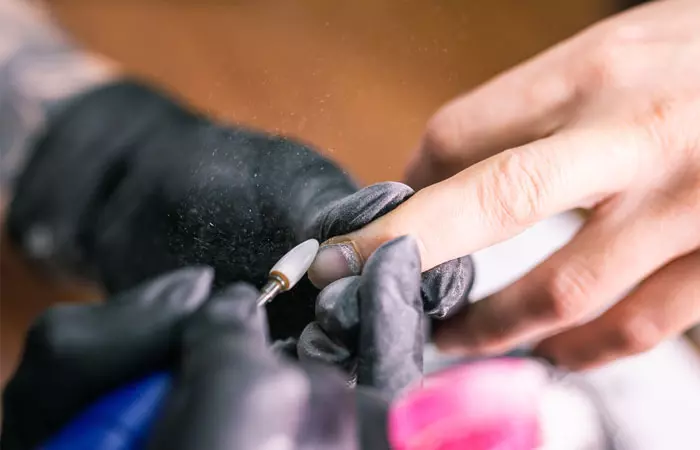
Wondering how to get fake nails off with ease? Try this method, it requires some great skills and is preferred by professionals. But there is no reason you cannot master this method at home. Let us show you how to take acrylic nails off at home.
Things You Will Need
- Electric nail file
- Acetone
- Cotton balls
- Tinfoil
- Cuticle pusher
- Cuticle oil
Step by Step Process
- Use the nail file to sand down the acrylics carefully. Be extremely gentle as you take off the top layer of your acrylic nails.
- Soak a cotton pad with acetone and wrap it around each nail.
- Wrap the cotton pad with tinfoil and cover it completely.
- Wait for 10-15 minutes before unwrapping the foil and removing the cotton.
- Use a cuticle pusher to remove the excess acrylic on your nails.
- Rinse your hands thoroughly with soap and water.
- Use cuticle oil to moisturize your nails and cuticles after the treatment just like in case of a manicure.
Quick Tip:
An electric nail file requires practice and precision for expert handling. Ensure you are equipped to handle this method on your own, or you might damage your natural nails.
You may face some potential issues when using an electric file or nail bit to remove acrylic nails, such as nail damage or difficulty in removing all the acrylic. To prevent nail damage, be gentle when sanding the top layer of acrylic and avoid pressing too hard on the natural nail. If you are new to using an electric file, practice caution to prevent over-filing, which could thin or damage the natural nail. If the acrylic does not come off easily, soak your nails a little longer in acetone and reapply the cotton pad and foil. Always moisturize with cuticle oil afterward to restore hydration and prevent dryness or irritation.
Method 3 – How To Remove Acrylic Nails Using Nail Filers
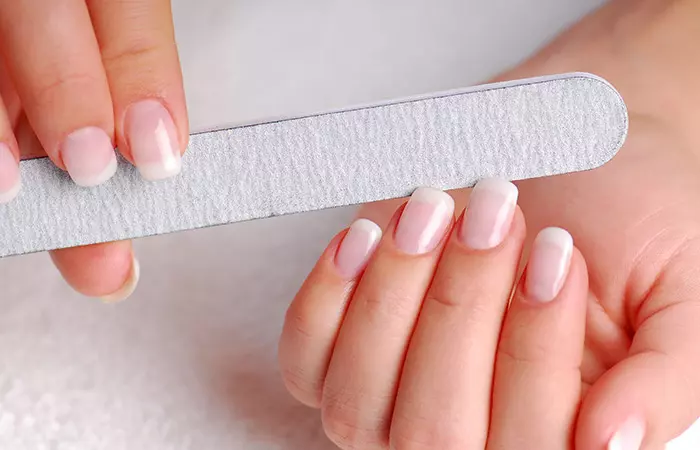
It can be time-consuming, but your skin does not come in contact with chemicals. Want to know how to get acrylics off using this method? If yes, then keep reading.
Things You Will Need
- Nail filer or buffer
- Orange sticks
- Nail clippers
- Cuticle scissors
- Cuticle oil
Step By Step Process
- Remove the color and design from nails and clip them to the shortest length possible.
- Start filing them using long strokes. Keep filing until you have reached the nail bed. Be careful and stop before you file off your actual bed.
- If you notice some of it remaining on your nails, take a cuticle scissor and pry open the edges and clip it. Make sure to cut only small pieces at a time and not try to pry open too much.
- Once all the acrylic nail is off, take the orange stick and scrape off the acrylic glue.
Quick Tip:
To prevent over-filing, make sure to file gently and stop before reaching the natural nail bed to avoid thinning or damaging the nail. Use cuticle scissors to carefully trim off any acrylic remnants in small sections to prevent accidental cuts or damage to the nail bed. This method can be time-consuming, so take breaks to avoid fatigue and maintain precision. This procedure can be a little harsh on your nails, follow it up with cuticle oil.
Method 4: How To Take Off Acrylic Nails With Hot Water (Without Acetone)
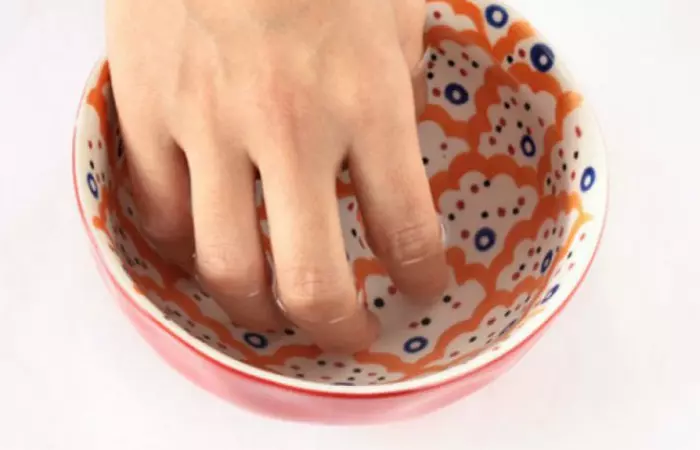
This is one of the easiest and gentlest methods to soak off acrylic nails. It is also the safest method. Are you trying to figure out how to remove nail extensions using this way? If yes, then read on to know more.
Things You Will Need
- Warm water
- Nail filer
- Orange sticks
- Nail clipper
Step By Step Process
- Trim the nail to the shortest length possible and pry the edges with the stick.
- Pour warm water into a bowl. Make sure the temperature is comfortable as you have to soak for a long time.
- Soak your nails in the warm water for at least 30-40 minutes to dissolve the glue. Dip at an angle where the warm water can seep through the inlet you made with your orange stick.
- If the nails do not come out, add warm water, and soak for some more time.
Quick Tip:
Be cautious of skin irritation by ensuring the water temperature is comfortable and not too hot as prolonged exposure to hot water can dry out the skin. If you experience any discomfort, take breaks to avoid softening the natural nails excessively. After removal, hydrate your nails and cuticles with a nourishing oil to restore moisture.
As you have to soak for a long time, the water will start getting cold. Keep pouring warm water now and then to maintain a constant warm temperature. Take a look at this video to know how to take off fake nails.
Method 5 – How To Remove Acrylic Nails Using Dental Floss
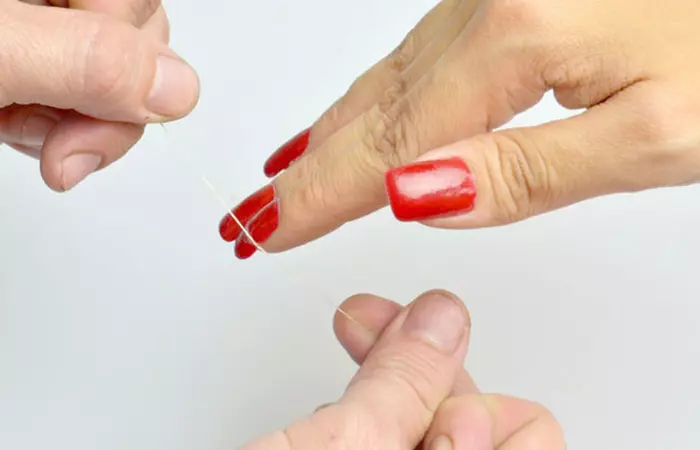
Head to your bathroom closet and get your dental floss out. Apart from your oral hygiene, these strong threads are an excellent way of removing acrylic nails. However, this cannot be done by you alone, so make sure you have someone to help you out with it. Here’s how to remove fake nails the easy way.
Things You Will Need
- Orange sticks
- Dental floss
- A partner
Step By Step Process
- Pry your cuticles with the orange sticks to make a little inlet.
- Ask your partner to insert the floss through the inlet and move it in a sawing motion.
- Continue until the acrylic nail pops off.
Quick Tip:
This method can be a little uncomfortable or painful, depending on your threshold. Prepare yourself accordingly and have patience. If the floss does not glide smoothly, try repositioning it at a different angle and use a gentle sawing motion to avoid damaging the natural nail. Since this method requires a partner, communication is key to ensuring the process is done carefully and with minimal discomfort. If you notice any resistance, take breaks and avoid forcing the floss to prevent nail or skin damage.
Method 6 – Removal Of Acrylic Nails Using A Laminated Business Card
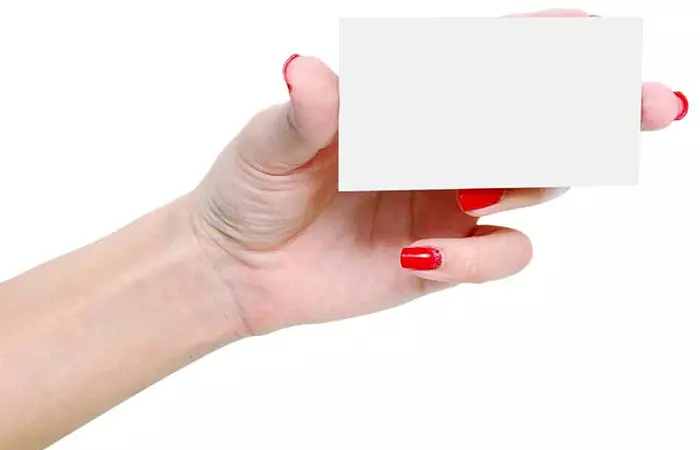
If you would like to know how to take acrylics off at home without running your real ones, then all you have to do is fish out a laminated business card from your purse.
Things You Will Need
- Laminated card
- Orange sticks
Step By Step Process
- Use the orange sticks to pry the edges of the acrylic nails and make a small inlet.
- Slide the laminated business card into the inlet while applying gentle pressure in an upward motion.
- Do this one side at a time to avoid ripping a layer of your actual nail bed. And, the nails should pop right out.
Quick Tip:
You can use a debit/credit card instead of a laminated business card for this method. Make sure to pry the cuticle area gently with the orange stick, creating just enough space for the laminated card to slide in without too much force. Apply gentle upward pressure, and avoid moving too quickly or roughly, which could harm your natural nails. If resistance occurs, take your time and work on one side at a time, ensuring you do not rush the process. If any acrylic remnants remain, gently repeat the motion until the nail is fully removed.
There are a variety of pros and cons of acrylic nails. While they have ultra-modern aesthetics and there are a variety of removal methods as noted above, all of it does not come without challenges. In the following sections, we shall learn more about protection, maintenance, and other tips and tricks of caring for your acrylic nails.
Now that you know how to remove your acrylic nails at home without spending a fortune on them, let us go over some advanced methods that are lately gaining popularity for the efficient removal of acrylic nails.
Advanced Methods For Removing Acrylic Nails At Home
Here are a few new methods for safely removing acrylic nails at home. Read on.
- Ultrasonic Nail Polish Remover
The ultrasonic nail polish remover is an innovative tool that uses gentle ultrasonic vibrations combined with a mild solvent to safely and effectively remove acrylic nails. To use it, fill the device with the recommended solution (usually acetone or a similar remover), place your fingers into the designated slots, and turn it on. The ultrasonic vibrations break down the adhesive bonds between the acrylic and the natural nail, allowing the product to lift off easily without excessive soaking or filing. It typically takes 10 minutes for the process to complete.
When using the device, ensure you follow the manufacturer’s instructions and avoid overexposure to the solvent to protect your skin and nails. Additionally, always clean the device after use to prevent residue buildup and maintain hygiene.
- Steam Nail Removers
Steam nail removers use steam combined with a small amount of acetone or a similar solution to soften and loosen acrylic layers. To use it, fill the device’s reservoir with the recommended solution, turn it on, and wait for it to heat up. Once ready, place your fingers in the designated slots and allow the steam to penetrate the acrylic for about 15 minutes. Then the softened acrylic can be easily scraped off using a cuticle pusher or nail stick.
While using a steam nail remover, it is important to follow all safety precautions. Avoid overfilling the device or touching the heated surfaces to prevent burns. Ensure the steam is directed only at the nails and not the skin, and always work in a well-ventilated area to minimize inhalation of acetone vapors. After the process, thoroughly moisturize your nails and cuticles to replenish lost hydration.
This method is less abrasive than traditional techniques, as it minimizes prolonged soaking and reduces the need for harsh filing.
- Acrylic Removal Creams
Acrylic removal creams are a convenient and gentle alternative for removing acrylic nails. These creams work by breaking down the acrylic bond without the need for excessive soaking or filing. To use it, simply apply a generous layer of the removal cream to the surface of your acrylic nails, ensuring full coverage. Let it sit for the recommended amount of time (usually 10 minutes), allowing the cream to soften the acrylic. Once the acrylic has loosened, you can gently scrape it off with a cuticle pusher or nail stick.
Be sure to perform a patch test before use to ensure you do not have an allergic reaction to the formula and avoid applying it to broken or sensitive skin. After removal, wash your hands thoroughly and moisturize your nails and cuticles with nourishing oil or cream to restore hydration.
- Silicone Nail Removal Caps
Silicone nail removal caps are a reusable and eco-friendly solution designed to make acrylic nail removal easier and more controlled. These caps work by creating a sealed environment around the nails, holding the removal solution (usually acetone or an acetone alternative) against the acrylic, allowing it to soften more effectively. To use, soak cotton pads in your chosen nail remover, place the pads over your acrylic nails, and then secure the silicone caps over them. Let the caps sit for 15 minutes to allow the solution to work. The acrylic should begin to loosen, and you can gently push it off using a cuticle stick or nail tool.
When using silicone nail removal caps, it is important to follow a few precautions. Avoid using caps that are too tight, as they could cause discomfort or restrict blood flow. Do not over-soak the cotton pads or let the remover spill out, as it can irritate the skin. Make sure to clean the caps thoroughly after each use to maintain hygiene and prevent any build-up of residue.
So now that you know all the methods that are used to remove acrylic nails at home, let us go over some precautions to ensure your nails stay healthy in the long run.
Important Tips And Precautions To Be Followed While Removing Acrylic Nails
- Under no circumstances, try to yank out your nails forcefully. It might pull out your real nail bed and end up in excruciating pain or infection.
- If you want to try methods that include acetone, make sure there is no fire around you, as acetone is highly flammable.
- In most cases, the side effects of acetone include dehydration of the skin and wrinkling of the skin because it is a potent chemical compound. If you feel a burning sensation or severe redness, do not push your boundaries. Seek professional help immediately.
- Cover the table or the surface on which you do this procedure to safeguard it from acetone stain or damage.
- This process usually takes a long time. Have patience and be seated comfortably in a place for a while.
Once your acrylics are removed, you may find your nails looking dry and unhealthy. But a little TLC can fix that, so do not skip the following steps.
How To Care For Your Nails After Removing Acrylics
- After removing the nail, scrape off the residue of acrylic nails from your nail bed.
- Use a cuticle oil right after you remove the acrylic nails to restore your real nail bed.
- These procedures can be really harsh on the skin, so apply a gentle moisturizer after the process.
- If it has been a while, the tips of your natural nails must have grown out. Trim your real nail tips with a nail clipper.
- As a follow-up beauty treatment, apply nail hardener every day for at least two weeks.
- You might be tempted to get creative with the shape of your nails, but allowing them to grow in their natural shape is essential as it will prevent cracking or breaking.
- Acrylics can weaken your real nails and leave them in need of nourishment. Keep them hydrated with cuticle oil and lotion.
 Quick Tip
Acrylics are a fun way to jazz up your nails, but they can take a toll on your natural nails. If you are an acrylic junkie, remember these nail care tips and tricks to prevent nail damage and keep them in optimal health.
How To Protect Against Acrylic Nail Damage In Future
- After removing your nails, wait for a week to let your real nails restore balance before putting on the next pair of acrylic nails.
- During this break, apply a coat of nail strengthener every day to protect your nails from breakage.
- You can apply cuticle cream and cuticle oil alternatively over your nails and wrap them in warm washcloths for 5 minutes.
Follow these tips diligently to enjoy healthy and shiny nails without worrying about acrylic damage.
But while we have covered everything about removing acrylic nails effectively and effortlessly at home, let us explore how to do them as well in the section below. For the ones who always wanted to try them but didn’t know how to, simply scroll down!
How To Do Your Own Acrylic Nails
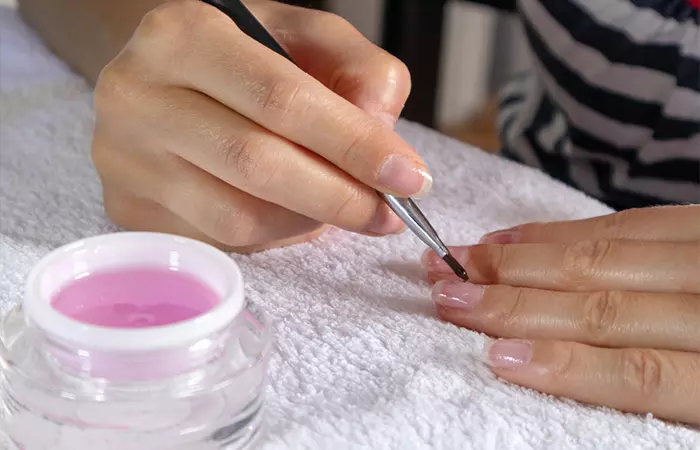
- Select preferred acrylic nail kit, acrylic liquid and powder, filer, and a brush.
- Clean, shape, then buff the natural nails.
- Dip the brush in acrylic liquid, pick up the acrylic powder, and apply a small bead to the nail.
- Shape and smooth the acrylic powder to fit the edges.
- Repeat the process for all the nails.
- File the nails to give the desired shape and apply preferred nail polish.
Now that you know all the tips and tricks to take acrylics off at home, do not hold yourself back from rocking those killer designer acrylic nails with nail art. Go ahead and get your favorite acrylic nail designs done without worrying about painful, stressful, and expensive removal methods. Just remember to follow up with a generous dose of strengthening nail treatments.
Infographic: What To Keep In Mind Before Getting Acrylic Nails
While acrylic nails instantly make your fingertips look beautiful and healthy, the procedure itself might be intimidating if you’re new to the scene. But fortunately, acrylics are extremely simple to maintain even if they initially seem like quite an effort. You just need to keep certain things in mind to get the process right. Check out the following infographic to learn more.

Illustration: StyleCraze Design Team
Acrylic nails can add length to your nails and glamorize your overall look. But they are difficult to remove. However, the above-mentioned simple tips will answer all your questions on how to remove acrylic nails at home. Using acetone, you can remove your acrylic nails easily. Following these tips and precautions while removing acrylic nails can also help you prevent nail damage. Take cues from the listed TLC to maintain optimal nail health. Finally, by following the listed tips, jazz up your nails with acrylics without worrying about damage.
Frequently Asked Questions
Does olive oil remove acrylic nails?
Yes. You may use olive oil instead of cuticle oil to loosen the glue between acrylic and natural nails. Then, soak your nails in a bowl of warm water, acetone, and olive oil for 10-15 minutes to melt the acrylic.
How do you remove acrylic nails with baking soda?
You may soak your nails in a solution of baking soda and toothpaste in warm water for 15-20 minutes to loosen the glue of acrylic nails.
How long do acrylic nails last?
Acrylic nails are incredibly strong and can last for about 6-8 weeks with regular touch ups and good nail care practices.
Does salt water affect acrylic nails?
Yes saltwater can damage acrylic nails by discoloration or turning them yellow when overexposed to it. It can dry out your nails and cause them to crack or peel.
How much does it cost to remove acrylic nails?
The cost varies depending on location and technician experience. However, it can cost anywhere from $10 to $50.
Remove your nail paint while protecting your nails and keeping them squeaky clean! Watch this video to remove your acrylic nail paint at home with these easy-to-follow steps
Personal Experience: Source
StyleCraze's articles are interwoven with authentic personal narratives that provide depth and resonance to our content. Below are the sources of the personal accounts referenced in this article.
i. Life after Acrylic Nailshttps://kirstensstylereport.wordpress.com/2010/04/30/life-after-acrylic-nails/
References
Articles on StyleCraze are backed by verified information from peer-reviewed and academic research papers, reputed organizations, research institutions, and medical associations to ensure accuracy and relevance. Read our editorial policy to learn more.
- Acetone
https://pubchem.ncbi.nlm.nih.gov/compound/Acetone - Evaluation of structural damage and pH of nail plates of hands after applying different methods of decorating.
https://pubmed.ncbi.nlm.nih.gov/30246242/
Read full bio of Madison Williams
Read full bio of Shalini Roy
Read full bio of Shatabdi Bhattacharya
Read full bio of Anu Pallavi







Community Experiences
Join the conversation and become a part of our empowering community! Share your stories, experiences, and insights to connect with other beauty, lifestyle, and health enthusiasts.