43 Short Super Spunky Shag Hairstyles
Do not underestimate the powerful energies that well-done short hair can radiate.
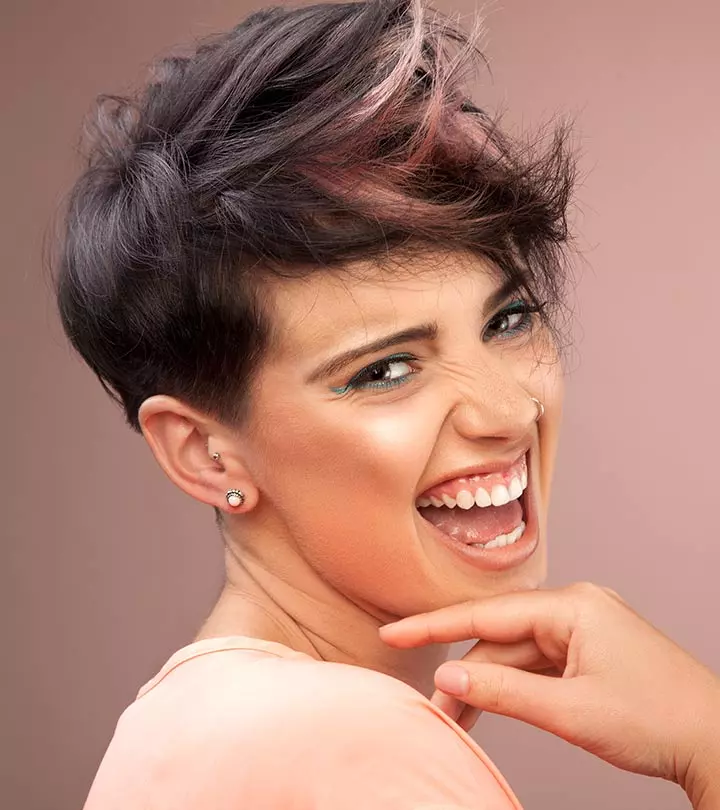
Image: iStock
It might come as a surprise that back in the day, sporting a short shag hairdo meant styling it as it was cut. Now, thankfully, there are a plethora of short shag hairstyles you can flaunt. This hairstyle is so versatile and trendy that you can find a shag for every event, occasion, season, time, mood, and personality. From sporting an edgy look to a show-stopping sleek short hairdo, the shag never disappoints. We have rounded up the best of the best, trendy handpicking styles that also suit different face shapes, hair textures, and personal styles. So, if you are ready to take your short shag to the next level, scroll down and find out how you can style your short shag cut to perfection.

 Before You Get Started
- Shags are great hairstyle choices for adding volume to all hair types and textures.
- Short shags look amazing on all face shapes as you can customize their layers to frame your face.
- Use the texturizing spray and dry shampoo to enhance the overall texture and dimension of your hairstyle.
- Highlights and lowlights complement this hairstyle beautifully to create edgy as well as boho looks.
In This Article
Super Chic Short Shag Hairstyles
- Red Shaggy Bob
- Short And Messy Waves
- Pixie Undercut Waves
- Messy Undercut Curls
- Straight Edge
- Bed Head Bangs
- Relaxed Waves
- Rocker Chic
- Shaggy Curls
- Pin-Up Curls
- Straight And Shaggy
- Messy Bouffant
- Shaggy Straight
- Waterfall Braid
- No Fuss Tresses
- Posh Messy Bob
- Faux Hawk
- Side Dutch Band
- Double Fishtail Pixie
- Pancaked Dutch Band
- Mixed Up Braids
- Cutesy Curls
- Rope Up Braid
- Symmetrical Fishtail Braids
- French Braid Headband
- Boho Bandana
- Pinned-Back Waves
- Teased Curls
- Deconstructed Dutch Band
- French Band Undercut
- Super Messy Dutch Band
- Twisted Bangs
- Boho Pulled-Back Braid
- Back-Combed Puff
- Straight Out Of Bed
- Tousled Curls
- Punk Rock Spikes
- Roller Brush Curls
- Fishtail Half Updo
- Cat Ear Buns
- Haphazard French Braid
- Half Bun
- Short Choppy Layers
1. Red Shaggy Bob
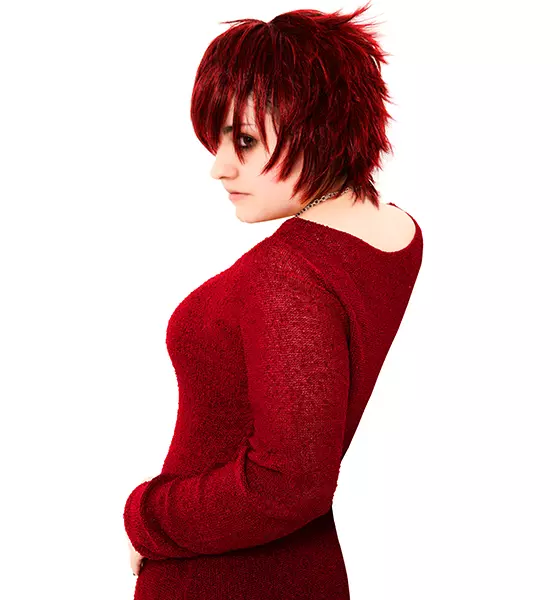
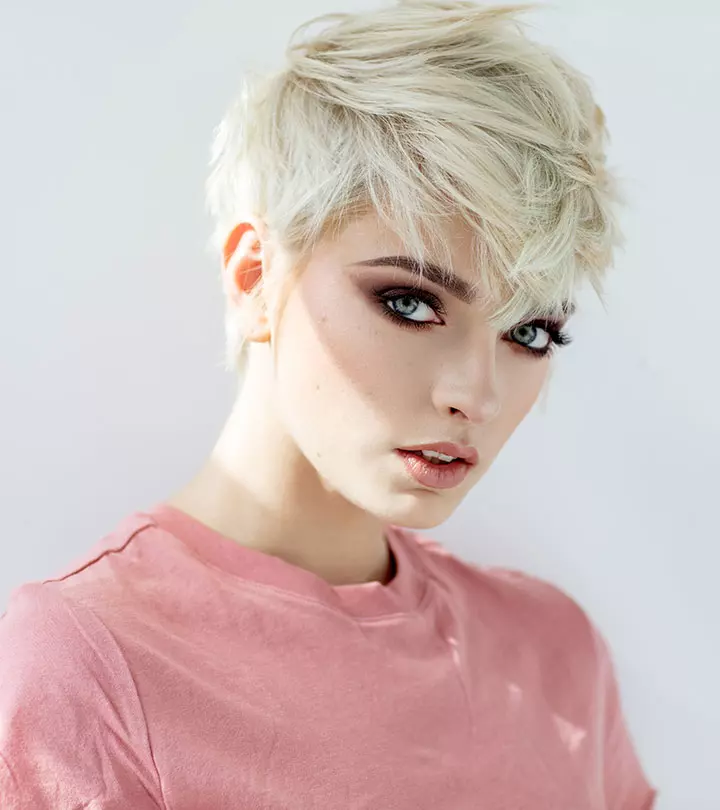
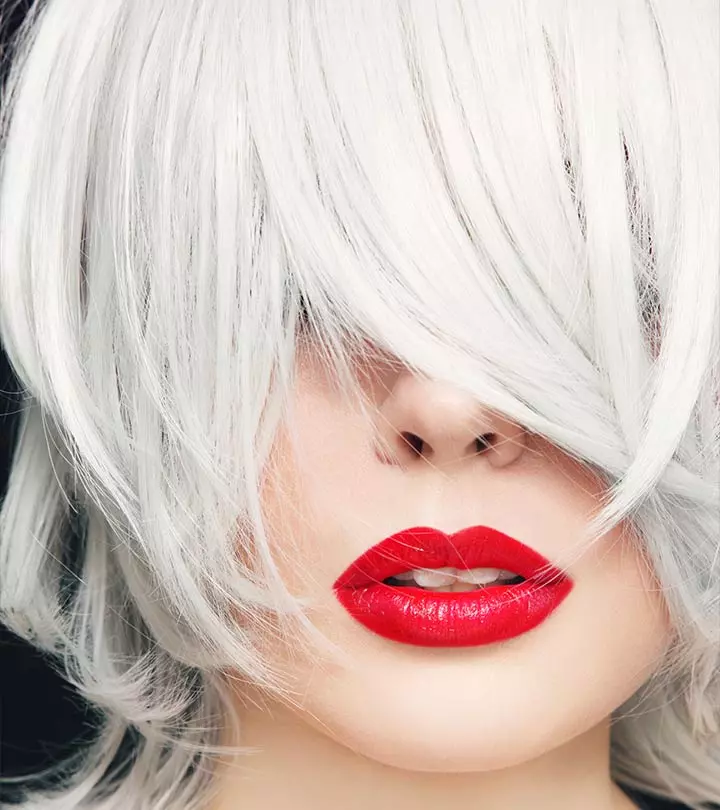
Even if we frequently feel the urge to give our hair a shaggy cut, it is functional, attractive, and appropriate for all hair types. Shaggy hairstyles are suitable for fine hair as it adds structure and volume to the look. So, if you’ve been wondering, does short hair suit me? This red shaggy bob is one of the edgy hairstyles you can experiment with.
What You Need:
- Comb
- Hair serum
How To Style:
- Air dry your washed hair till it’s slightly damp but not completely dry.
- Next, apply a dollop of serum all over your hair.
- Comb your hair forward till it gently falls on your forehead.
- Keep doing this till you find yourself with a neat yet bold hairstyle.
2. Short And Messy Waves

This hairstyle flatters all face shapes. Today, the ideal short wavy hairstyle adds movement and the right volume. Given the clearly defined waves, this style is also relatively straightforward:
What You Need:
- Texturizing spray
- Heat protectant spray
- Blow dryer
- Comb
How To Style:
- Air-dry your hair after washing it.
- While your hair is still damp, divide your hair into several sections and make medium-sized twists all over your hair to help define the shape of your waves.
- Use heat protectant spray to protect the hair.
- Blow-dry your twists using the low or medium setting.
- Lift a section of your hair around the crown and brush it down.
- Repeat this process on the rest of the crown and sides to create this messy yet fun hairstyle.
3. Pixie Undercut Waves
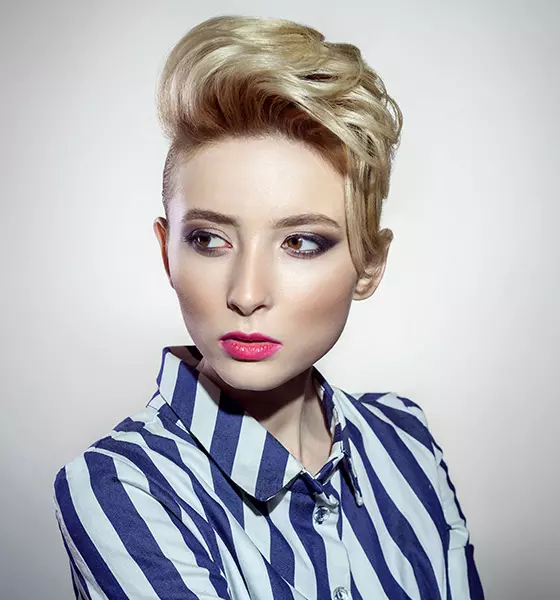
So you got an undercut but did not consider at the time that you also like the look of long wavy hair? No worries! Having an undercut does not mean that you have to give up on the girly look! Try out this wavy style to add a feminine touch to your otherwise edgy undercut.
What You Need
- A comb
- Volumizing mousse
- Blow dryer
- Round brush
How To Style
1. Prep your washed, wet hair with a dollop of volumizing mousse.
2. Divide your hair into three sections, starting from the top of your head to the base of your neck.
3. Wrap the bottom of your first section of hair halfway around the round brush and start blowdrying.
4. Repeat the previous step on all three sections of hair.
5. Rub a small amount of mousse into your palms and work them through your hair to smooth off any frizz.
6. Finish off the look by flipping your head forwards and backward to give your hair a disheveled look.
4. Messy Undercut Curls
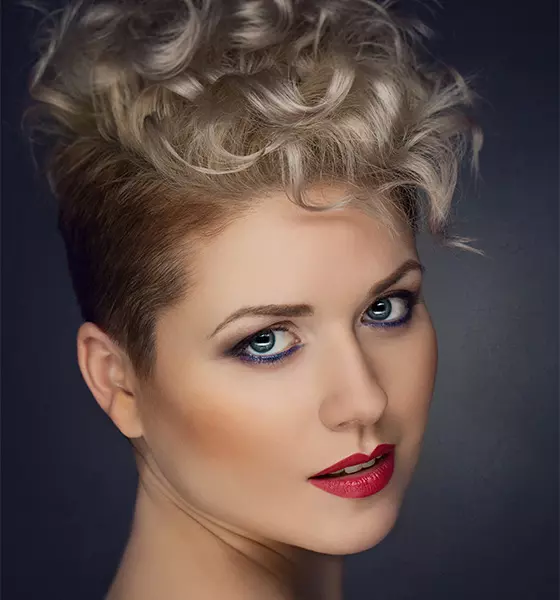
Do people only perceive you as the cute girl who can be easily messed with? Do you find it hard to make people believe that you can be tough as nails? If you answered ‘yes’ to both the questions, you absolutely need to try out these cute curls to confuse people by looking cute but also giving off a ‘Don’t mess with me’ vibe.
What You Need
- A comb
- Volumizing mousse
- 1 inch curling iron OR a blowdryer and 1 inch curlers
- Medium hold hairspray
- Smoothening serum
How To Style
1. Prep your washed, wet hair with a dollop of volumizing mousse.
2. Starting from the top of your head, pick up a 1 inch section of hair at a time and curl it tightly with a 1 inch curling wand. Repeat this step on all your hair.
3. If you do not have a curling wand, you can use 1 inch curlers all over your head and blow dry them.
4. Rub 3-4 drops of serum into your palms and work them throughout your hair to smooth off any frizz.
5. Finish off with some medium-hold hairspray to prevent the curls from unraveling through the day.
5. Straight Edge
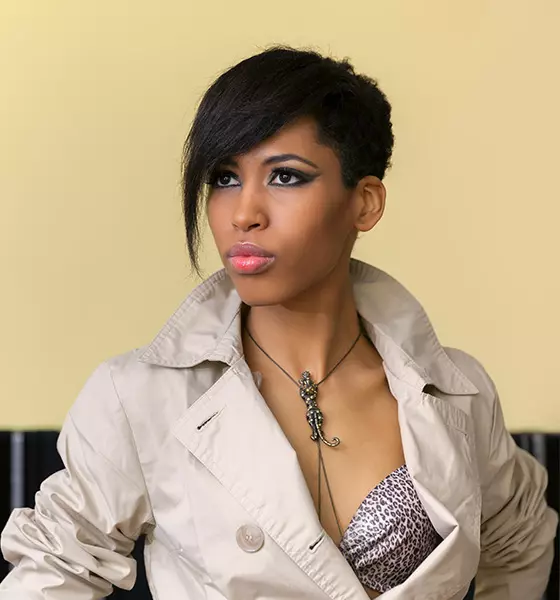
Some girls like their hair short and poker straight. If you are one of those girls, this sleek style will make you look fearless and stylish at the same time! Paired with a chic dress and kohl rimmed eyes, this look is sure to ward off all those short-hair haters.
What You Need
- Wide-toothed comb
- Fine-toothed comb
- Heat protectant serum/spray
- Straightening iron
- Smoothening serum
How To Style
1. Remove all knots and tangles from your washed and dried hair using a wide-toothed comb.
2. Rub heat protectant serum all over your palms and run them through your hair.
3. Take ½ inch sections at a time, and run a straightening iron 3-4 times over each section right from the root to the ends.
4. Rub smoothening serum throughout your hair to smooth off any frizz.
5. Finish off by flipping all your hair over to one side.
6. Bed Head Bangs
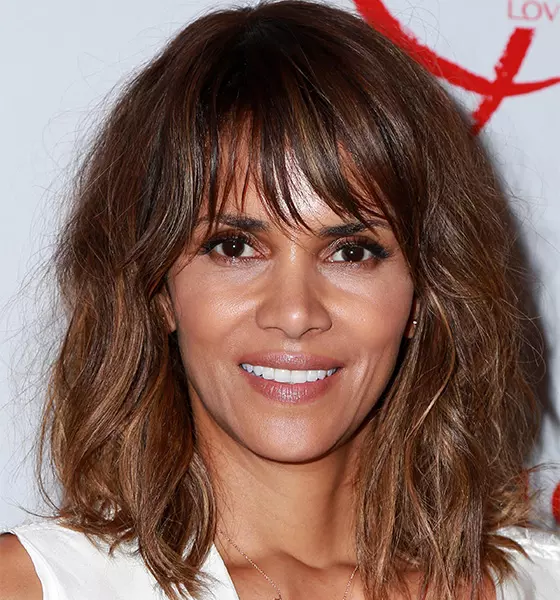
Styling your hair can be a frustrating job right in the morning, especially if you are in a hurry to get to school or work. If you’ve got bangs and tons of that ‘short hair, don’t care’ attitude, this ‘rolled out of bed’ look will make you look effortlessly chic and uber cool.
What You Need
- Wide-toothed comb
- 2 inch curling iron
- Straightening iron
How To Style
1. Remove all knots and tangles from your washed and dried hair using a wide-toothed comb.
2. Picking up 3-4 inch sections haphazardly at a time, curl your hair using the 2 inch curling wand. No need to be neat. In fact, the messier, the better.
3. Using a straightening iron, straighten out your bangs completely.
4. Run a wide-toothed comb through your hair to unravel the curls.
5. Finish off by shaking out your hair with your hands to achieve a disheveled look.
 Trivia
7. Relaxed Waves
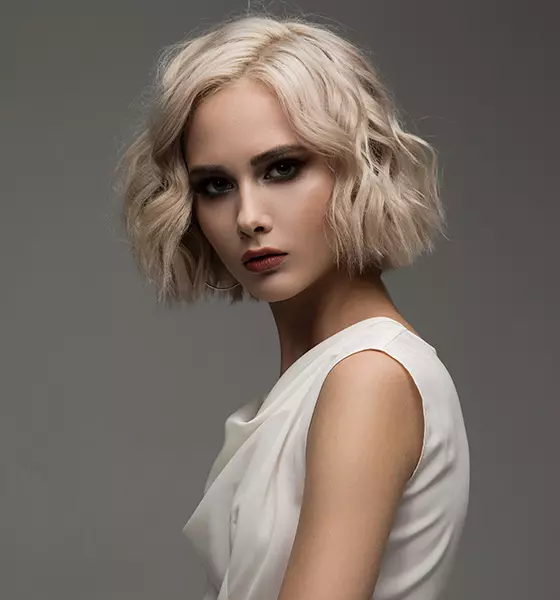
Who says you can’t sport a relaxed look in a professional setting? This wavy look strikes the perfect balance between professional and casual, while making you look super chic. Since they take all of 10 minutes to complete, these super easy waves are especially convenient for the woman on-the-go.
What You Need
- Wide-toothed comb
- 2 inch curling iron
- Smoothening serum
How To Style
1. Remove all knots and tangles from your washed and dried hair using a wide-toothed comb.
2. Part your hair down the middle.
3. Picking up 2 inch sections at a time, roll the section of hair just once around the curling iron. Repeat this step throughout your hair.
4. Finish off the look by unraveling the curls using a wide-toothed comb and smoothing off frizz with a serum.
8. Rocker Chic
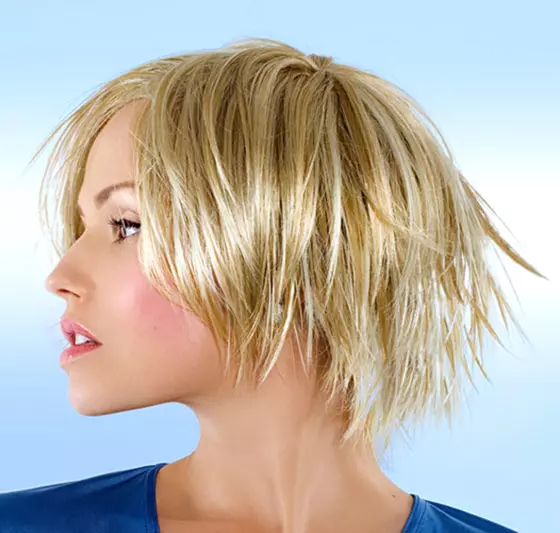
Admit it – you’ve always admired the wet choppy hair look sported by rockstars, right after they’ve played an electrifying concert. And try as you might, you have never been able to perfect it. Well, here is the tutorial that will help you unleash your inner rocker chick with this sleek and wet style. Licensed cosmetologist Danielle Wilkinson Brucklacher says, “ Just add a leather jacket and go!”
What You Need
- Straightening iron
- Heat protectant serum
- Wet hair gel
How To Style
1. Prep your clean, dried hair with a heat protectant serum.
2. Take ½ inch sections at a time, and run a straightening iron 3-4 times over each section, right from the root to the ends.
3. Finish off by applying wet hair gel throughout your hair to give it the fashion-forward, straight-out-of-the-shower look.
9. Shaggy Curls

Are you looking for short curly shag haircuts? We all know that repeatedly applying heat to our hair causes some real damage. But who can resist the charm of those perfectly curled curls? Well, here’s an alternative – give your hair a naturally textured, messy, and curly look without using a curling iron!
What You Need
- Wide-toothed comb
- Volumizing mousse
- Blowdryer with a hair diffuser attachment
How To Style
1. Prep your washed, wet hair with a dollop of volumizing mousse.
2. Remove all knots and tangles using a wide-toothed comb.
3. Bend forward and flip all your hair in front of you.
4. Place the diffuser (attached to your blowdryer) at the ends of your hair and start scrunching up your hair towards your scalp. Hold the blowdryer there until your hair is completely dry.
5. Repeat the previous step all over your hair.
6. Finish off by rubbing a little mousse through your hair with your fingers to separate the curls.
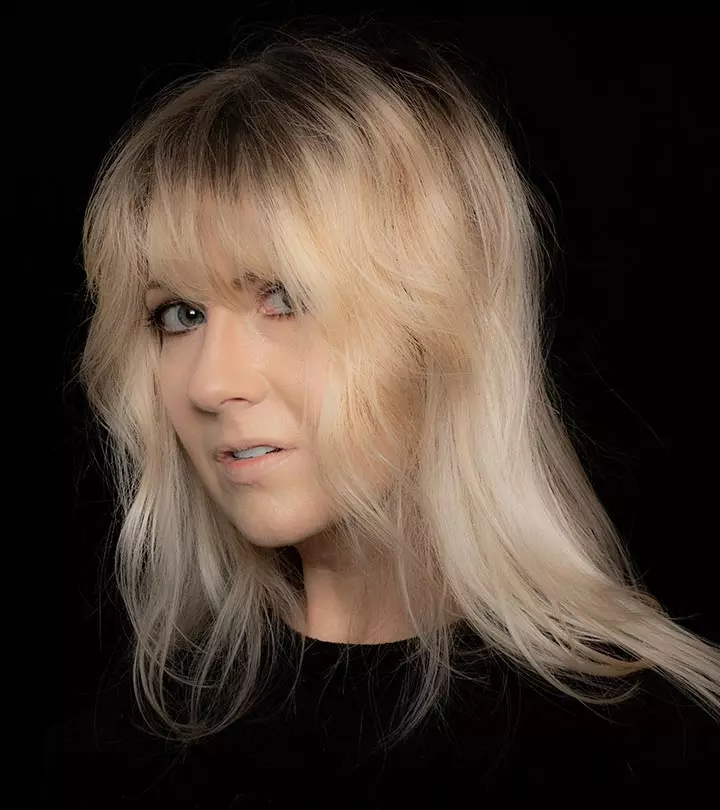
Kristin, a YouTuber and musician, shares how getting a shag haircut makes her feel in one of her vlogs: “This hairstyle really does just make me feel so confident. I have no idea why but it does so (i).”
10. Pin-Up Curls
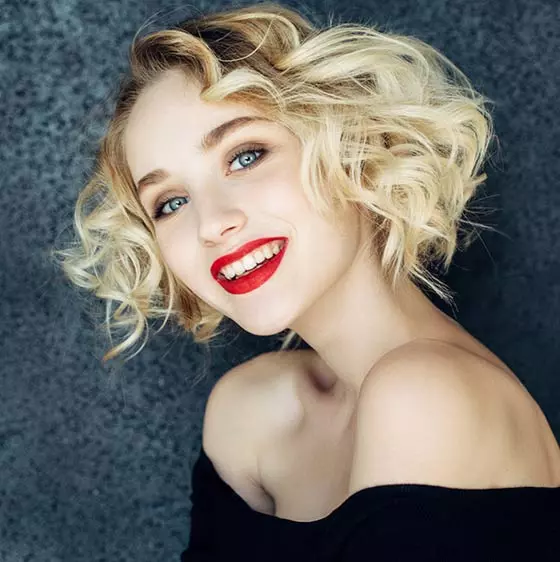
No matter how many hours you spend on your hair with a curling iron, you know that you can never make it look the way a professional hairdresser can. Achieve more defined curls by using this simple hack involving bobby pins and fool everyone into thinking that you made a trip to the salon to get this look.
What You Need
- Bobby pins
- ½ inch curling iron
- Heat protectant serum
- Medium hold hairspray
How To Style
1. Prep your clean, dried hair with a heat protectant serum.
2. Using your curling iron, start curling your hair, picking up ½ inch sections at a time.
3. After removing the curling iron, but before unraveling the curl, insert a bobby pin into the rolled up hair and leave it in for about 30 seconds.
4. Finish off with some medium-hold hairspray to ensure that the curls stay intact through the day.
11. Straight And Shaggy
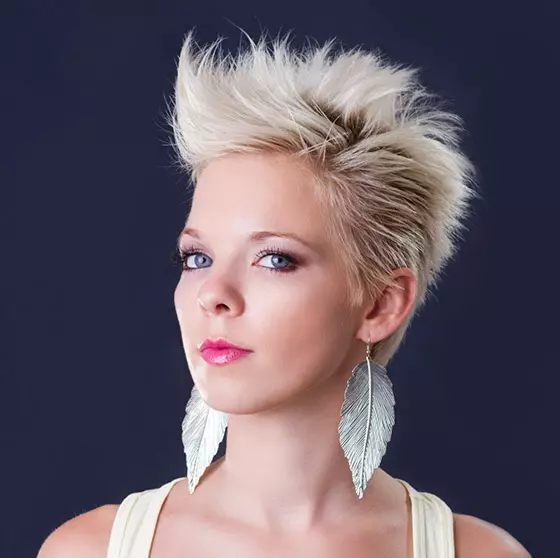
Here comes a ravishing short shag style haircut for you to try. Who says that spikes are reserved only for punk rock stars? Grab some hair gel and go crazy with your hair! Throw on some statement earrings to give off a ‘No Nonsense’ vibe and go seize the day with this straight hair look that is designed to intimidate people.
What You Need
- Heat protectant
- Straightening iron
- Strong hold styling gel
How To Style
1. Prep your washed, dried hair with a heat protectant serum.
2. Picking up ½ inch sections at a time, run a straightening iron 3-4 times over each section right from the root to the ends.
3. Create a parting on any one side of your head.
4. With styling gel rubbed all over your palms and fingers, finish off by sweeping all your hair away from your face in a sideways and upwards motion, keeping the length of your hair away from the scalp.
12. Messy Bouffant
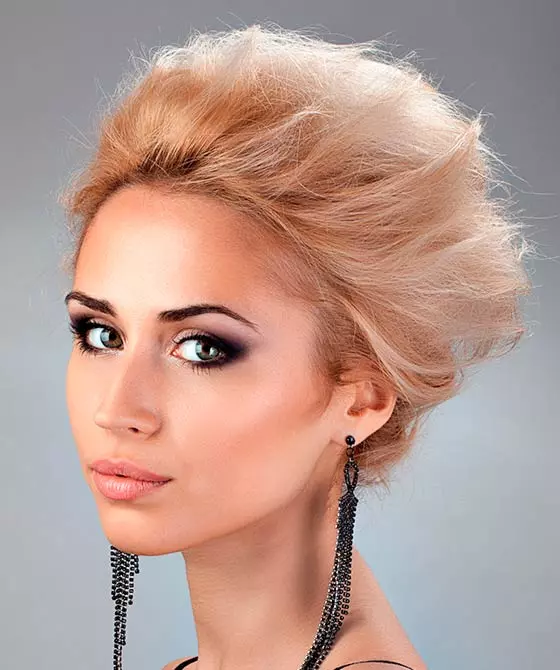
I think we have all spent countless hours poring over our grandmothers’ old photographs, wondering how those big bouffants could ever have been in style. Well, if you add this modern messy twist to the retro look, you’ll know why!
What You Need
- Sectioning clip
- Texturing spray
- Teasing comb
- Fine-toothed comb
- Smoothening serum
How To Style
1. Prep your washed, dried hair with a light texturizing spray.
2. About 1 inch in, section off all the hair along the front hairline around your face, using a sectioning clip.
3. Start teasing down the rest of your hair that hasn’t been sectioned down using a teasing comb to add volume to your bouffant.
4. Once all the hair has been teased, smooth the sectioned-off hair to cover all the teased hair.
5. Rub some smoothening serum all over your fine-toothed comb and run it all over the outer layer of your bouffant.
13. Shaggy Straight
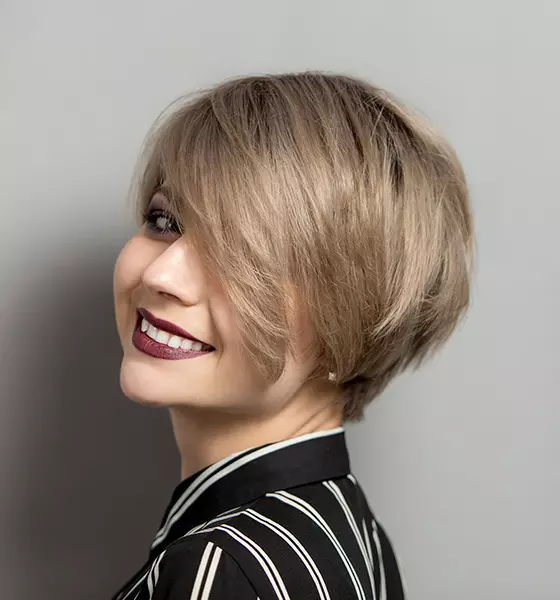
Straightening your hair to make it perfectly poker-straight can be a real pain. So, try out this much simpler look to look cute, youthful, and effortless without the qualms of using a straightening iron. Not only will it look natural, it will also save you from applying heat to your hair.
What You Need
- Texturizing spray
- Round brush
- Blowdryer
How To Style
1. Prep your washed, wet hair with a texturizing spray.
2. Blowdry your hair using a round brush from the inside of your hair, curving slightly inwards as you blowdry down the length of your hair.
3. Finish off by shaking your hair out and messing it up with your fingers to give it a shaggy look.
14. Waterfall Braid
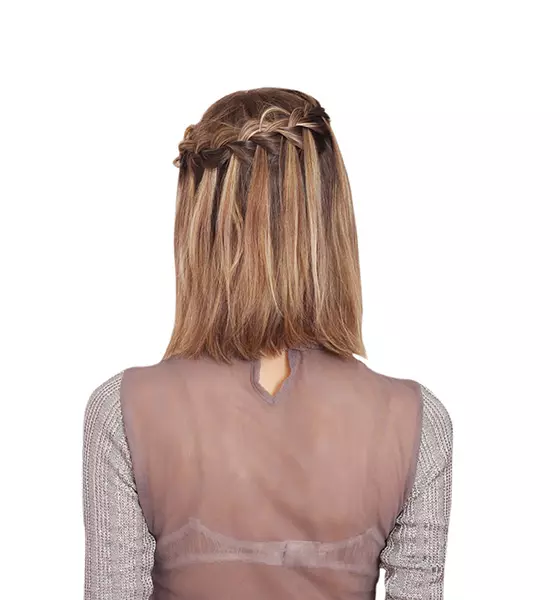
Want to dress up for a date night? Or maybe have a wedding to attend? This intricate look may seem difficult to do but actually requires simply altering just one step in the classic French braiding method. Moreover, this braid is much easy to style on short hair than on long hair.
What You Need
- Texturizing spray
- Fine-toothed comb
- Bobby pins
- Medium hold hairspray
How To Style
1. Starting from the left side of your face, pick up a 2 inch section of your hair from near your temple.
2. Divide this section into 3 horizontal parts. We will label the bottom section as section 1, middle section as section 2, and top section as section 3.
3. Twist section 1 OVER section 2. Now, section 1 is your middle section.
4. Now, twist section 3 over section 1. Then, drop section 3. Trust me, I know what I’m talking about.
5. There are now only 2 sections remaining in your hand.
6. Twist the bottom section OVER the top of the top section.
7. Then, pick up a section of hair from the top from right next to the section 3 that we had dropped. Twist this new section 3 over the middle section and drop it completely. This is basically creating the waterfall effect.
8. Continue doing this till you have reached your right temple.
9. At the end, simply braid the hair a couple of times and secure above your right ear by crossing two bobby pins.
10. Loosen up the hair a little and gently pull up the hair on the top of your head to mess it up and add more dimension.
11. Finish off with some medium hold hairspray to ensure the braid does not unravel through the day.
15. No Fuss Tresses
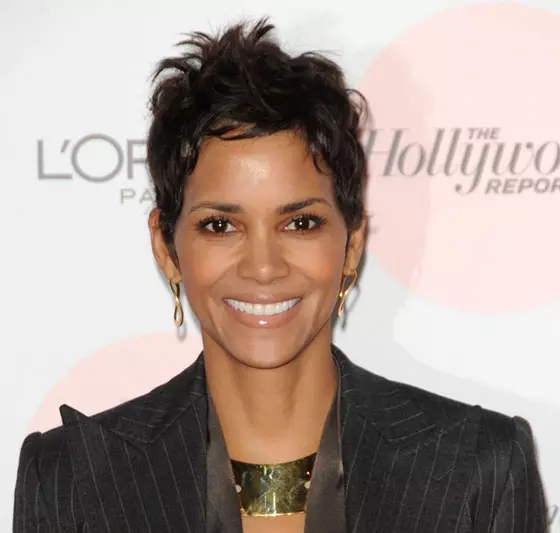
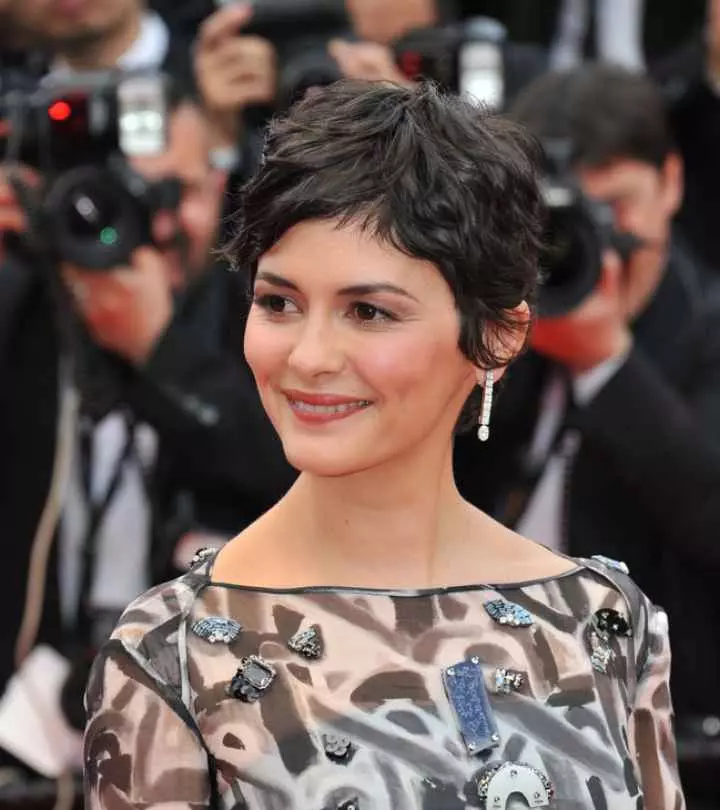
Halle Berry became a style icon when she sported this pixie cut in ‘Die Another Day.’ Perhaps the easiest of styles that you can ever do, this look requires a little bit of styling gel, your nifty fingers, and nothing else! Who doesn’t want that, am I right, ladies?
What You Need
Light hold styling gel.
How To Style
1. Comb your hair.
2. Rub some styling gel all over your fingers and mess up your hair any way you want until you are satisfied with how it looks. Voila! You are done.
16. Posh Messy Bob
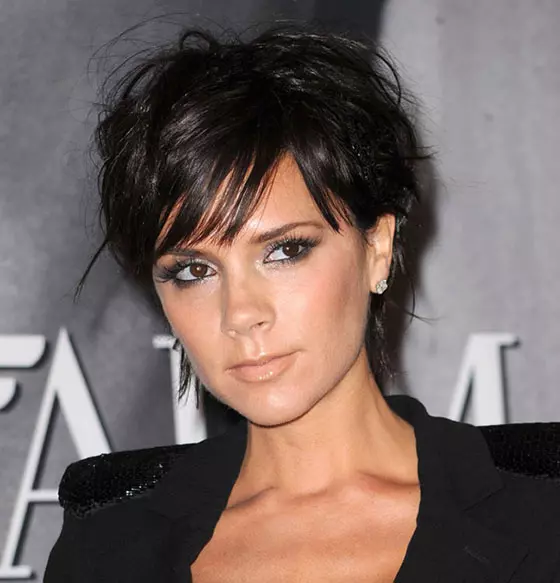
Who would not want to look like Victoria Beckham, a.k.a. Posh Spice? This simple but elegant look will help you do just that! You can also pretend as if you are a former pop star turned fashion icon. And the best part? You don’t even need to wash your hair for this look!
What You Need
- Unwashed hair
- Texturizing spray
- Straightening iron
How To Style
1. Prep your unwashed hair with some texturizing spray.
2. Picking up random sections of hair, start straightening your hair by running the straightening iron just once or twice over each section. Be as messy as your heart desires.
3. Part your hair to one side and use your fingers to shag up your hair as much as you want.
4. Finish off with a final spritz of texturizing spray to add a roughened up look to your hair.
17. Faux Hawk
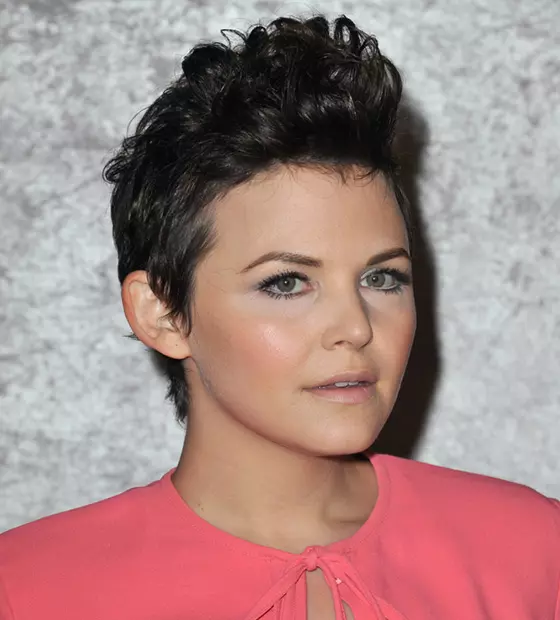
In my humble opinion, no other celebrity has rocked the pixie cut as amazingly as Ginnifer Goodwin. So, of course, I had to add her version of the faux mohawk to this list! Pair this fierce look with a more feminine outfit, the way Ginnifer has, and create a striking contrast of styles.
What You Need
- Volumizing mousse
- Texturizing spray
- Blowdryer
- Round brush
- Strong hold styling gel
How To Style
1. Prep your washed, wet hair with some volumizing mousse and texturizing spray.
2. Blowdry the sides of your hair and press them down towards your scalp.
3. Starting from the top of your head to the nape of your neck, blowdry the middle section of your hair using the round brush to sweep the hair backwards.
4. Rub styling gel all over your palms and fingers and start pulling up the hair from the middle section and make them stand up on ends. Keep working your fingers into your ‘mohawk’ this way until you are satisfied with the way it looks.
18. Side Dutch Band
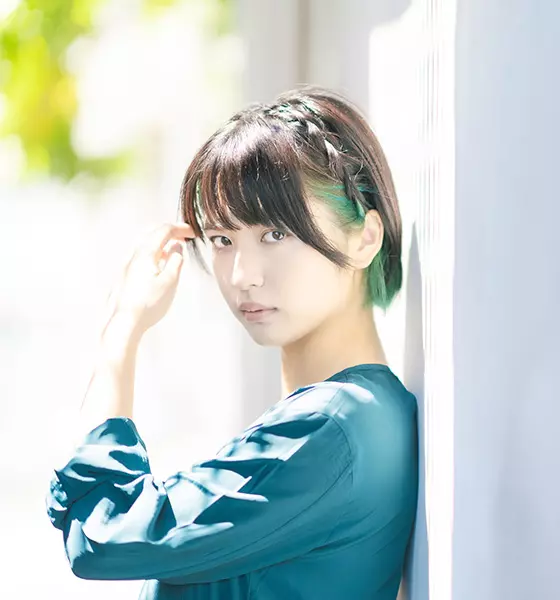
This careful bit of braided flirtation can add a great contrast to your otherwise shaggy and careless look. Yeah, it takes a little bit of nifty technique to master this look. But, trust me, the end result will be worth that tiny bit of hard work.
What You Need
- Wide-toothed comb
- Heat protectant
- Straightening iron
- Thin hair elastic
- Texturizing spray
- Smoothening serum
- Light hold hairspray
How To Style
1. Prep your washed, dried hair with a heat protectant serum and texturizing spray.
2. Remove all knots and tangles using a wide-toothed comb.
3. Part your hair to one side.
4. On the side with less hair, about 2 inches in, pick up a 2 inch section of hair and divide it into 3 parts.
5. Start Dutch braiding the hair. Adding pieces of hair from both sides as you go down, but braiding outwards rather than inwards.
6. When you are about an inch away from the ends of your hair, just braid normally a couple of times and secure the ends with a hair elastic.
7. To eliminate frizz, use a smoothing serum and a light hold hairspray.
19. Double Fishtail Pixie
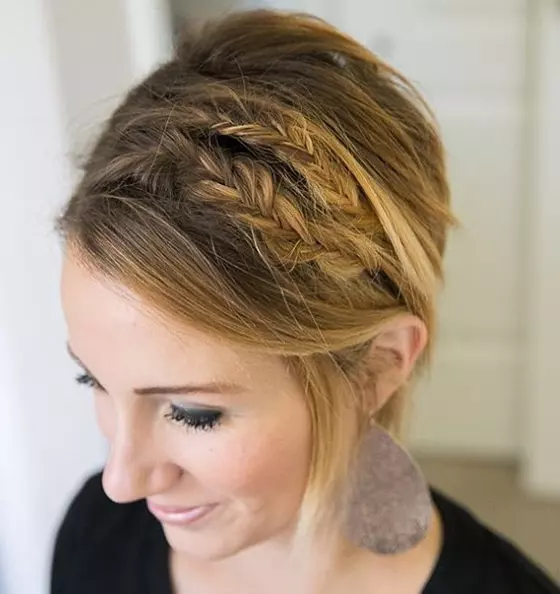
Fishtail braids are underrated, which is such a shame because they look oh-so-cute! Though they take a little longer to do than a normal braid, the end result is worth the wait. Plus, they look gorgeous when done in a way that they’re not usually done, like in this look where the bangs have been braided.
What You Need
- Fine-toothed comb
- Texturizing spray
- Light hold hairspray
- Hair elastics
- Bobby pins
How To Style
1. Prep your washed, dried hair with a texturizing spray.
2. Create a deep parting on any one side of your hair.
3. Leaving the front section of your hair as bangs, pick up a 2 inch section of hair.
4. Divide this section into 2 parts.
5. Pick up a thin section of hair from the outer side of the right section and add it to the inner side of the left section.
6. Next, pick up a thin section of hair from the outer side of the left section and add it to the inner side of the right section.
7. Repeat the 2 previous steps alternately until you reached the end of your hair.
8. Secure the ends with a hair elastic and secure the braid behind your ear using 2 bobby pins crossed over each other.
9. Do one more fishtail braid right next to the first one.
10. Loosen up the braids by pulling on them from the center to add more dimension and create a messy look.
11. Finish off the look with some light hold hairspray to prevent the braids from unraveling through the day.
20. Pancaked Dutch Band
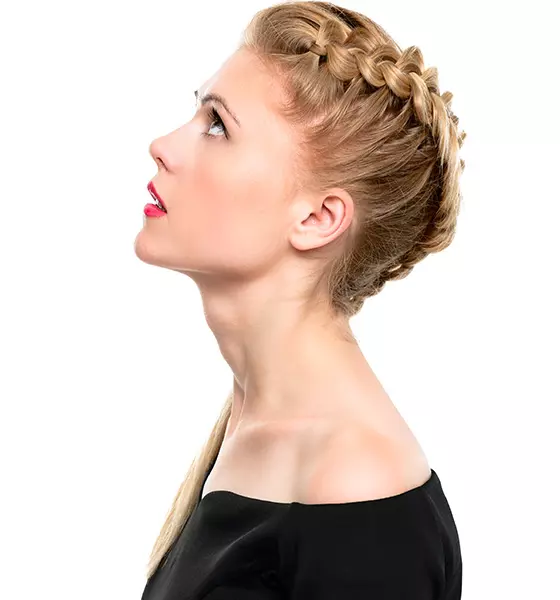
Sometimes, we all need some oomph in our look to show the world that we too can make some bold style choices. This Dutch braided band is perfect for those kinds of days. The volume and texture this look adds to your hair will make everyone sit up and take notice.
What You Need
- Texturizing spray
- Heat protectant serum/spray
- 1.5 inch curling wand
- Paddle brush
- Hair elastics
- Bobby pins
- Light hold hairspray
How To Style
1. Prep your washed, dried hair with some heat protectant and texturizing spray.
2. Curl all your hair with a 1.5 curling iron.
3. Gently unravel the curls using a paddle brush.
4. Create a deep parting on any one side of your hair.
5. One the side with more hair, pick up a 4 inch section of hair and divide it into 3 parts.
6. Start Dutch braiding your hair, i.e., add more hair on either side of the braid as you go down the length of your hair. Braid outwards instead of inwards.
7. Secure the end of your hair with a hair elastic.
8. Loosen up the braid by pulling out from the center (this is called ‘pancaking’). This makes the braid thicker and wider.
9. Secure the braid behind your ear with 2 bobby pins crossed over each other.
10. Finish off with some light hold spray to ensure the braid does not unravel throughout the day.
21. Mixed Up Braids
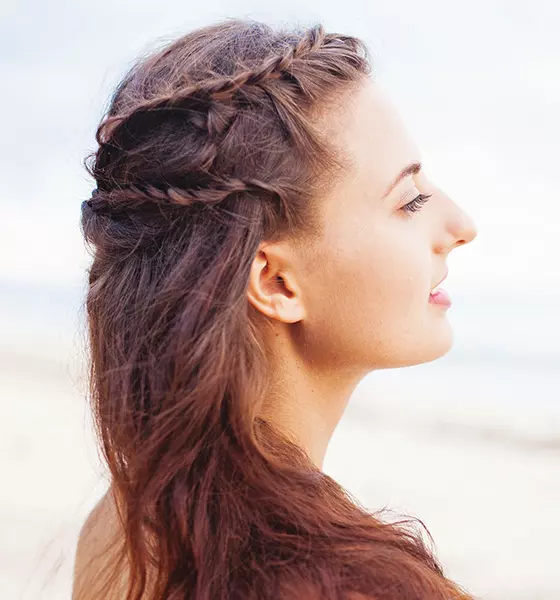
Honestly, when talking about hair looks, symmetry is so passé. Nowadays, it is all about mixing and matching styles. A mixture of Dutch and French braids and the different sized braids incorporated into this look add a sense of variety and a boho chic vibe to a rather simple look.
What You Need
- Heat protectant
- Texturizing spray
- 1.5 inch curling iron
- Hair elastics
- Bobby pins
- Light hold hairspray
How To Style
1. Prep your washed, dried hair with some heat protectant and texturizing spray.
2. Curl all your hair using a 1.5 inch curling iron.
3. Create a deep parting on any one side of your face.
4. Leaving your bangs out, pick up a half inch section of hair on the side of your head with more hair.
5. French braid this half inch section of hair and secure it with a hair elastic.
6. Right next to the French braid, pick up a 3 inch section of hair and Dutch braid it, securing it at the end with a hair elastic.
7. Pancake the Dutch braid by pulling it out from the center.
8. Secure both the braids at the back of your head using bobby pins crossed over each other.
9. Finish off with some light hold spray to ensure the braid does not unravel throughout the day.
22. Cutesy Curls
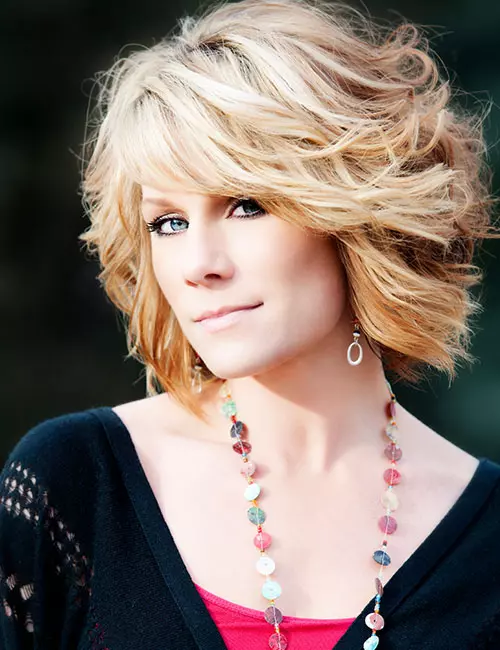
If you are looking for the best short shag hairstyles for women then cutesy curls is the answer. I know it takes quite a bit of effort to curl your hair and the thought of intentionally messing them up is cringe-worthy to many. But trust me when I tell you that messing up those curls will take your look to a whole other level that I, personally, refer to as adorably-chic.
What You Need
- Heat protectant
- Texturizing spray
- 1 inch curling iron
- Straightening iron
- Paddle brush
- Light hold spray
How To Style
1. Prep your washed, dried hair with some heat protectant and texturizing spray.
2. Straighten your bangs and section them off.
3. Using the curling iron, curl the rest of your hair, picking up 1 inch sections at a time.
4. Run a paddle brush throughout your hair to open and mess up the curls.
5. Give a final spritz of texturizing spray and scrunch up the curls with your hands to finish off the look.
23. Rope Up Braid
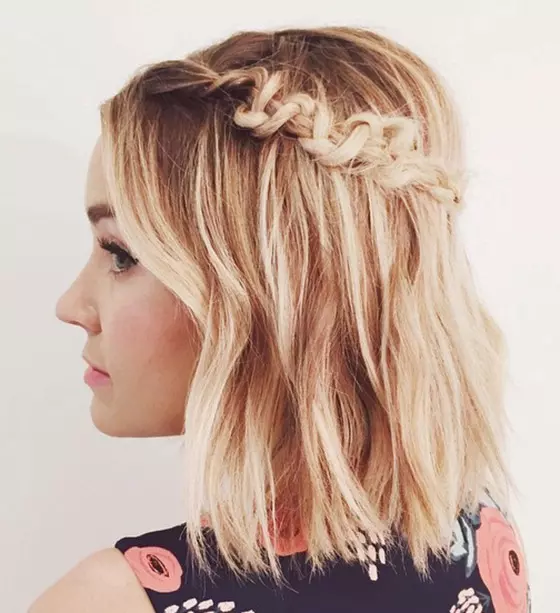
By adding just one simple step to your normal braiding routine, give your hair a whole new fancy look that you had never dreamed of before. Yes, it does take a little bit of trial-and-error to get the hang of doing this braid, but I’m sure that you will perfect it in no time!
What You Need
- Wide-toothed comb
- Texturizing spray
- Bobby pins
- Hair elastic
- Light hold hairspray
How To Style
1. Prep your washed, dried hair with some texturizing spray.
2. Create a parting on any one side of your face.
3. On the side with more hair, pick up a 3 inch section of hair and do a simple braid.
4. Once you have reached the end of the braid, hold the middle strand of the braid with one hand and the 2 side sections in the other.
5. Push up the 2 side sections of the braid towards your scalp while holding the middle section firmly in place.
6. Slowly pull back down the 2 sections and secure all 3 sections with a hair elastic. This will make your braid look like a rope.
7. Secure the braid at the back of your head using 2 bobby pins crossed over each other.
8. Finish off with some light hold spray to ensure the braid does not unravel through the day.
24. Symmetrical Fishtail Braids
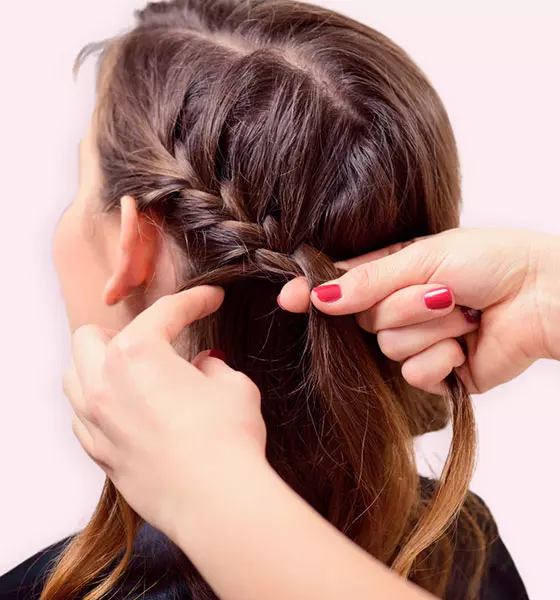
What is better than one fishtail braid? Two fishtail braids, duh! Do up these braids on either side of your head that are great for a formal event as well as a chill day out. An added bonus is that this look lets you keep your hair down while also keeping it off of your face.
What You Need
- Texturizing spray
- Heat protectant
- 2 inch curling iron
- Hair elastics
- Bobby pins
- Light hold hairspray
How To Style
1. Prep your washed, dried hair with some heat protectant and texturizing spray.
2. Curl all your hair using a 2 inch curling iron.
3. Part your hair down the middle.
4. Pick up a 2 inch section of hair.
5. Divide this section into 2 parts.
6. Pick up a thin section of hair from the outer side of the right section and add it to the inner side of the left section.
7. Next, pick up a thin section of hair from the outer side of the left section and add it to the inner side of the right section.
8. Repeat the 2 previous steps alternately until you reached the end of your hair, then secure with a hair elastic.
9. Do the same braid on the other side.
10. Secure both the braids on the back of your head using bobby pins crossed over each other.
11. Finish off with some light hold spray to ensure the braid does not unravel through the day.
25. French Braid Headband
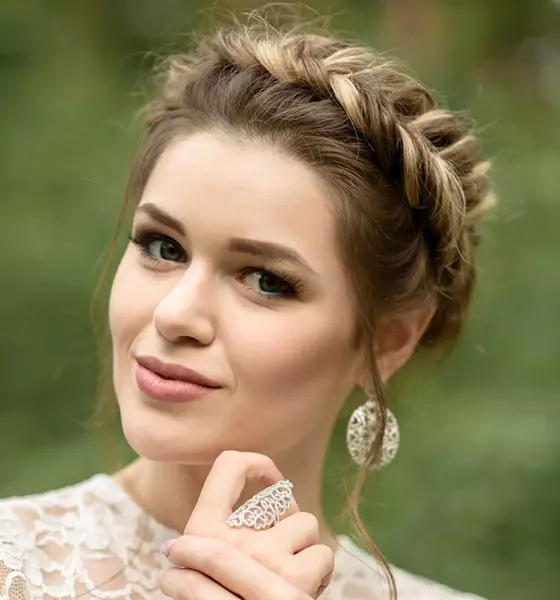
When you have short hair, it can be quite a challenge to keep your hair off your face. I know what you are thinking right now- “But head bands exist!” But, honestly, headbands make a lot of people’s head hurt. So, here’s a headband fashioned out of your own hair that looks gorgeous!
What You Need
- Fine-toothed comb
- Heat protectant serum/spray
- Texturizing spray
- 1 inch curling iron
- Bobby pins
- Light hold spray
How To Style
- Prep your washed, dried hair with some heat protectant and texturizing spray.
- Curl all your hair using a 2 inch curling iron.
- Back comb the front part of your hair using a fine-toothed comb.
- Pick up a 2 inch section of hair from above your left ear.
- Start French braiding, but make sure to only add hair from the front section/side towards your face, and not from the back side.
- Once you have braided till your right ear, braid a couple of more time and secure the braid behind your ear with two bobby pins crossed over each other.
- Finish off with some light hold spray to ensure the braid does not unravel through the end of the day.
26. Boho Bandana
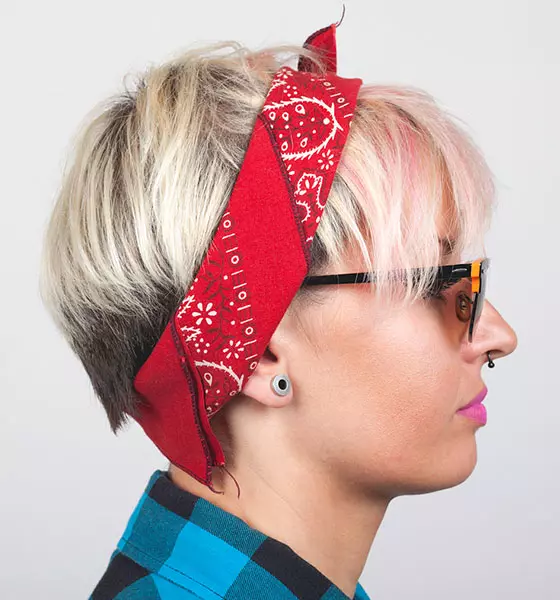
Let’s be real for a moment here. There are going to be days- so many days- when you will not want to wash your hair but still want to look presentable. This is a look for those kinds of days and it takes less than 2 minutes to perfect!
What You Need
- Straightening iron
- Cloth headband/ bandana
How To Style
1. Straighten your bangs/front section of your hair. You do not need to be precise here. Be as messy as you want.
2. Leaving your bangs out, position your bandana behind your ears and tie it up at the nape of your neck.
3. Run your hands through your hair and mess it up until you are satisfied.
27. Pinned-Back Waves

Who says you need to live near a beach to sport beachy waves? Sport this half-up, half down pinned up hairdo, that takes less than 5 minutes to do, to look like you are ready for a day filled with sand, sea, and the sun.
What You Need
- Texturizing spray
- Heat protectant serum/spray
- 2 inch curling iron
- Paddle brush
- Bobby pins
How To Style
1. Prep your washed, dried hair with some heat protectant and texturizing spray.
2. Curl all your hair using a 2 inch curling iron.
3. Brush out the curls with a paddle brush and spritz on some more texturizing spray.
4. Part your hair down the middle.
5. Pick up sections of hair from the front and start pinning them on the back of your head using bobby pins.
6. Ideally, you should have pinned back 3 to 4 sections from each side.
7. Gently pull out and loosen the pinned section to give them a more relaxed look.
28. Teased Curls
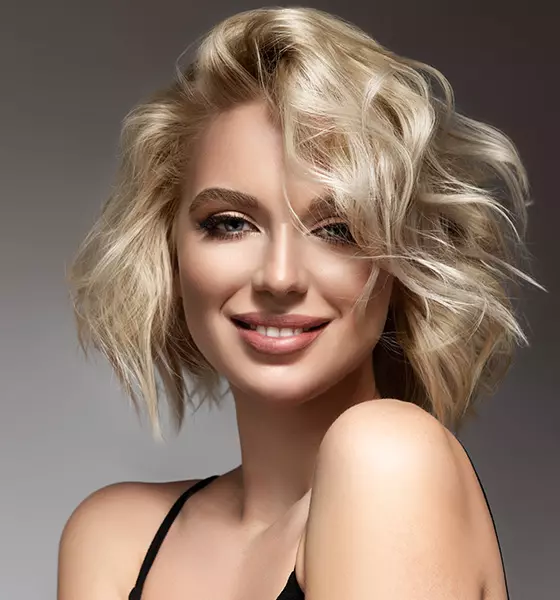
Who says you need to pack away that curling iron once you get a short haircut? You don’t need to play by anyone’s rules except your own. Add some teased volume to your simple curls by adding just one step to your regular curling routine. This is one of the best chic medium shag haircuts to match your vibe.
What You Need
- Heat protectant serum/spray
- ½ inch curling iron
- Teasing comb
- Fine-toothed comb
- Smoothening serum
How To Style
1. Prep your washed, dried hair with some heat protectant.
2. Curl all your hair using a ½ inch curling iron.
3. Create a deep parting on the opposite side of where you want the final parting to be.
4. Start teasing 1 inch sections of hair at a time and flipping them on the opposite side.
5. When you are done teasing half of the hair, flip the remaining unteased hair onto the opposite side as well. Now your parting will be on the side you desire.
6. Smooth down the top section of your hair using a fine-toothed comb.
7. Finish off with some smoothening serum to get rid of any frizz.
29. Deconstructed Dutch Band
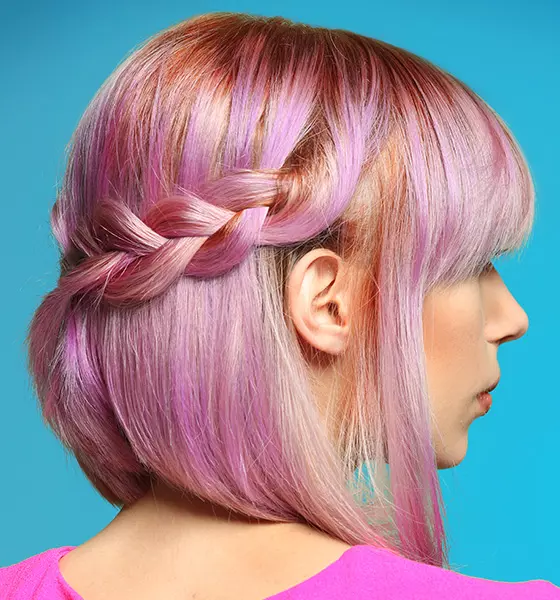
You don’t need to give up on doing big, extra volume hairstyles just because you have short hair. You just need to make generous use of mousse and a strategically placed braid to get that volume. Do just that by making your regular Dutch band look funky and cool by adding this deconstructed twist to it.
What You Need
- Texturizing spray
- Bobby pins
- Strong hold hairspray
How To Style
1. Prep your washed, dried hair with some texturizing spray.
2. Create a deep parting on one side.
3. Leaving your bangs out, pick up a 3 inch section of hair and start Dutch braiding. This involves braiding outwards as you add more pieces of hair from either side as you go down the braid.
4. When you have braided up to your ear, leave out the corner sections of the braid, tuck the middle section behind your ear, and secure it with two bobby pins.
5. Finish off the look with some strong hold spray to prevent the braid from unraveling throughout the day.
30. French Band Undercut
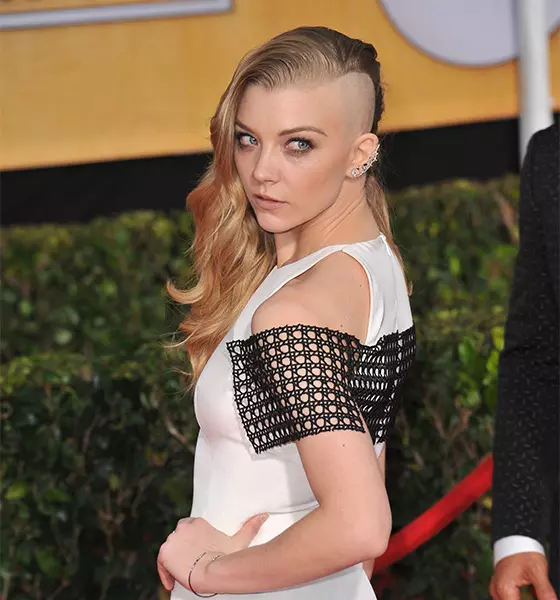
A messy bun and leaving your hair open are not your only options when you have an undercut. Feel free to experiment with braids and twists with random sections of your hair to see what works for you. Case in point: This delicate French braid look that can add a hint of femininity to your otherwise edgy undercut.
What You Need
- Texturizing spray
- Heat protectant serum/spray
- Straightening iron
- Bobby pins
- Medium hold hairspray
How To Style
1. Prep your washed, dried hair with some heat protectant and texturizing spray.
2. Straighten all your hair and flip them over to the opposite side of your undercut.
3. Pick up a ¾ inch of hair from near your temple and start French braiding, adding pieces from both sides as you go down the braid.
4. Once you have reached the end of your braid, secure it down with bobby pins crossed over each other.
5. Finish off the look with some medium hold spray to prevent the braid from unraveling through the day.
31. Super Messy Dutch Band
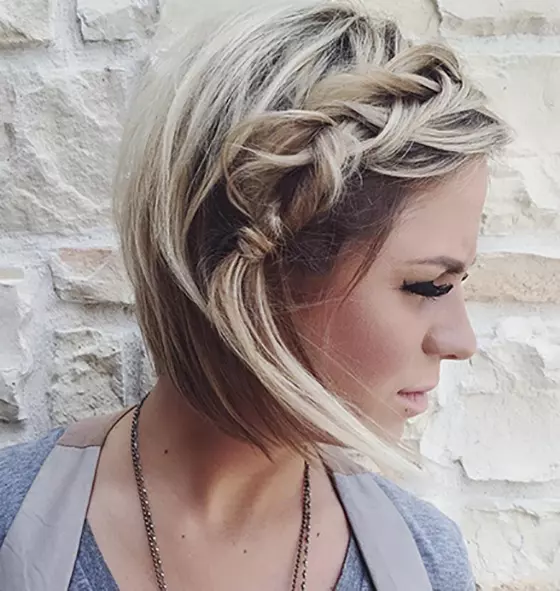
This easy-breezy style will make it look like you have put lots of effort into doing up your hair even when you haven’t! All you need to do is fashion a faux hair elastic from your own hair to create a stylish illusion that will take some time for other people to figure out.
What You Need
- Texturizing spray
- Hair elastics
- Bobby pins
- Light hold hairspray
How To Style
1. Prep your washed, dried hair with some texturizing spray.
2. Create a deep parting on one side.
3. Pick up a 3 inch section of hair from near your forehead and start Dutch braiding. This involves braiding outwards as you add more pieces of hair from either side as you go down the braid.
4. Once your braid has reached your ear, tie up the ends with a hair elastic.
5. Pancake your braid by pulling it out and loosening it from the center. Be as messy as you want.
6. Pick up a few strands of hair from the end of your braid and wrap it completely around the hair elastic tied around your braid, until it is completely hidden.
7. Secure the strands of hair covering the hair elastic with a few bobby pins tucked right under the braid.
8. Finish off with some light hold spray to ensure the braid does not unravel through the day.
32. Twisted Bangs
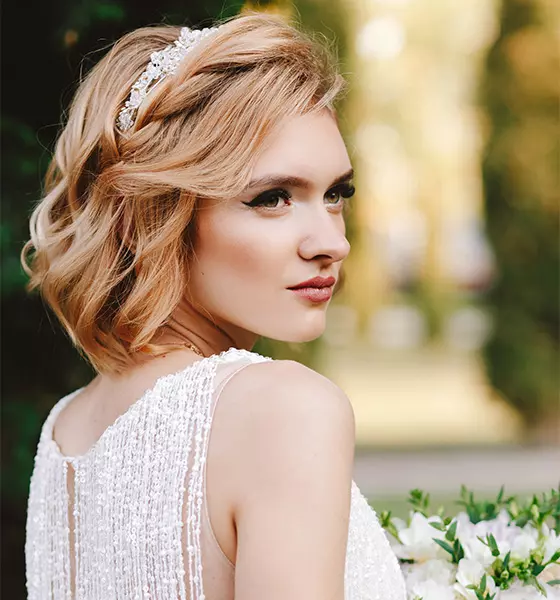
For all those people out there who struggle with braiding, here is a style that requires you to just twist up your hair but looks just as cute as a braid. This look is especially great for people whose bangs are in that awkward in-between transition stage of growing out.
What You Need
- Texturizing spray
- Heat protectant
- 1.5 inch curling iron
- Hair elastics
- Bobby pins
- Light hold hairspray
How To Style
1. Prep your washed, dried hair with some heat protectant and texturizing spray.
2. Curl all your hair using a 1.5 inch curling iron.
3. Create a deep parting on one side of your head.
4. Pick up a 3 inch section of hair from the front of your head and divide it into 2 sections.
5. Twist the front section once towards the right and then twist it over the back section.
6. Repeat the previous step over and over again until you reach the ends of your hair.
7. Secure the section at the back of your head using two bobby pins crossed over each other.
8. Pick up another 3 inch section of hair from right next to the first one and repeat steps 4 to 7.
9. Once both the twisted sections are secure, gently loosen them a little to give them a more disheveled look.
10. Finish off with some light hold spray to ensure the twisted bangs do not unravel through the day.
33. Boho Pulled-Back Braid
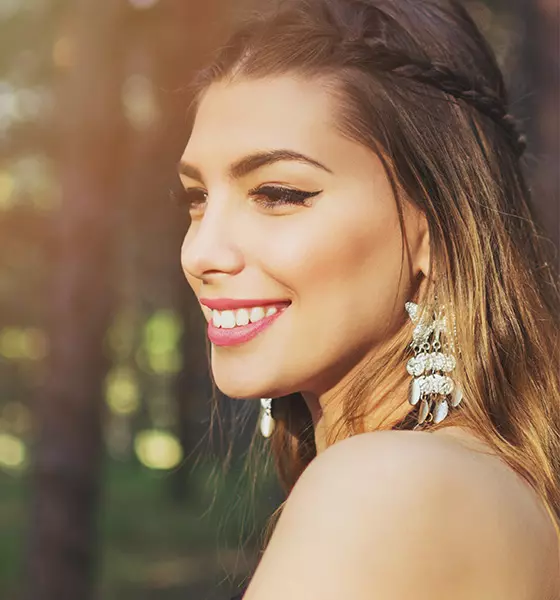
Roughen up your look for school, college, or work, without worrying about not looking presentable by sporting this version of a simple pulled back braid. The biggest appeal of this look is that it allows you the freedom to be as messy as your heart may desire.
What You Need
- Texturizing spray
- Heat protectant serum/spray
- ½ inch curling iron
- Paddle brush
- Bobby pins
How To Style
1. Prep your washed, dried hair with some heat protectant and texturizing spray.
2. Curl all your hair using a ½ inch curling iron.
3. Unravel your curls using a paddle brush.
4. Part your hair down the middle.
5. On the side that you prefer, pick up a 2.5-3 inch section of hair from the very front.
6. Pull back the section of hair and simply braid it.
7. Once you have reached the end of your braid, secure it on the back of your head using two bobby pins crossed over each other.
8. Finish off the look by running your hands through your hair and roughening it up a bit to give it a messy vibe.
34. Back-Combed Puff
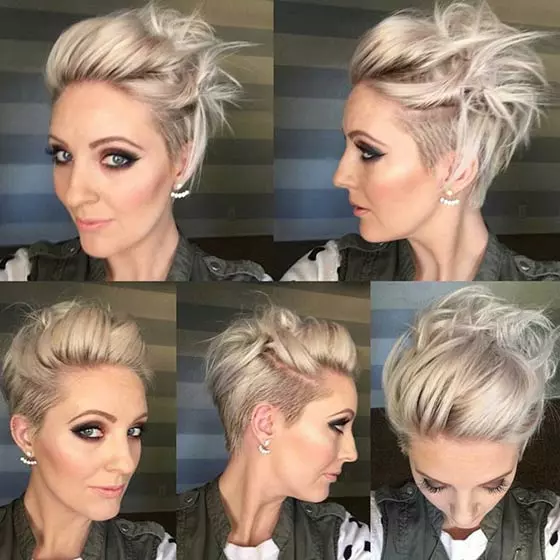
Don’t you hate it when you are out dancing and your sweaty hair keeps falling on your face and messing up your makeup? This teased puff look is perfect to keep your hair off your face as you party the night way without worrying about touching up every few hours. If you’re aiming for a carefree look, consider going for messy, short, choppy hairstyles like this that add an edge to your look.
What You Need
- Texturizing spray
- Teasing comb
- Fine-toothed comb
- Bobby pins
- Light hold hairspray
How To Style
1. Prep your washed, dried hair with some texturizing spray.
2. Section off the front section of your hair/bangs and tease all the remaining hair at the back with a teasing comb.
3. Leaving 2 inch sections of hair on either side, comb and smoothen back the front section of your hair using a fine-toothed comb and secure it on the back of your head using bobby pins.
4. Take one of the side sections that you left out earlier, twist it a couple of times, and secure it at the back of your head using bobby pins.
5. Repeat the previous step on the other side.
6. Finish off the look with a few spritzes of a light hold spray.
35. Straight Out Of Bed
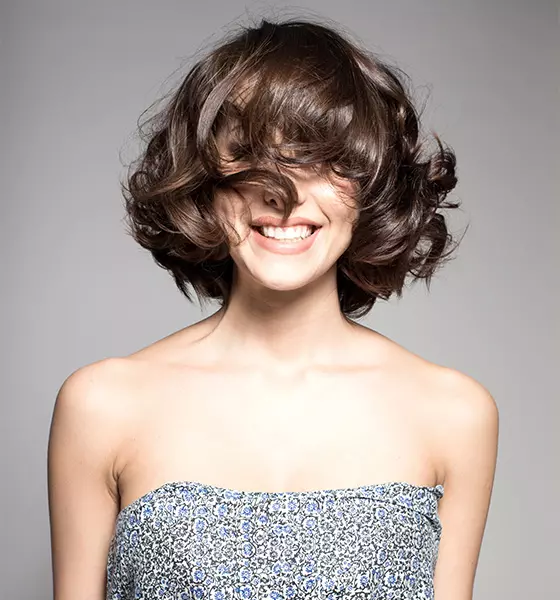
I think it is every girl’s dream to just roll out of bed and have perfect hair to take on the day. I can’t really recommend you to simply go out with a bed head, but I can show you a way to improve on it with just a few seconds with the curling iron and lots of texturizing spray.
What You Need
- Texturizing spray
- Heat protectant serum/spray
- 1 inch curling iron
- Paddle brush
- Volumizing mousse
How To Style
1. Prep your unwashed hair with some heat protectant and lots of texturizing spray.
2. Curl your hair haphazardly with a 1 inch curling iron, being as messy as possible. You can even leave some sections uncurled to add to the shagginess of the style.
3. Brush out all the curls with a paddle brush to open up the curls and add more volume.
4. Finish off by applying a little mousse and running your hands through your hair to achieve the straight-out-of-bed look.
36. Tousled Curls
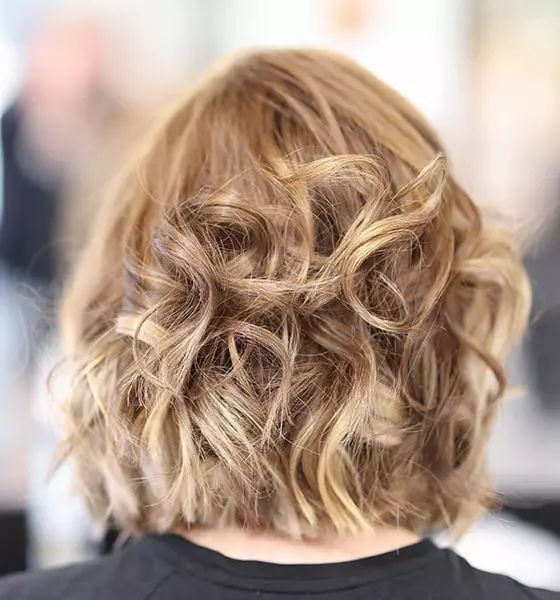
In my opinion, one drawback of having short shag hair is that it sits right on your neck, which makes it particularly annoying on those hot summer days. These cute pin-up curls are perfect for a summery day out to keep your hair off your neck in a chic way.
What You Need
- Texturizing spray
- Heat protectant serum/spray
- Volumizing mousse
- ½ inch curling iron
- Medium hold hairspray
How To Style
1. Prep your washed, dried hair with some texturizing spray and heat protectant.
2. Picking up ½ inch sections at a time, curl all your hair using a ½ inch curling iron.
3. Rub some mousse all over your fingers and run them through your curls to tousle and open them up.
4. Scrunch up your curls with your hands and finish off with a few spritzes of medium hold spray.
37. Punk Rock Spikes
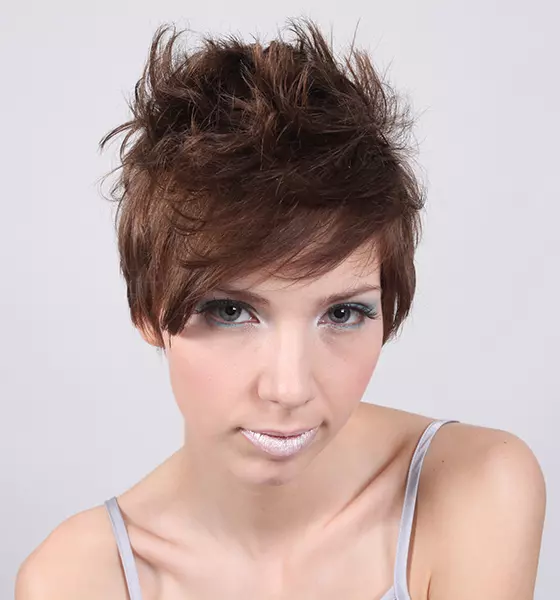
Unleash your inner punk rock alter ego through this asymmetrical, spiky hairdo that requires nothing but a dollop of styling gel. Finish the look with a smoky eye, rosy lips, and funky jewelry to create a perfect combination of girly and hardcore that will wow everyone around you.
What You Need
- Heat protectant serum/spray
- Straightening iron
- Strong hold styling gel
How To Style
1. Prep your washed, dried hair with some heat protectant.
2. Straighten all your hair until it is poker straight.
3. Rub a dollop of styling gel into your hands and run them through your hair until they are standing on their hands.
4. Using your fingers, bend and shape your spikes any way you want until you are satisfied with the way they look.
38. Roller Brush Curls
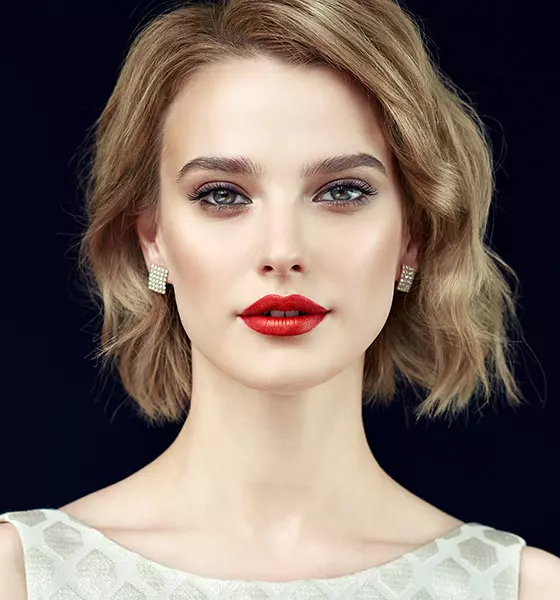
Everyone needs to start combining different ways of curling into one look to come up with some innovative looks. Curling your hair in two different ways can add a whole new dimension to your short shag and create a look that you could never even have imagined before.
What You Need
- Heat protectant serum/spray
- Round brush
- Blowdryer
- 2 inch curling iron
- Smoothening serum
How To Style
1. Prep your washed, wet hair with some heat protectant.
2. Divide all your hair into 4 sections (2 sections on each side).
3. Picking up 1 section of hair at a time, roll the ends of the hair around the round brush and blowdry through the length of the section. Repeat this step on all 4 sections.
4. With the 2 inch curling iron, curl random sections of hair to create some haphazard waves.
5. Brush out the waves to give them a softer look.
6. Finish off with some smoothening serum to get rid of any frizz.
39. Fishtail Half Updo
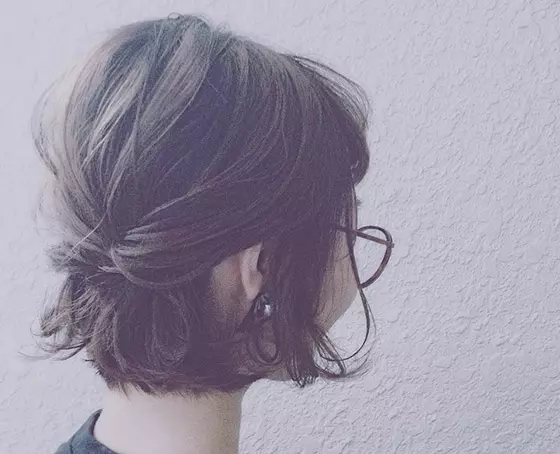
This slightly different version of the fishtail braid is perfect for the college-going girl who has no time to spare on doing intricate hairstyles but still wants to look cute. It may be confusing to look at – honestly, even I struggled with figuring out how to do this one, but once you read the tutorial, it is the simplest thing to do.
What You Need
- Texturizing spray
- Fine-toothed comb
- Bobby pins
- Light hold hairspray
How To Style
1. Prep your washed, wet hair with some texturizing spray.
2. With a fine-toothed comb, smooth out your hair and part it down the middle.
3. Leaving out your bangs, pick up 4 inch sections of hair from the other side of your face.
4. Start fishtailing by picking up a small section of hair from the outside of one section, crossing it over to the other side, and adding it to the opposite section.
5. Continue this fishtail braid until you reach the ends of your hair.
6. Secure the braid with a few bobby pins.
7. Pull up hair from the section between the sections comprising your fishtail to create some volume.
8. Finish off the look with a few spritzes of a light hold spray.
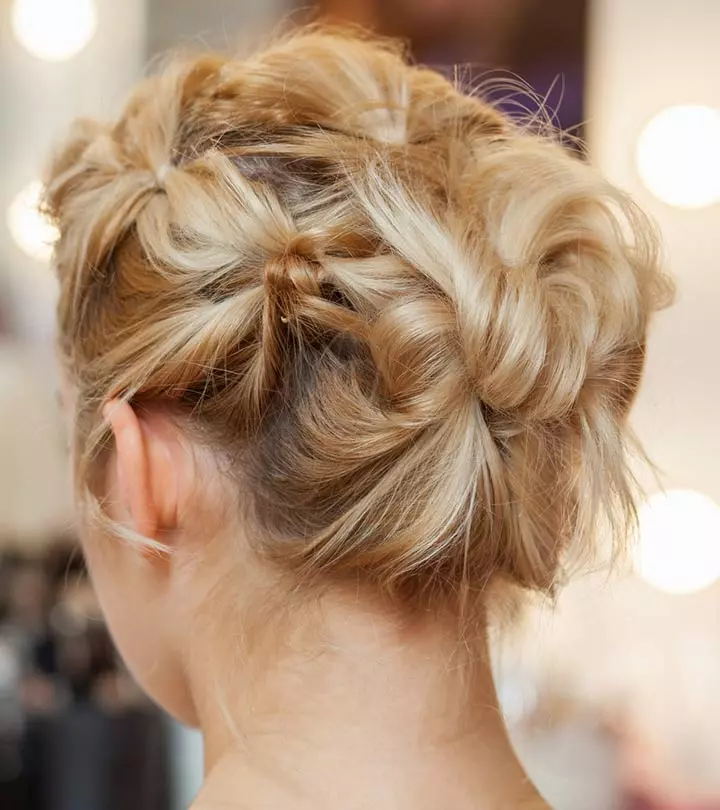
40. Cat Ear Buns

These adorable cat ears style buns have taken the world by storm lately. And the great news is it just takes 2 hair elastics to achieve this look. If anyone tells you they look too childish, hiss at them – as any self-respecting cat would – and carry on rocking your hairdo!
What You Need
- Texturizing spray
- Hair elastics
- Light hold hairspray
How To Style
1. Prep your washed, dried hair with some texturizing spray.
2. Part your hair any way you prefer – in the middle or on the side.
3. Starting on one side, gather all the hair in the front and twist it up right till the end.
4. Taking care not to untwist the hair, roll it up into a bun on the side of your head and secure it down with some bobby pins.
5. Repeat the previous step on the other side.
6. Finish off the look with a few spritzes of a light hold spray.
41. Haphazard French Braid
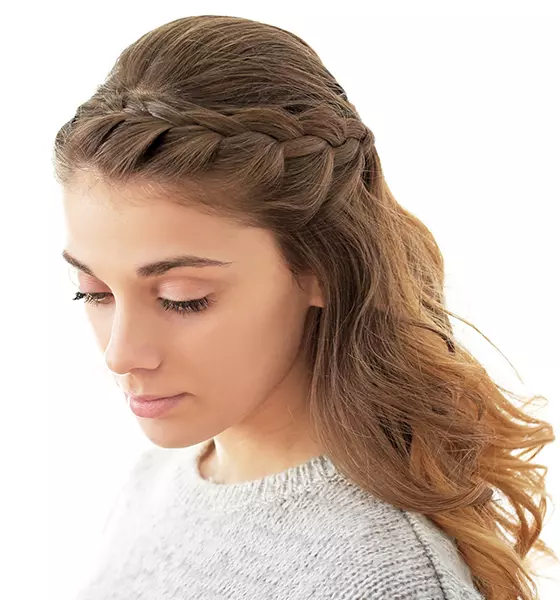
Freshen up your boring old French braiding technique by cutting down on a few steps but adding a whole lot of glamor to it. All you need to do is randomize the pattern of your braiding and you end up with a whole new look. Yes, it’s that simple!
What You Need
- Texturing spray
- Heat protectant serum/spray
- 1.5 inch curling iron
- Bobby pins
- Light hold hairspray
How To Style
1. Prep your washed, dried hair with some heat protectant and texturizing spray.
2. Curl all your hair using a 1.5 inch curling iron.
3. Unravel your curls using a paddle brush to create a wavy look.
4. Part your hair on the side.
5. Pick up a 3 inch section of hair from the front of your face and start braiding.
6. After braiding a couple of times, start adding hair from both sides at every alternate turn. This will create a haphazard French braid look.
7. Finish off the look with a few spritzes of a light hold spray.
42. Half Bun

Who says that you can’t rock a bun just because you have short hair? Especially with the advent of the man-bun, we women need to take back our bun! Prove those short hair haters wrong with this half up-half down look that looks both casual and classy at the same time.
What You Need
- Texturizing spray
- Hair elastics
How To Style
1. Prep your washed, dried hair with some texturizing spray.
2. Gather all the hair from the front and sides of your face and twist it right till the end into one section.
3. Making sure not to untwist the hair, roll up the section of hair into a bun and secure it with a hair elastic at the top of your head.
4. Finish off by pulling out a few strands from the bun and the top of your head to create a shaggy look.
43. Short Choppy Layers
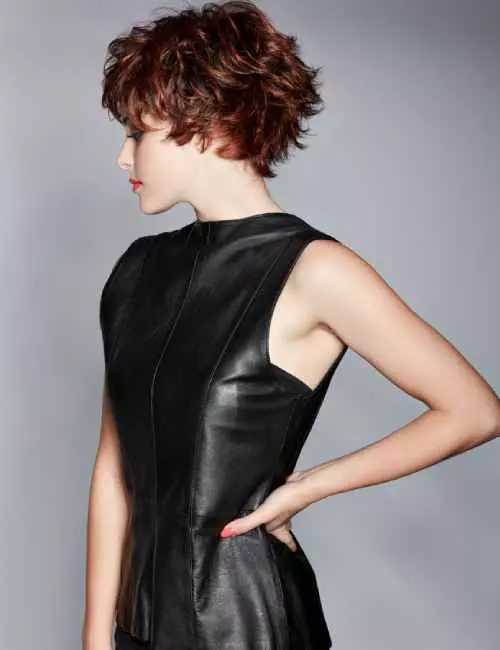
If you are looking for shag hairstyles with short choppy layers for a bold and modern look, this one is perfect for you. The multiple layers in this pixie-style shag add texture and movement to it, creating a playful and edgy vibe. The best thing is, this versatile style is sure to complement all hair types, be it straight, wavy, or curly.
What You Need
- Comb
- Texturizing spray
- Setting spray
How To Style
- Wash your hair and let it air dry until it is slightly damp.
- Spritz on some texturizing hair spray all over your hair
- Comb your hair outward and let the front strands gently fall on your forehead.
- Keep teasing the layers till you find yourself with a messy and bold hairstyle.
- Finish off with some setting spray.
 Quick Tip
Key Takeaways
- You can style a shag haircut in various ways, ranging from edgy to sleek.
- Waves and curls can add a feminine touch to your hairstyle.
- Messy and tousled shag hairstyles are quick and easy to style for professional and casual outings.
- Use a styling gel for poker straight or spiky hairstyle and pair it with statement accessories for a punk look.
Once you have selected the perfect shag hairstyle for yourself, it is important to keep a few maintenance tips in mind to truly enhance your look. Learn more in the next section.
Tips For Maintaining And Styling Your Short Shag
With these styling tips in your arsenal, your short shag hairstyle will always be on point :
- Go for regular trims to keep your layers fresh and well-defined.
- Use a good texturizing or sea salt spray to enhance that effortless, tousled vibe.
- Apply a lightweight mousse or styling gel to add lift at the roots and movement throughout.
- Use a round brush while blow-drying to help layers fall naturally and frame your face beautifully.
- Go for a quick scrunch with some styling cream on busy days to revive your shag with minimal effort.
Infographic: Accessories To Experiment With Short Shag Hairdo
Short super spunky shag hairstyles are on trend right now! They look edgy and androgynous. But, tricky shaggy cuts like the pixie undercut waves, rocker chic, a messy bouffant, and many more need the right accessories like jewelry and headbands to look truly fabulous.
Check out the infographic below to know which accessories you should pair with the short shag haircuts to stand out in the crowd.
hich accessories you should pair with a short shag hairdo to stand out in the crowd.
Some thing wrong with infographic shortcode. please verify shortcode syntax
Short-shag hairstyles are timeless and never go out of style. They can elevate your look to the next level with the right tweak. They are so versatile that you can sport them for any occasion effortlessly. You can go for hairstyles like rocker chic, half bun, or shaggy curls. For a more sleek look, try a straight edge or faux hawk. And if you thought you needed to go to the salon and spend a fortune on this hairstyle, you are wrong. With the right hair products and accessories, you can easily recreate these ultra-stylish shag hairstyles at home.
Frequently Asked Questions
What face shape do shags look good on?
The shag hairstyle can suit most face shapes, except if you have a very round face, then a shag hairstyle with fringes would make your hair look pretty short.
Are shags high maintenance?
No, it is pretty low-maintenance and easy to pull off.
How often should I cut my shag?
If you want to maintain the same length, you can get your haircut every 6-8 weeks to maintain the shag hairstyle.
Illustration: Short Super Spunky Shag Hairstyles
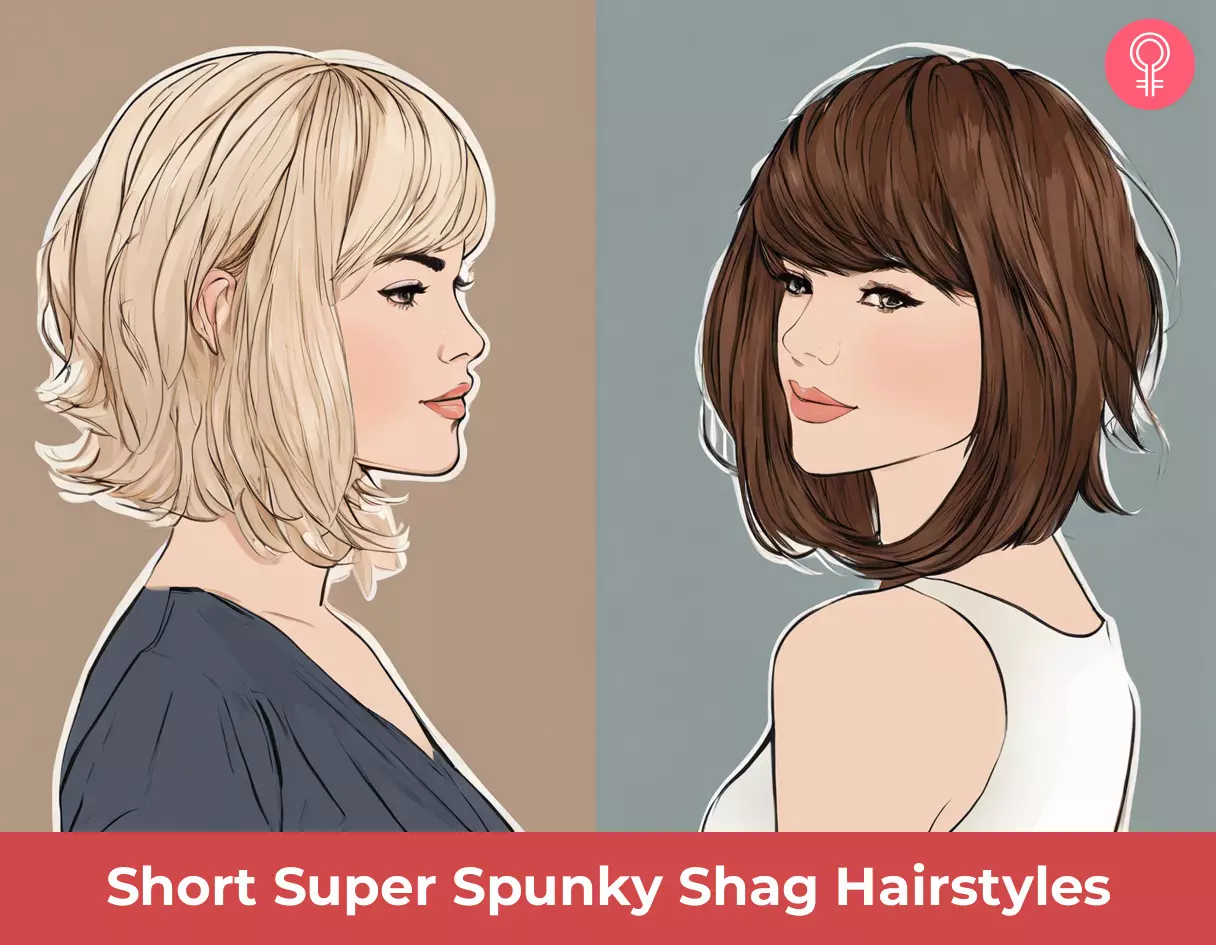
Image: Stable Diffusion/StyleCraze Design Team
Grab your hair styling tools and get ready to try edgy and cool short shaggy hairstyles! Make heads turn in awe wherever you go with the latest haircuts and styles in this video.
Personal Experience: Source
StyleCraze's articles are interwoven with authentic personal narratives that provide depth and resonance to our content. Below are the sources of the personal accounts referenced in this article.
i. NEW HAIR: I GOT A SHAG MULLET!https://www.youtube.com/watch?v=S73DhYDrX2k
Read full bio of Danielle Wilkinson Brucklacher
Read full bio of Arshiya Syeda
Read full bio of Asmita De
Read full bio of Joyce Joyson






Community Experiences
Join the conversation and become a part of our empowering community! Share your stories, experiences, and insights to connect with other beauty, lifestyle, and health enthusiasts.