8 Different Nail Shapes And How To Achieve Them
Picking the right nail shape is just as important as picking the right nail color!
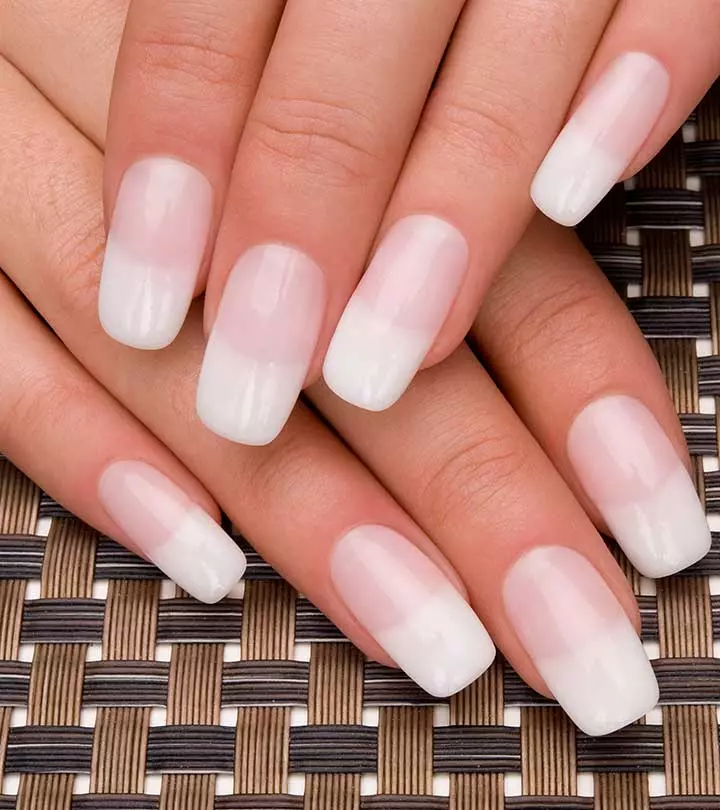
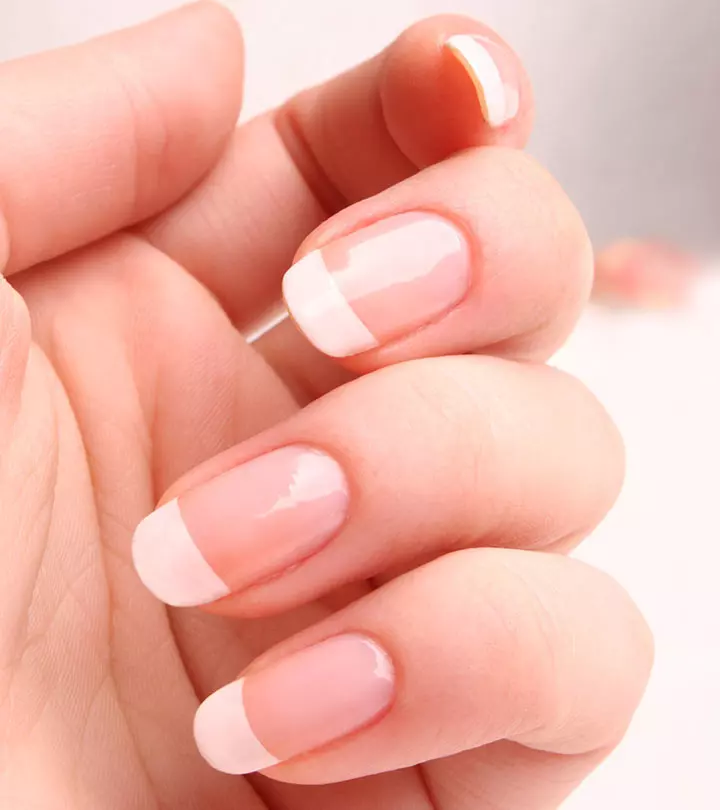
Image: shutterstock
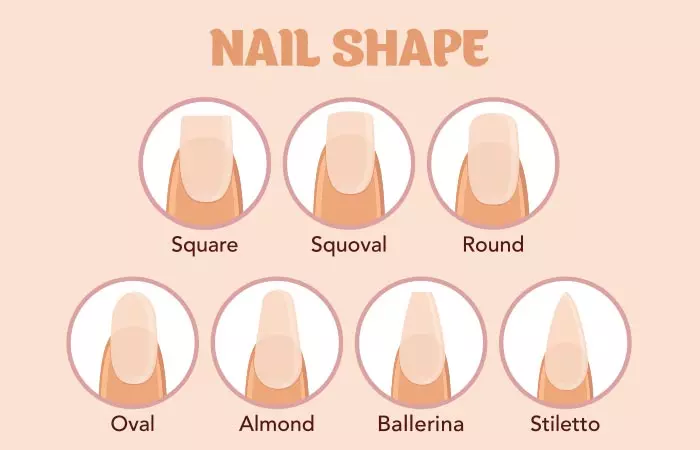
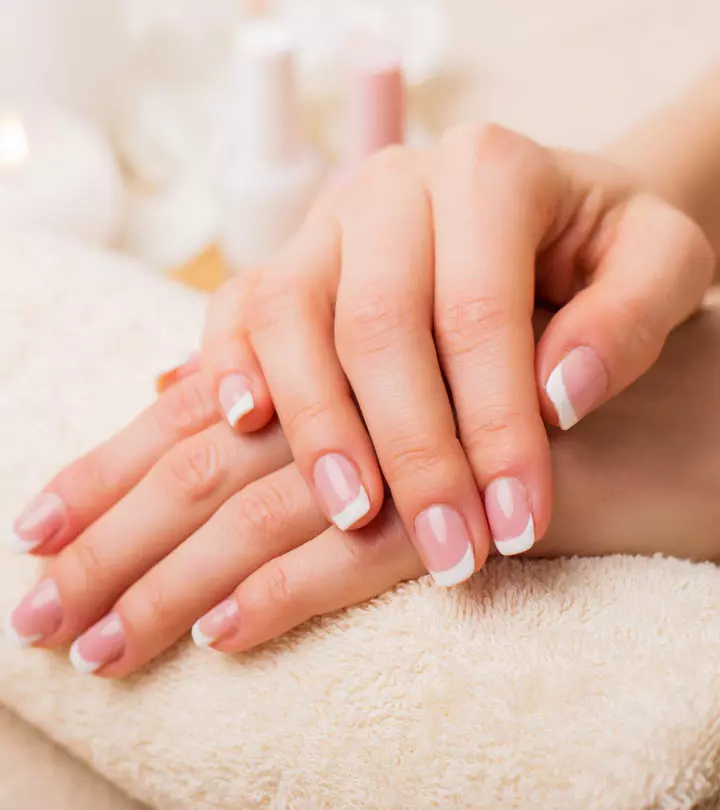
Beautiful and manicured nails are attractive and make you appear gorgeous. So, if you are someone who wants to learn about different nail shapes and how to achieve them, we can help you. You can easily achieve a variety of nail shapes like oval, round, stiletto, square, squoval, almond, or ballerina. So, say goodbye to unkempt and filthy nails. Having perfectly manicured nails is not an ordeal, and you can get them done by experts or try them out by yourself at home.
But before that, let us look at the complete list of various nail shapes. Keep scrolling to check them out!
 Keep In Mind
- Finger and Palm Shape: Finger and Palm Shape Get round-, oval- and almond-shaped nails if you’ve short fingers and palms, whereas go for stiletto- or coffin-shaped nails if you have longish palm and slender fingers.
- Nail Health: Certain nail shapes may put more stress on the nails. Round nail shapes are considered to put the least amount of stress on the nail bed and is a healthier choice.
- Nail Care: A balanced diet, including foods that are rich in biotin, iron, and zinc can strengthen nails (1). Further, regularly moisturizing your nails and cuticles can help keep them healthy and shiny.
In This Article
What If I Can’t Grow My Nails Out?
Now, you may be thinking, since you can’t grow out your nails, you can’t do much with them apart from the basic round. Well, I’m here to tell you that it is not so! Here are some tips for those of you who suffer from nail breakage.
- Acrylic Nails: When you have very brittle nails, and you want to go for various nail shape options, it’s best that you go for acrylic nails. They are quite sturdy, and the chances of them breaking are very less.
- Gel Nail Polish: I personally love getting gel nails. Firstly, it lasts SO much longer than just regular nail polish, and the shine of the nail polish that everyone loves stays the whole time! Another huge advantage for all my fellow weak-nailed women is it makes your nails so much stronger by adding an extra layer. Do not peel them off, no matter what! Soak them in acetone and remove them accordingly. You can find a detailed step-by-step tutorial on how to remove them here.
If you are wondering what the difference between acrylic and gel nails is, the former is considered more expensive, thicker, and bulkier than the latter. Gel nails, on the other hand, have a more natural finish, are flexible, and are less resistant to chipping.
- Cuticle Nail Oil: A lot of people tend to ignore using this product but many people claim that it may help make nails grow stronger and healthier. Make it a practice to apply it every night before going to bed.
 Quick Tip
Let’s take a look at the various nail shapes so that you can figure out which one tickles your fancy!
Key Takeaways
- Use cuticle oil to nourish your nails and keep them healthy.
- You can apply gel nail polish to give a protective layer to your nails.
- Try sharper nail shapes, like a square, stiletto, or ballerina, to have an edgy vibe.
- You can opt for classic shapes like almond, round, or oval to accentuate your soft hands.
Types of Nail Shapes
1. Round Shaped Nails
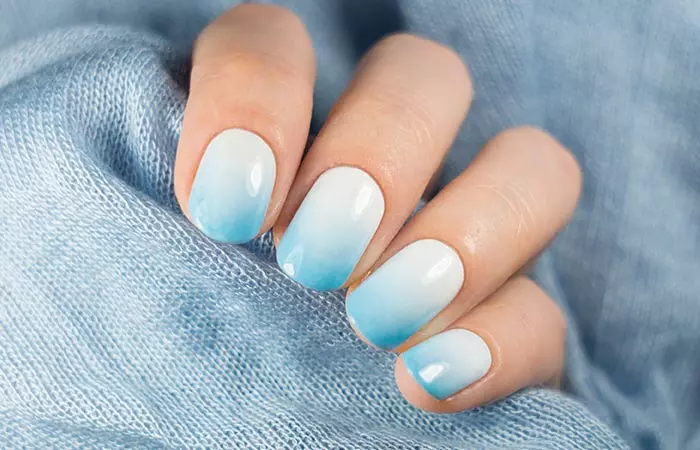
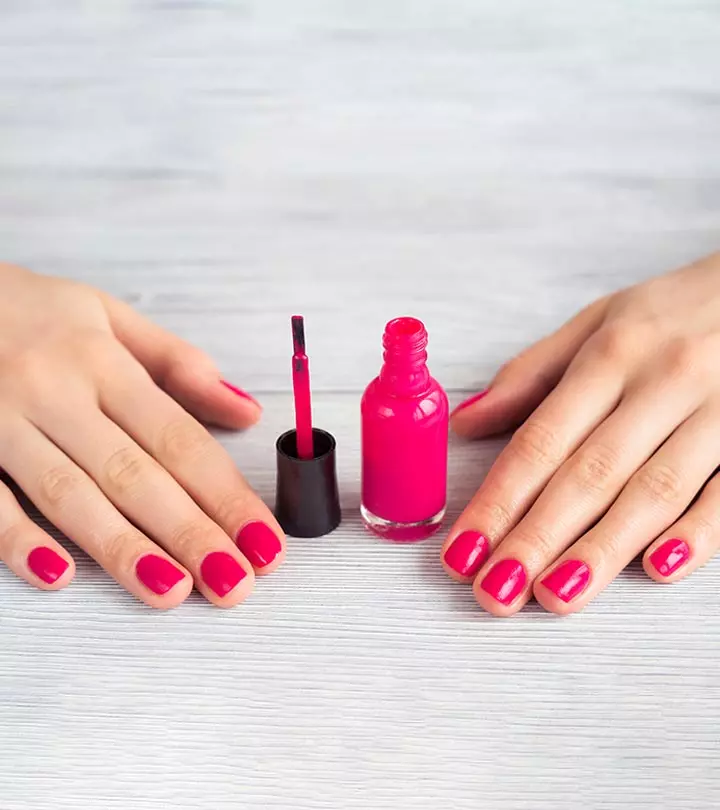
This is probably the easiest shape to maintain. If you want something low maintenance but still want your nails to look good, this is probably the shape for you. This is also very easy to do. This is the best look for those who find it difficult to grow out nails. It also makes for a fabulous option for those looking to rock stylish nail designs for short nails.
Best Suited For: All types of fingers.
Here are the steps for achieving a round-shaped nail at home.
Steps To Achieve Round-Shaped Nails
Tools Needed
- Nail clipper
- Nail file (180-240 grit)
- Buffer
- Cuticle pusher (optional)
Step 1: Trim Your Nails To The Desired Length
- Use a nail clipper to trim your nails to a short to medium length.
- Keep the length uniform across all fingers to maintain symmetry.
- If you have long nails, trim them gradually rather than cutting too much at once to avoid splitting.
Step 2: File The Edges Straight First
- Begin by shaping the free edge of your nails into a soft square shape.
- Hold the nail file at a slight angle and move it in one direction rather than following a back-and-forth motion to prevent nail weakening.
Step 3: Follow The Natural Curve Of Your Fingertip
- Once you have a soft square shape, start rounding the corners by filing in gentle, curved strokes.
- Follow the natural contour of your fingertip to create a smooth, rounded shape.
- Use light pressure to avoid over-filing, which can thin the nail.
Step 4: Refine The Shape For Smoothness
- Go over the edges again using a fine-grit nail file to smooth out any rough edges.
- Check that both hands have a consistent shape by comparing them side by side.
Step 5: Buff And Moisturize
- Buff the nail surface to remove any roughness and enhance the natural shine.
- Apply cuticle oil and hand cream to keep your nails and skin hydrated.
Advantages Of Round-Shaped Nails
- Low Maintenance
Round-shaped nails are easy to maintain and require minimal filing and shaping. They do not snag or break as easily as other shapes, making them perfect for those with an active lifestyle.
- Natural And Classic Look
This shape follows the natural contour of the fingertips, providing a clean and timeless appearance. It complements all finger types, making hands look well-groomed without excessive effort.
- Ideal For Short Nails
If you struggle to grow your nails, round-shaped nails can make them appear longer and neater. They work well for those who prefer short nails but still want a stylish and polished look.
- Stronger And Less Prone To Breakage
Unlike square or almond-shaped nails, round nails have fewer sharp edges that can chip or break. Their curved edges distribute pressure evenly, reducing the risk of nail splitting.
- Great For Everyday Wear
Round nails are practical for people who use their hands frequently, such as healthcare workers and office professionals. They are less likely to interfere with daily tasks like typing, cooking, or using a touchscreen.
- Versatile For Nail Designs
While often seen as a simple shape, round nails can accommodate various nail art designs, including minimalist styles, French manicures, and intricate patterns.
Disadvantages Of Round-Shaped Nails
- Limited Nail Art Space
Since round nails are usually kept short, they may not provide enough space for detailed or elaborate nail art. Designs like ombré gradients or intricate 3D embellishments may not be as prominent on this shape.
- May Not Be As Fashion-Forward
Compared to stiletto, coffin, or almond-shaped nails, round nails may be seen as more basic or traditional rather than trendy or bold. Some people prefer edgier nail shapes for a more dramatic look.
- Not Ideal For Weak Or Brittle Nails
If your nails are already weak or brittle, a round shape may not provide enough reinforcement to prevent splitting. Those with fragile nails may benefit from squoval or oval shapes, which offer more structural support.
Tips For Maintaining Round-Shaped Nails
- Regularly file your nails to maintain their shape and prevent snagging.
- Keep your nails hydrated with cuticle oil to prevent brittleness.
- Avoid using nails as tools to reduce breakage.
 Quick Tip
2. Oval Shaped Nails
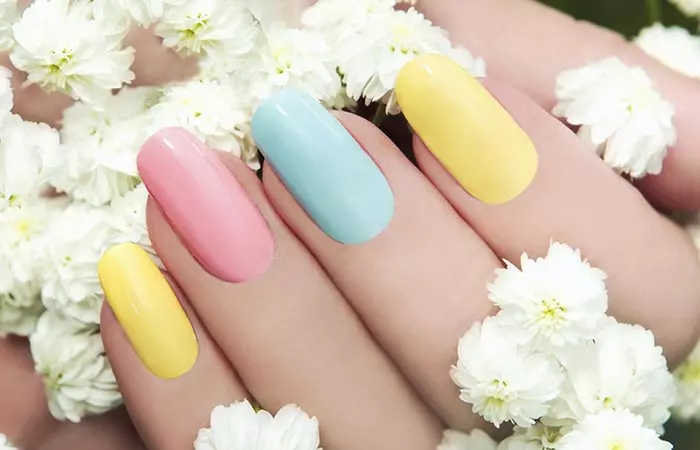
This is considered to be a more traditional shape. It was extremely popular in the late 1900s and early 2000s. This nail shape gives your nails a very elegant appearance. It is great for those with short fingers as it makes the fingers look longer.
Best Suited For: Short fingers.
Steps To Achieve Oval-Shaped Nails
Tools Needed
- Nail clipper
- Nail file (180-240 grit)
- Buffer
- Cuticle pusher (optional)
Step 1: Trim Your Nails To The Desired Length
- Clip your nails leaving a moderate length to achieve the elongated oval shape.
- Ensure all nails are trimmed to a similar length to maintain symmetry.
- Avoid cutting nails too short, as oval nails look best with some length.
Step 2: Create A Soft Square Shape First
- Begin by filing your nails into a soft square shape.
- File in one direction to avoid weakening the nail structure. This will provide a balanced base to refine into an oval shape.
Step 3: Round The Edges Into An Oval Shape
- Start filing the corners of your nails in smooth, even strokes.
- Follow the natural curve of your fingertip to create a soft, rounded look.
- Maintain a gentle, consistent motion without applying excessive pressure to prevent over-filing.
Step 4: Refine And Smooth The Shape
- Continue filing until all nails have an even oval shape.
- Check both hands side by side to ensure symmetry.
- Use a finer grit file to refine and smooth out any rough edges.
Step 5: Buff And Hydrate
- Lightly buff the nail surface to smooth any ridges and enhance the natural shine.
- Apply cuticle oil to keep your nails strong and hydrated.
- Finish with a hand cream to maintain overall nail and skin health.
Advantages Of Oval-Shaped Nails
- Elegant And Feminine Look
The elongated shape creates a sophisticated appearance. It is a universally flattering shape that enhances the look of both long and short fingers.
- Makes Fingers Look Longer And Slender
The curved edges and tapered tip help create an illusion of longer fingers. Ideal for those with short or wide fingers, as it elongates the hands beautifully.
- Strong And Less Prone To Breakage
Compared to sharper shapes like stiletto or coffin, oval nails have fewer weak points. The rounded edges help distribute pressure evenly, reducing the risk of chipping.
- Works Well With Various Nail Lengths
Unlike some shapes that require long nails, oval nails can be achieved with medium-length nails as well. This makes it a versatile option for those who prefer a practical look.
- Versatile For Different Nail Designs
Oval nails provide a great base for classic manicures. They work well with French tips, ombré effects, and minimalist nail designs.
Disadvantages Of Oval-Shaped Nails
- Requires More Maintenance
Regular filing is necessary to maintain the oval shape, as nails may naturally grow rounder. The symmetry needs to be checked often to prevent uneven shaping.
- Not Ideal For Extremely Short Nails
Since oval nails require some length to achieve the tapered effect, they may not be suitable for very short nails. Those with naturally short nail beds might find it difficult to maintain the shape.
- May Weaken The Nail Tips
Filing too aggressively to achieve an oval shape can thin out the nail tips. Over-filing can cause weakening, leading to increased breakage if not maintained properly.
Tips For Maintaining Oval-Shaped Nails
- Regularly file your nails to maintain the oval shape and prevent them from turning rounder.
- Use a strengthening nail treatment if you have weak or brittle nails.
- Keep your nails hydrated with cuticle oil or creams.
- Avoid using nails as tools and reduce the risk of breaking or chipping.
3. Square Shaped Nails
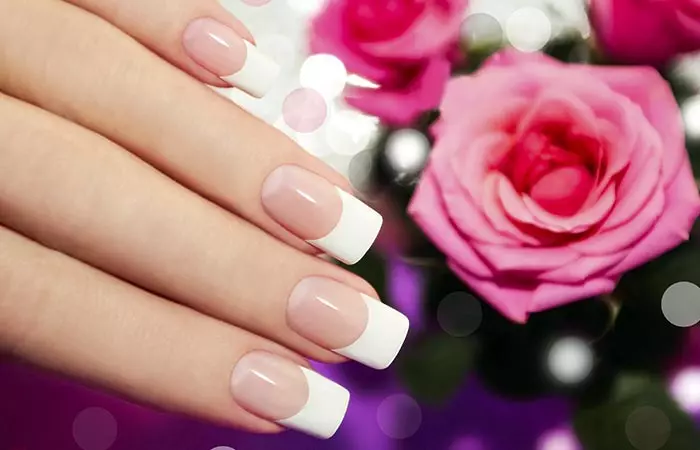
These nails are squarely shaped at the tips. This is probably one of the most popular nail shapes. It’s a good choice as far as nail shapes go as the risk of it breaking is less since it follows the natural width of your nails. If you want a variation you could also go for tapered square nails that are narrower and sharper toward the length and edges.
Best Suited For: Long fingers with wide nail beds.
Steps To Achieve Square-Shaped Nails
Tools Needed:
- Nail clipper
- Nail file (180-240 grit)
- Buffer
- Cuticle pusher
Step 1: Trim Your Nails To The Desired Length
- Use a nail clipper to cut your nails straight across to create a flat edge.
- Ensure all nails are trimmed to a similar length to maintain uniformity.
- If you prefer longer square nails, avoid cutting too short as this shape looks best with some length.
Step 2: File The Sides Straight
- File vertically and file the sides of your nails in straight, even strokes.
- Avoid filing in a rounded motion, as square nails should have straight edges.
- Continue filing until the sides are even and symmetrical on all fingers.
Step 3: Shape The Free Edge Into A Flat Tip
- Position the nail file horizontally and file straight across the top of your nail.
- Use steady, even pressure to ensure a sharp, straight-edge finish.
- Avoid filing back and forth aggressively to prevent weakening the nails.
Step 4: Refine The Shape For Sharpness
- Check your nails side by side to ensure they are all evenly shaped.
- If needed, refine the edges to create a crisp, squared-off appearance.
- If you prefer a softer square, slightly round out the corners for a squoval look.
Step 5: Buff And Hydrate
- Lightly buff the nail surface to smooth out any roughness.
- Apply cuticle oil and hand cream to keep your nails healthy and hydrated.
- Finish with a strengthening nail polish or top coat for added protection.
Advantages Of Square-Shaped Nails
- Modern And Bold Look
Square nails have a clean, sharp aesthetic that is sleek and stylish. This shape is popular for both natural and acrylic nails, adding a polished touch to any manicure.
- Prevents Nail Snagging
The flat tip minimizes the chances of nails getting caught on fabric or objects. Unlike rounded shapes, square nails provide a sturdy edge that resists breakage.
- Ideal For Wide Nail Beds
Square nails work well for individuals with wide nail beds, as they enhance the natural width. The shape provides a balanced look without making fingers appear longer or thinner.
- Strong And Durable
Square nails are structurally strong, making them less prone to bending or splitting. They provide additional reinforcement for those with naturally strong nails.
- Perfect For Nail Art
The flat tip creates an excellent canvas for intricate nail designs, including French tips, geometric patterns, and ombré effects. Square nails work well with acrylic or gel extensions for added length and creativity.
Disadvantages Of Square-Shaped Nails
- Prone To Corner Chipping
The sharp edges can be more susceptible to breakage, especially if nails are weak or brittle. To prevent chipping, it is important to keep the nails strong and hydrated.
- May Not Suit Short Or Narrow Fingers
Square nails can make short or narrow fingers appear even shorter. Those with naturally small hands may prefer a more tapered shape like an oval or almond for elongation.
- Requires Regular Maintenance
Since the edges are sharp, they need regular filing to maintain their crisp shape. Without upkeep, square nails may start to look uneven or lose their structured look.
Tips For Maintaining Square-Shaped Nails
- File your nails regularly to maintain straight edges and sharp corners.
- Use a strengthening nail polish or hardening treatment to prevent breakage.
- Moisturize your nails and cuticles daily to keep them strong and hydrated.
- Avoid excessive pressure on your nails to prevent chipping at the edges.
4. Squoval Shaped Nails
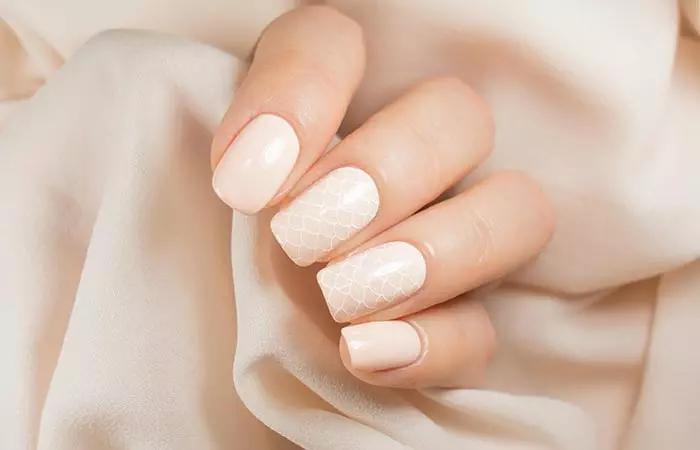
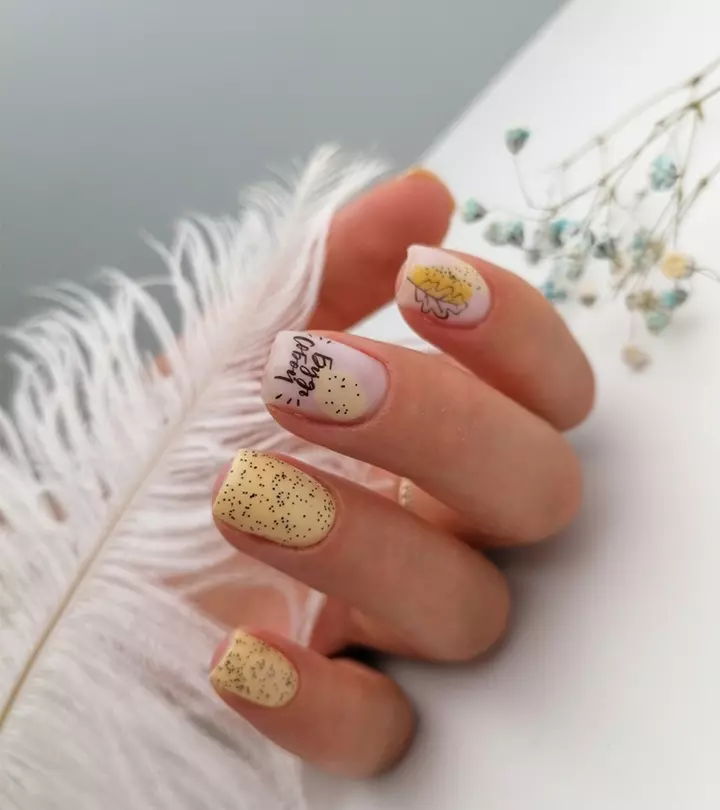
A variation of the square and oval, the squoval or the soft square, is another popular choice in the world of nail shapes. While it is easier to manage because of its rounded edges, the classiness of the square shape still remains as is. For these nails, shape your nails in an oval as you normally would, and then shape it across the tip to square it out a little.
Melissa, a blogger, shared that when she started painting her nails, she filed them in a round shape. However, she states in one of her blog posts, “My only problem with the rounded look is that the sides of my nails are very weak, and often the sides would begin to slowly wear away.” Due to this, she shifted to square nails with slightly rounded ends. She adds, “I love this look on my short nails but find that when they get longer my nails look huge! Apparently, your nails are stronger if they are shaped square or squoval and that has been my experience so far (i).”
Best Suited For: Any type of fingers.
Steps To Achieve Squoval-Shaped Nails
Tools Needed:
- Nail clipper
- Nail file (180-240 grit)
- Buffer
- Cuticle pusher (optional)
Step 1: Trim Your Nails To The Desired Length
- Use a nail clipper to cut your nails straight across for an even starting point.
- Keep the length uniform across all fingers for symmetry.
Step 2: File The Sides Straight
- Hold the nail file vertically and file the sides in straight, even strokes.
- Avoid angling the file too much to keep the squoval’s squared structure.
Step 3: Round The Corners Gently
- Once you have a squared shape, soften the sharp corners by filing in curved strokes.
- Use gentle, light pressure to create a smooth transition from the flat tip to rounded edges.
Step 4: Refine The Shape For A Balanced Look
- Check that each nail has a consistent squoval shape by comparing both hands side by side.
- Continue refining the edges if needed to ensure symmetry.
Step 5: Buff And Hydrate
- Gently buff the nail surface to remove rough spots and enhance the smoothness.
- Apply cuticle oil and hand cream to keep your nails healthy and hydrated.
Advantages Of Squoval-Shaped Nails
- Balanced And Natural Look
Squoval nails provide a soft, polished appearance that looks both stylish and natural. They suit all finger shapes, making hands look well-groomed.
- Less Prone To Chipping
The slightly rounded edges reduce the risk of corner breakage compared to sharp square nails. This shape is durable and ideal for daily wear.
- Flatters All Nail Lengths
Squoval nails look great whether they are short, medium, or long. Unlike square nails, they do not require extra length to maintain a balanced look.
- Easy To Maintain
This shape is simple to file and does not require frequent reshaping. Ideal for individuals who want a practical yet elegant nail shape.
- Works Well With Nail Art
Squoval nails provide a stable canvas for a variety of nail art designs. They look great with classic French tips, minimalist styles, and detailed patterns.
Disadvantages Of Squoval-Shaped Nails
- Not As Bold Or Dramatic
Squoval nails are more subtle compared to edgier shapes like stiletto or coffin. Those who prefer a more dramatic or fashion-forward nail shape may find it too understated.
- Can Look Shorter On Small Hands
While squoval nails are flattering, they can make short fingers appear even shorter. People with small hands may prefer an elongated shape like an almond or oval for a lengthening effect.
Tips For Maintaining Squoval-Shaped Nails
- Regularly file your nails to maintain the soft square-oval shape.
- Keep nails hydrated with cuticle oil to prevent brittleness.
- Use a nail strengthener to reinforce nail structure.
- Avoid excessive force on nails to reduce stress fractures.
5. Almond Shaped Nails
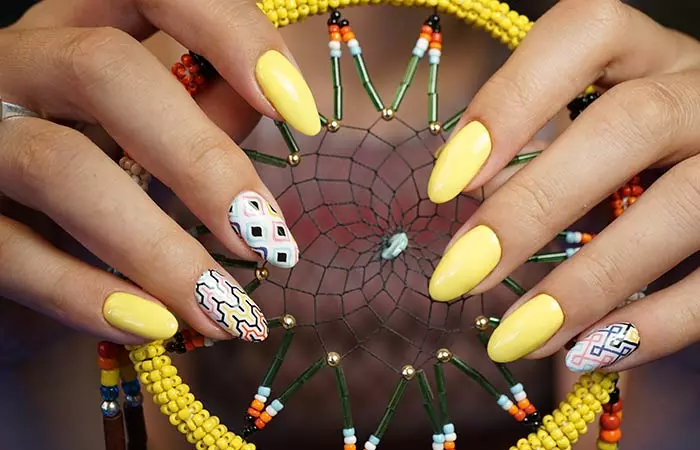
This one is much like the oval shape, except that it’s a little more pointed at the top. It is wide at the base and slender along the sides. Come to think of it, it takes the appearance of an actual almond.
Best Suited For: Short fingers.
Steps To Achieve Almond-Shaped Nails
Tools Needed:
- Nail clipper
- Nail file (180-240 grit)
- Buffer
- Cuticle pusher
Step 1: Trim Your Nails To A Medium Or Long Length
- Almond nails require some length, so avoid cutting your nails too short.
- If your nails are short, allow them to grow before shaping, or opt for acrylic or gel extensions.
Step 2: Find The Center Point Of Your Nail
- Identify the middle of your nail tip to ensure symmetry.
- Mark it lightly with a pencil or dot for guidance.
Step 3: File The Sides Into A Soft Taper
- Using a nail file, start filing from the outer edges toward the center in diagonal strokes.
- Keep the file at a slight angle and move in one direction to prevent nail splitting.
- Avoid making the sides too sharp. Maintain a smooth, even slope.
Step 4: Round The Tip To A Soft Point
- Once the sides are tapered, gently round the tip for a natural almond shape.
- Avoid making the tip too sharp or too flat, aim for a soft, almond-like curve.
Step 5: Refine And Smooth The Edges
- Go over the edges again with a file to even out any imperfections.
- Check both hands for symmetry and make adjustments as needed.
Step 6: Buff And Hydrate
- Lightly buff the nail surface and apply cuticle oil and moisturizer to keep your nails strong and nourished.
Advantages Of Almond-Shaped Nails
- Elegant And Feminine Appearance
The tapered shape gives a sleek, stylish look, making fingers appear more elongated.
- Flattering For Most Hand Shapes
Almond nails suit both wide and narrow nail beds. They make short or stubby fingers appear more slender.
- Versatile For Nail Art And Designs
The extended nail surface allows for detailed nail art, including ombré, French tips, and intricate patterns. Works beautifully with both neutral and bold colors.
- Stronger Than Stiletto Or Coffin Nails
Almond nails have a softer point, reducing the risk of breakage compared to sharp, angular nail shapes. They distribute pressure evenly, making them more durable.
- Good For Natural Or Acrylic Nails
This shape can be achieved with natural nails if they are strong and well-maintained. It also works well with acrylic, gel, or dip powder enhancements.
Disadvantages Of Almond-Shaped Nails
- Requires Longer Nails
Almond nails do not work well on very short nails. They need medium to long lengths to maintain their tapered shape.
- Not As Durable As Round Or Squoval Nails
While stronger than stiletto, almond nails can still be prone to breakage if not properly maintained. They may not be the best choice for individuals with an active lifestyle or frequent hand use.
- Can Be Difficult To Shape Evenly
Achieving perfect symmetry on both hands requires precision and practice. Uneven shaping can make nails look asymmetrical.
Tips For Maintaining Almond-Shaped Nails
- Use a nail strengthener to reinforce the structure of your nails.
- Apply cuticle oil daily to prevent dryness and brittleness.
- Wear gloves while doing household chores to protect nails from breakage.
- Be gentle with your nails—avoid using them as tools to prevent accidental chipping.
6. Stiletto Shaped Nails
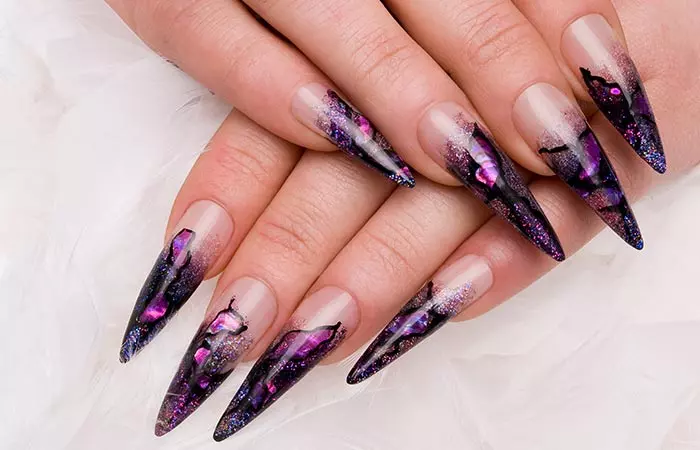
You need some guts to pull this one off. It’s not very common, but celebrities like Rihanna go for this look all the time. This nail shape gives your nails the appearance of being long and slender. Same as in the case of almond nails, find a center point and start filing from each side to meet the point. This nail shape may cause the nails to break off easily so it’s best to use acrylic or gel nails for this one. If you want sharp point nails but not as sharp and long as the stiletto nails, you could go for arrow or arrowhead nails that have a shorter point but more dramatic angles. Another alternative is a mountain or mountain peak nail that curves slightly to form a tip that is not as sharp as a stiletto nail.
Best Suited For: All types of fingers.
Steps To Achieve Stiletto-Shaped Nails
Tools Needed:
- Nail clipper
- Nail file (180-240 grit)
- Buffer
- Cuticle pusher (optional)
Step 1: Grow Or Extend Your Nails To A Long Length
- Stiletto nails require a significant length to create the sharp, tapered point.
- If your natural nails are short or weak, consider using acrylic or gel extensions.
Step 2: Find The Center Point Of Your Nail
- Identify the middle of your nail tip to ensure symmetry.
- Lightly mark it with a pencil for guidance.
Step 3: File The Sides Into A Sharp Taper
- Start filing from the outer edges toward the center in diagonal strokes.
- Keep the file at a steep angle to create a dramatic, pointed tip.
- Work slowly and check for evenness on both sides.
Step 4: Refine The Tip To A Sharp Point
- Once the sides are tapered, focus on shaping the tip into a defined point.
- Avoid making it too thin, as this may cause breakage.
Step 5: Smooth And Buff The Surface
- Use a fine-grit file to refine the edges and remove any rough spots.
- Lightly buff the surface.
Step 6: Hydrate And Strengthen
- Apply cuticle oil and moisturizer to keep your nails healthy.
- Consider using a strengthening base coat to reinforce durability.
Advantages Of Stiletto-Shaped Nails
- Dramatic And Fashion-Forward Look
This bold shape is a statement style, often associated with high fashion and trendsetters.
- Elongates The Fingers
The sharp, tapered shape creates the illusion of longer, more elegant fingers.
- Perfect Canvas For Nail Art
Stiletto nails provide ample space for intricate nail designs, including rhinestones, 3D art, and ombré styles.
- Great For Special Occasions
This shape is ideal for events, photo shoots, and glamorous nights out.
Disadvantages Of Stiletto-Shaped Nails
- Prone To Breakage
The extreme tapering weakens the nail structure, making it more susceptible to chipping and snapping.
- Not Practical For Daily Use
Stiletto nails can make everyday tasks like typing, texting, or opening cans more challenging.
- Requires Regular Maintenance
This shape needs frequent reshaping and upkeep to maintain the sharp point.
Tips For Maintaining Stiletto-Shaped Nails
- Use a strengthening base coat to reinforce durability.
- Avoid doing household chores or rough manual tasks to prevent breakage.
- Be mindful of your nails when performing other general everyday tasks to avoid accidental chips.
7. Ballerina Shaped Nails
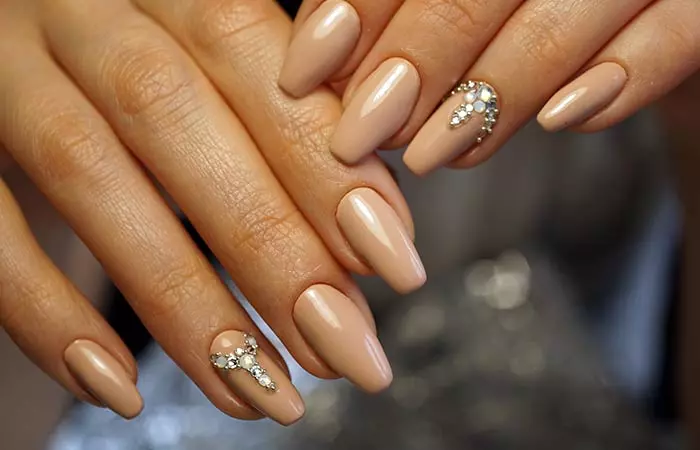
This is a more subtle version of the stiletto nail shape. It follows the same shaping technique. Doesn’t it look like a ballerina slipper? This one is a good choice if you want to go for something bold, but still keep it comfortable. Due to how long the nails have to be for this type of nail shape, it is recommended that you use acrylic or gel nails. This is a favorite of Kylie Jenner.
 Quick Tip
Best Suited For: All types of fingers.
Steps To Achieve Ballerina-Shaped Nails
Tools Needed:
- Nail clipper
- Nail file (180-240 grit)
- Buffer
- Cuticle pusher (optional)
Step 1: Grow Or Extend Your Nails
- If your natural nails are short or weak, consider using acrylic or gel extensions.
Step 2: File The Sides Into A Tapered Shape
- File the outer edges at a diagonal angle towards the center.
- Keep both sides symmetrical and avoid filing too aggressively.
Step 3: Create The Flat Tip
- Once the sides are tapered, file the tip straight across to form a flat, squared-off edge.
- The contrast between the tapered sides and the flat tip defines the ballerina shape.
Step 4: Smooth And Refine The Shape
- Use a finer grit file (240 grit) to smooth out any rough edges.
- Check for symmetry by comparing each nail side by side.
Step 5: Buff And Hydrate
- Lightly buff the nail surface for a sleek finish.
- Apply cuticle oil and moisturizer to keep nails healthy.
Advantages Of Ballerina-Shaped Nails
- Trendy And Fashionable
This shape is popular among celebrities and influencers, making it a go-to for stylish, modern nail designs.
- Creates The Illusion Of Slimmer Fingers
The tapered sides elongate the fingers, making them appear more slender and elegant.
- Perfect For Nail Art
The broad, flat tip provides ample space for intricate nail art, ombré effects, and rhinestone embellishments.
- More Durable Than Stiletto Nails
While still stylish, ballerina nails offer slightly more strength than stiletto nails due to their flat tip.
Disadvantages Of Ballerina-Shaped Nails
- Prone To Breakage At The Tip
The squared-off tip can be fragile and prone to chipping, especially if the nails are too long.
- Requires Length To Achieve The Look
This shape is difficult to achieve on short natural nails and usually requires extensions.
- Needs Regular Maintenance
The defined shape requires frequent filing to maintain the sharp angles and flat tip.
Tips For Maintaining Ballerina-Shaped Nails
- Avoid using nails as tools to minimize stress on the tip.
- Schedule regular touch-ups to maintain the shape.
8. Flare Nails
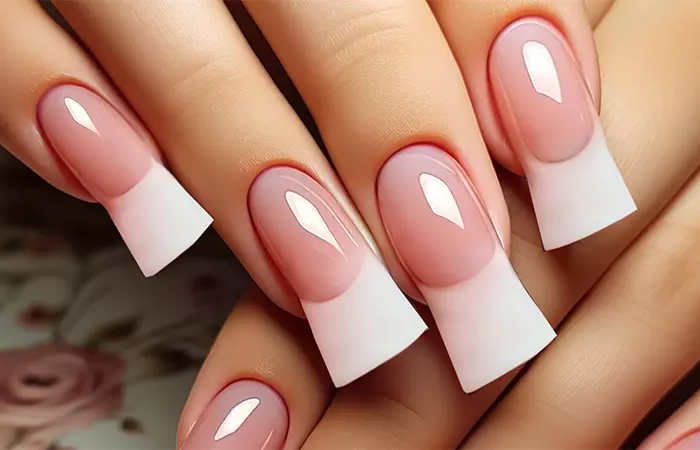
Flare-shaped nails, also known as duck nails or flared nails, are a trendy and eye-catching nail style that adds a touch of flair to one’s manicure. Characterized by a wide, squared tip that gradually flares out from the base, these nails offer a unique and bold look. The broader tip provides ample space for intricate nail art design, decals, or vibrant polish. Flare-shaped nails are favored for their ability to elongate the fingers and create a visually striking appearance. This nail shape has gained popularity for those seeking a fashionable and confident statement, offering a stylish departure from traditional nail shapes.
Steps To Achieve Flare-Shaped Nails
Tools Needed:
- Nail tips or acrylic extensions
- Nail glue
- Nail clipper
- Nail file (180-240 grit)
- Buffer
- Acrylic powder and liquid (optional)
Step 1: Apply Nail Tips Or Extensions
- Since flare nails require width, apply specially designed flared nail tips.
- If using acrylic, build out the shape using a form and acrylic mixture.
Step 2: Trim To Desired Length
- Use a nail clipper to cut the tips to your preferred length.
- Longer lengths enhance the dramatic effect of the flare shape.
Step 3: Shape The Sides To Flare Outward
- File the edges at an outward angle to achieve the signature flared effect.
- Keep the flaring consistent on both sides for a balanced look.
Step 4: Refine And Smooth The Edges
- Use a fine-grit nail file (240 grit) to smooth out rough edges.
- Check the symmetry of the flare shape across all nails.
Step 5: Buff And Finish With A Top Coat
- Buff the surface to smooth out any uneven areas.
- Apply a strong top coat to seal and protect the nail shape.
Advantages Of Flare-Shaped Nails
- Unique And Eye-Catching
This bold style stands out and makes a strong fashion statement.
- Provides A Large Canvas For Nail Art
The wide nail tip allows for elaborate nail designs, including 3D embellishments and intricate patterns.
- Works Well With Acrylics
Flare nails are ideal for acrylic applications, making them durable and long-lasting.
Disadvantages Of Flare-Shaped Nails
- Not Practical For Everyday Activities
The wide tips can make tasks like typing, texting, and buttoning clothes difficult.
- Higher Risk Of Snagging And Breakage
The flared edges are more prone to catching on objects, increasing the likelihood of chipping or breaking.
- Difficult To Maintain
Flare nails require regular touch-ups and reshaping to keep the flared effect intact.
Tips For Maintaining Flare-Shaped Nails
- Use strong nail glue to secure extensions and prevent lifting.
- Apply cuticle oil daily to keep nails hydrated and healthy.
- Avoid excessive pressure on the tips to prevent breakage.
- Schedule regular salon visits for upkeep and reshaping.
If you do not want to follow the other traditional nail shapes and want to go a bit dramatic then you can go for flared or duck feet shaped nails, nails shaped as lipstick, or pipe nails.
Let us now take a quick peak at how different nail shapes suit different occasions.
Nail Shapes For Different Occasions & Celebrity Favorites
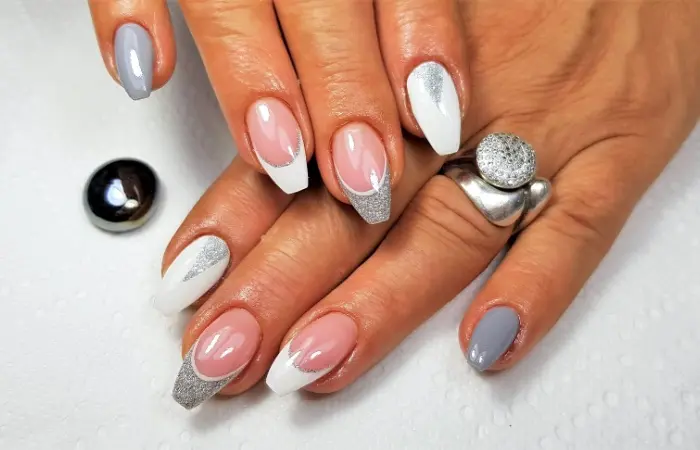
The right nail shape can truly amp up your overall look, making it perfect for specific occasions. For a classic look, round or squoval nails are ideal, as they are low-maintenance and practical for everyday wear. Whereas oval and almond shapes are elegant choices for formal events, elongating the fingers and adding a touch of sophistication. These nail styles are often seen on celebrities like Beyoncé and Selena Gomez as they take every live stage by storm.
If you are looking to make a bold statement, stiletto and coffin nails are popular among trendsetters like Kylie Jenner and Cardi B, often adorned with intricate nail art or embellishments. For those who love experimental and edgy styles, flare nails are making waves in avant-garde fashion and social media trends.
So, now you know why choosing the right nail shape can elevate your style and suit any occasion, from casual outings to red-carpet events. Wait no longer, and take your pick!
Infographic: Different Colors For Different Nail Shapes
Properly manicured nails can take your nail game to the next level. In order to do that, it is important to know which color is suitable for your nail type. We have compiled a list of colors suitable for different nail shapes.
Check out the infographic below to know more. Illustration: StyleCraze Design Team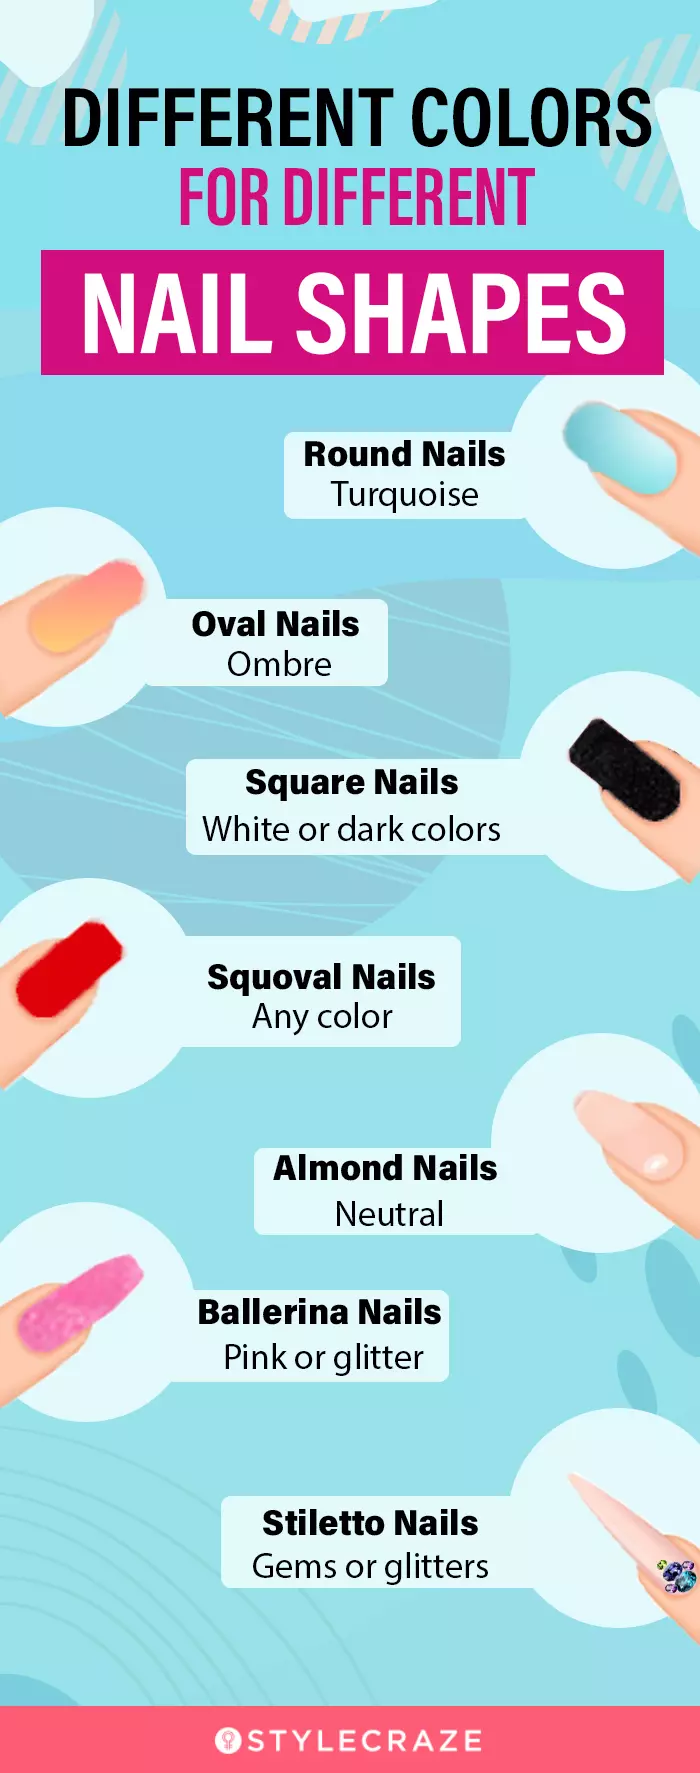
When it comes to different nail shapes, the options are endless. From round, oval, and square shapes to squoval, almond, stiletto, and ballerina – you can shape your nails in so many different ways. Whether you want to sport 3D nail art designs or ombre one, before styling them, make sure you are taking care of their health. This will help to give a fresh and healthier appearance to your nails. For this, eat healthy, stay hydrated, sleep, and do not forget to apply a cuticle nail oil to prevent breakage. An ideal lifestyle will help maintain the health of your nails and make them look refined and stylish. Go ahead, and try the shapes you love.
Frequently Asked Questions
What is the strongest nail shape?
Oval nail shape is the strongest because the wide nail bed makes it least prone to breaking.
What nail shape is the weakest?
Stiletto nail shape is the weakest as it makes the long and slender nails more prone to breaking.
What is the most natural nail shape?
Squoval is one of the most natural nail shapes.
Which nail shape is more feminine?
Oval nails are known to be the most feminine.
Illustration: Different Nail Shapes And How To Achieve Them
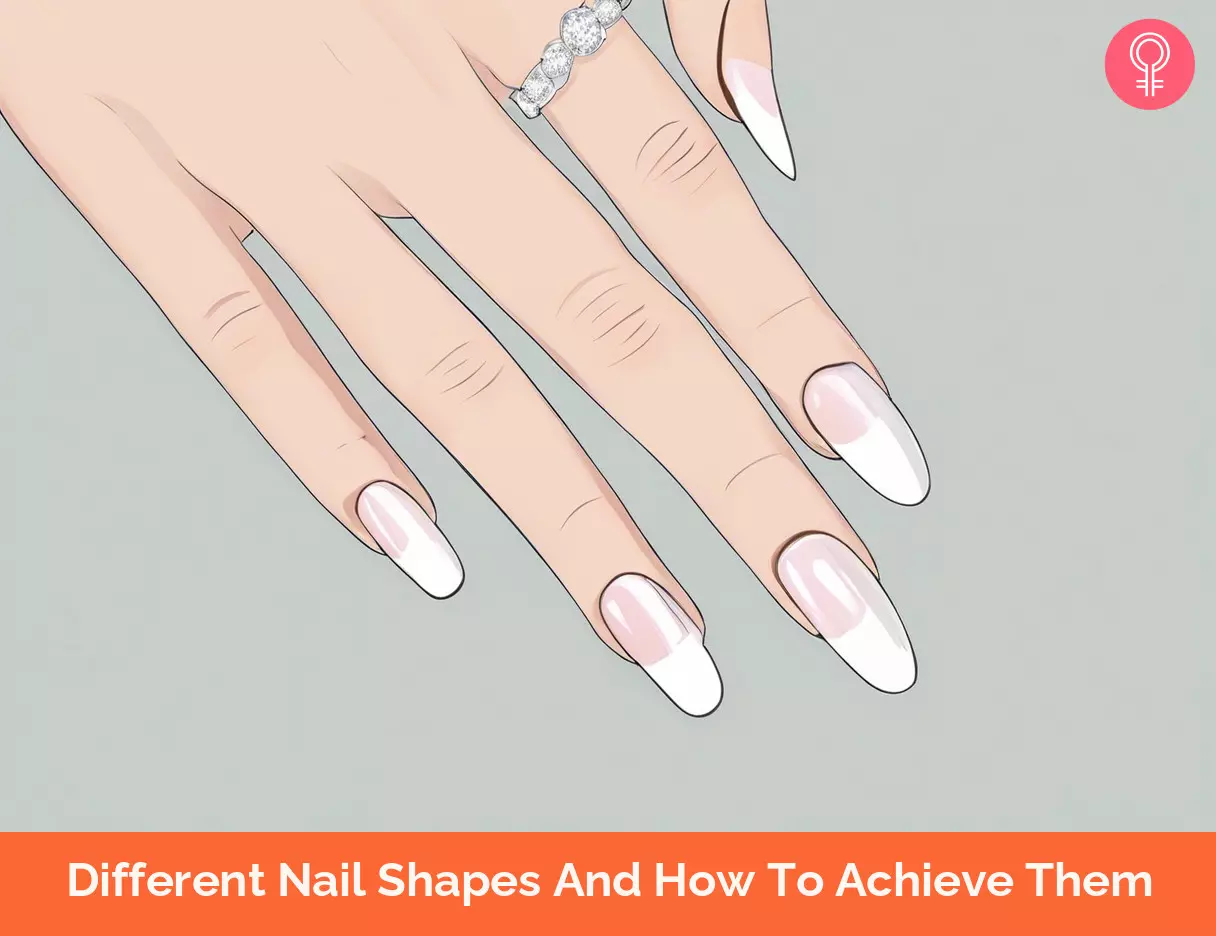
Image: Stable Diffusion/StyleCraze Design Team
Learn how to shape natural nails into beautiful shapes. Follow these easy steps and you will have perfect nails in no time. Watch now!
Personal Experience: Source
StyleCraze's articles are interwoven with authentic personal narratives that provide depth and resonance to our content. Below are the sources of the personal accounts referenced in this article.
i. How to: Shape your nailshttps://passionforpolish.blogspot.com/p/how-to-shape-your-nails.html
References
Articles on StyleCraze are backed by verified information from peer-reviewed and academic research papers, reputed organizations, research institutions, and medical associations to ensure accuracy and relevance. Read our editorial policy to learn more.
Articles on StyleCraze are backed by verified information from peer-reviewed and academic research papers, reputed organizations, research institutions, and medical associations to ensure accuracy and relevance. Read our editorial policy to learn more.
- Vitamins and minerals: their role in nail health and disease.
https://pubmed.ncbi.nlm.nih.gov/17763607/
Read full bio of Gabrielle Richens
Read full bio of Shalini Roy
Read full bio of Asmita De
Read full bio of Vaishali Sinha






Community Experiences
Join the conversation and become a part of our empowering community! Share your stories, experiences, and insights to connect with other beauty, lifestyle, and health enthusiasts.